Project Workflow
The CAT tool manages translation projects from creation to export.
Step 1: Create a Project
From CAT tool → My projects, select New project.
- Define:
- Source language
- Target language
- File to upload (max. 25 MB)
- Click Create project.
After creation, you can start translating immediately or configure translation settings.
Step 2: Configure Translation (Optional)
Each project can use a specific model and glossary configuration.
If no configuration is selected, the default model is applied.
See Translation Configuration for details.
Step 3: Translate in the Editor
Documents are divided into segments automatically.
For each segment:
- Enter a translation manually, or
- Select a suggestion from Machine Translation (MT) or Translation Memory (TM)
- Confirm a segment to:
- Mark it as completed
- Save it to Translation Memory
- Formatting elements appear as tags and must be preserved.
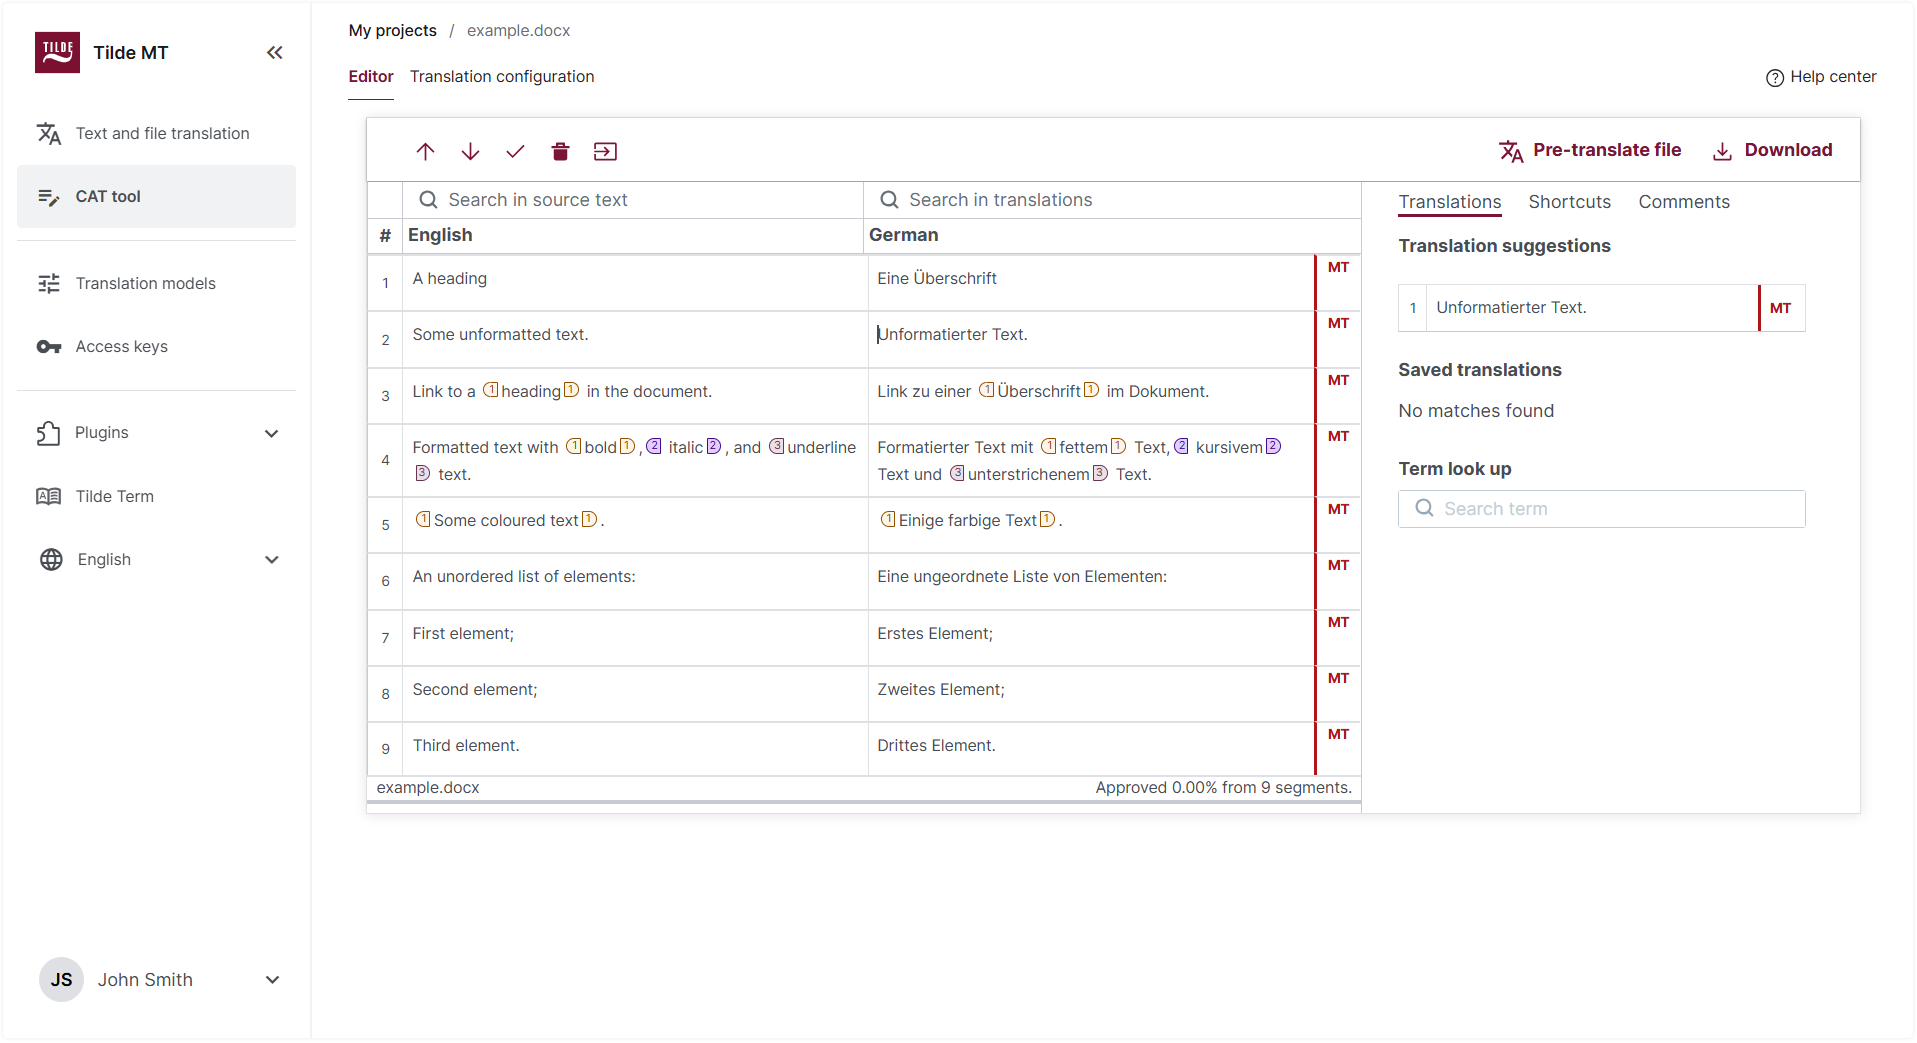
Formatting Tags
Some segments contain formatting elements such as bold text, hyperlinks, or structural markers. These elements appear in the editor as numbered tags.
Tags represent formatting from the original document and must be preserved in the translation.
Important
- Tags must appear in the translated segment.
- Tags can be repositioned within the segment if needed to match the grammar of the target language.
- If tags are missing or incorrectly placed, the system will display an error and prevent confirmation.
Step 4: Pre-Translate (Optional)
Use Pre-translate file to populate segments automatically using automatic translation and translation memory.
Review and confirm segments before exporting.
Step 5: Download
Download the translated file from the editor when the translation is complete.
Unconfirmed segments remain in the source language.
Translation Configuration
Translation configurations define which model and glossary are used for a project.
Configurations can be reused across multiple projects.
Create a Configuration
- Open Translation configuration.
- Select New configuration.
- Enter a configuration name.
- Add language direction(s).
- Select model and glossary.
- Save.
Apply a Configuration
Select a saved configuration from the dropdown list.
Edit or Delete
Configurations can be modified or deleted at any time.
Changes apply immediately to the project where the configuration is active.
Translation Memory
Translation Memory (TM) stores confirmed segment pairs and provides reuse suggestions.
- Confirming a segment (
Ctrl+Enter) saves it to TM. - Identical or similar segments generate suggestions automatically.
Comments
Comments support collaboration and review within a project.
Add a Comment
- Select a segment.
- Open the Comments panel.
- Enter and publish your comment.
Manage Comments
- Search comments using the filter field.
- Resolve comments when issues are addressed.
- Resolved comments can be reopened if needed.
Delete Project
Projects can be permanently deleted from My projects.
Deletion removes all project data and cannot be undone.