Translating and editing
This guide explains how to translate your web pages using the Website Translator widget and how to review and edit those translations in the Translation editor.
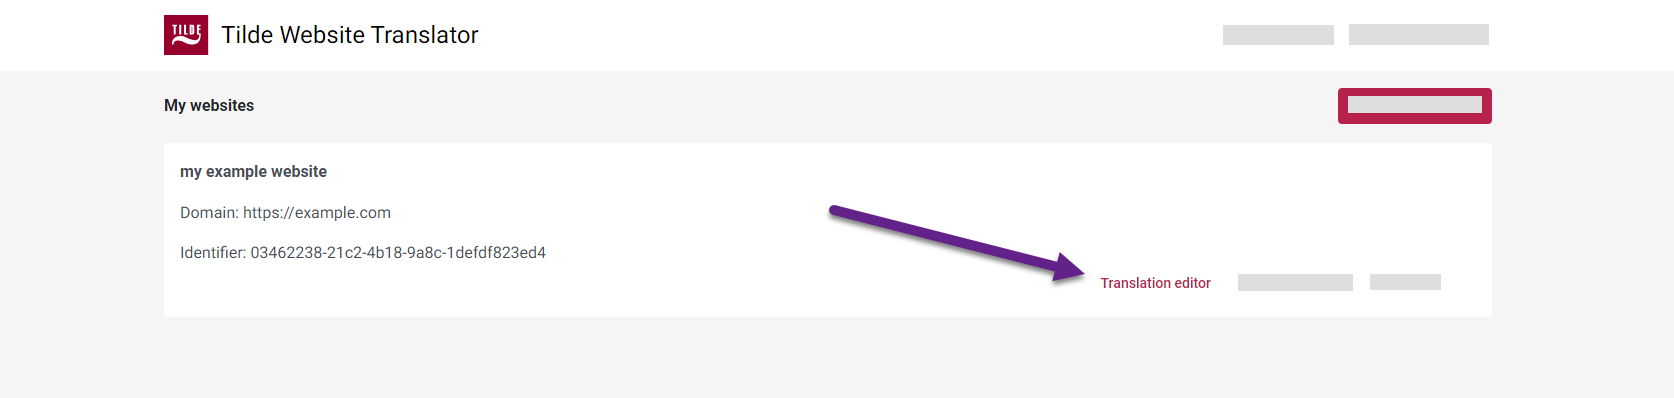
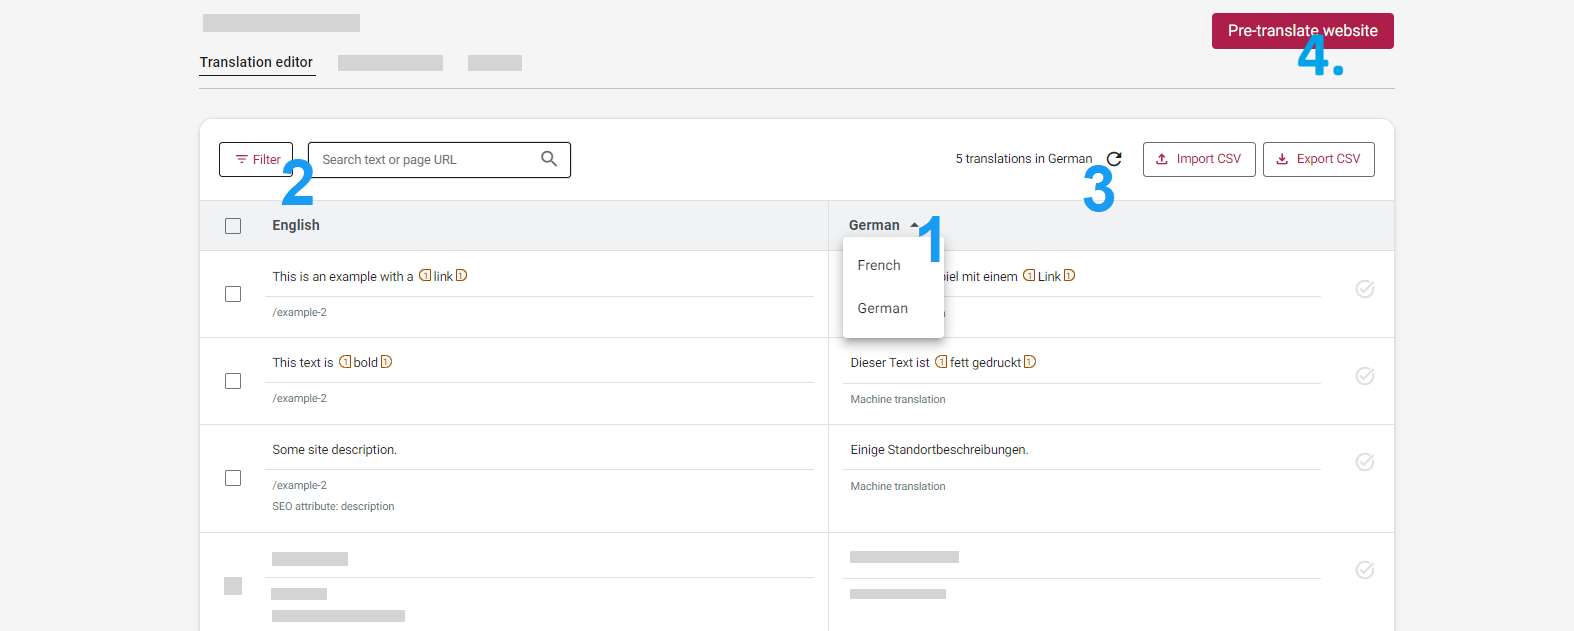
To manage translations, go to the Website Translator platform, find your website in the list, and click Translation editor.
Understanding the Translation editor layout
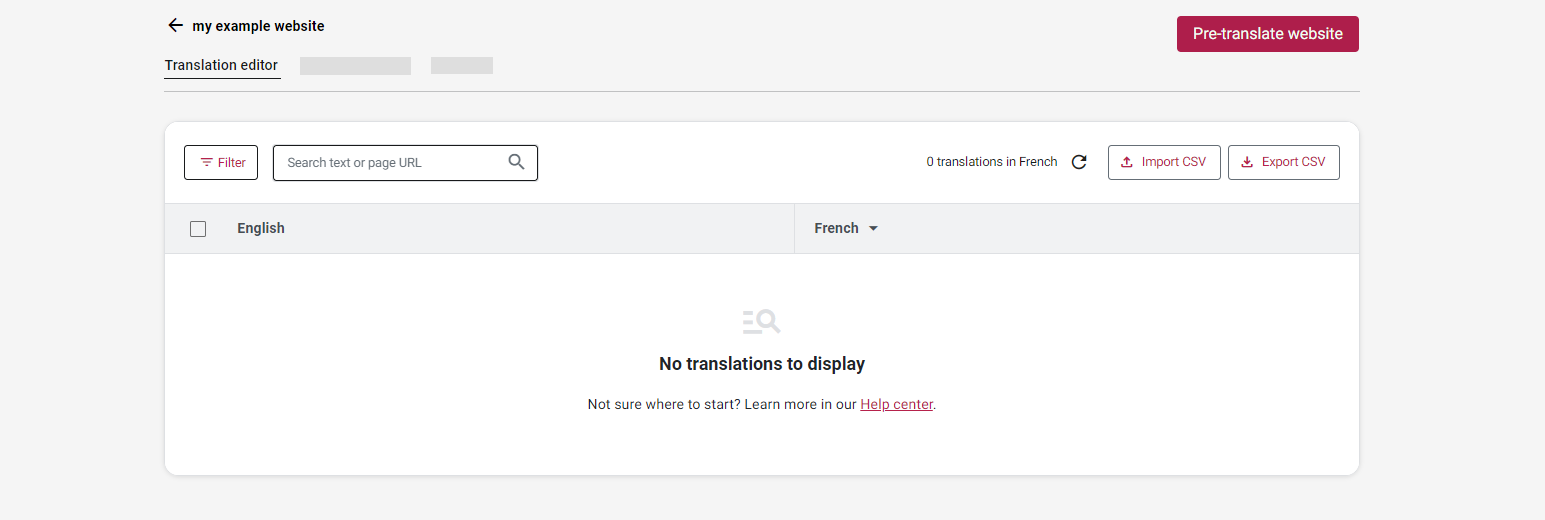
Before you start editing, familiarize yourself with the editor interface. It presents your original text alongside its translations in a table format.
- Language Selector: Switch between target languages using the dropdown at the top.
- Filters: Refine the view by text content, page URL, content type (Text/SEO), translation type (Machine/Edited), or status (Confirmed/Unconfirmed).
- Refresh: Click the refresh icon to load the most recent translations captured from your site visits.
- Import and Export: Export the translations for editing in third party tools or creating a backup.
Step 1: Get page content into the editor
Translations appear in the editor after you visit and translate pages on your live website using the widget.
To populate the editor with translations from a particular page:
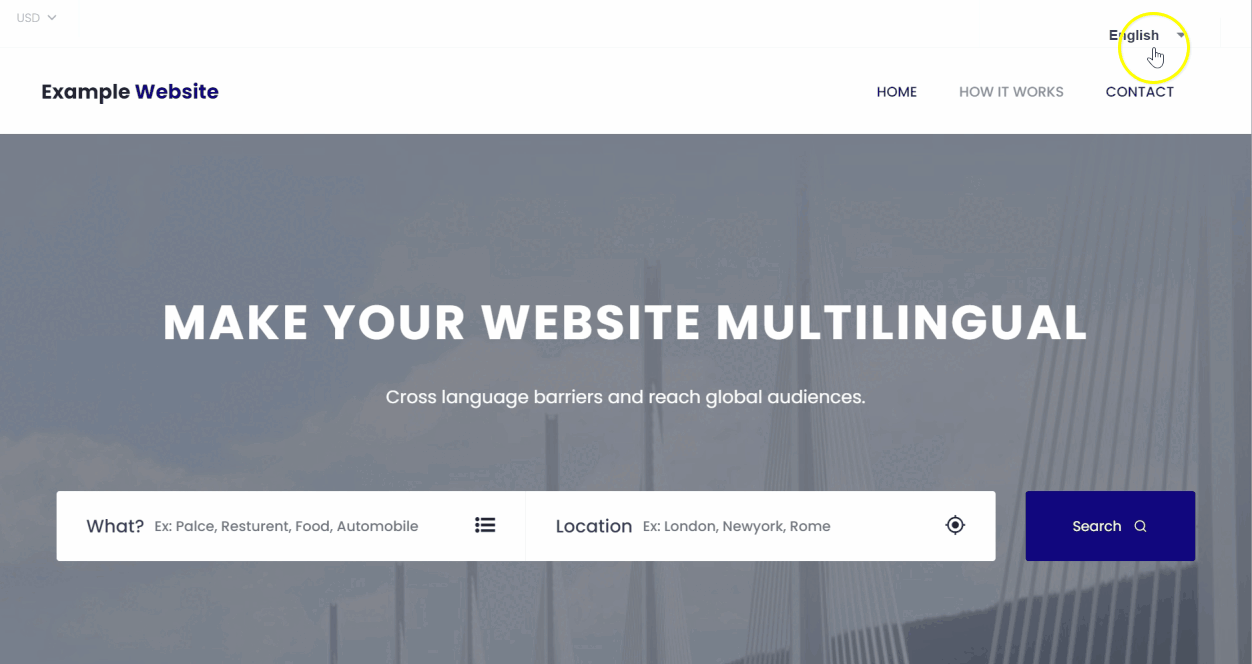
- Visit your website in your browser.
- Go to the specific page you want to translate.
- Use the Website Translator language selector on your page to choose a target language.
- Wait for the on-page translation process to complete.
- Interact with dynamic elements like forms or menus on the page to ensure their content is also captured and translated.
- Check the Translation Editor; the new content should appear (you may need to use the Refresh button or filters).
Repeat this process for other pages and languages as needed.
Step 2: Find, edit, and confirm translations
Once content is in the editor, you can locate specific segments, refine the text, and mark them as reviewed.
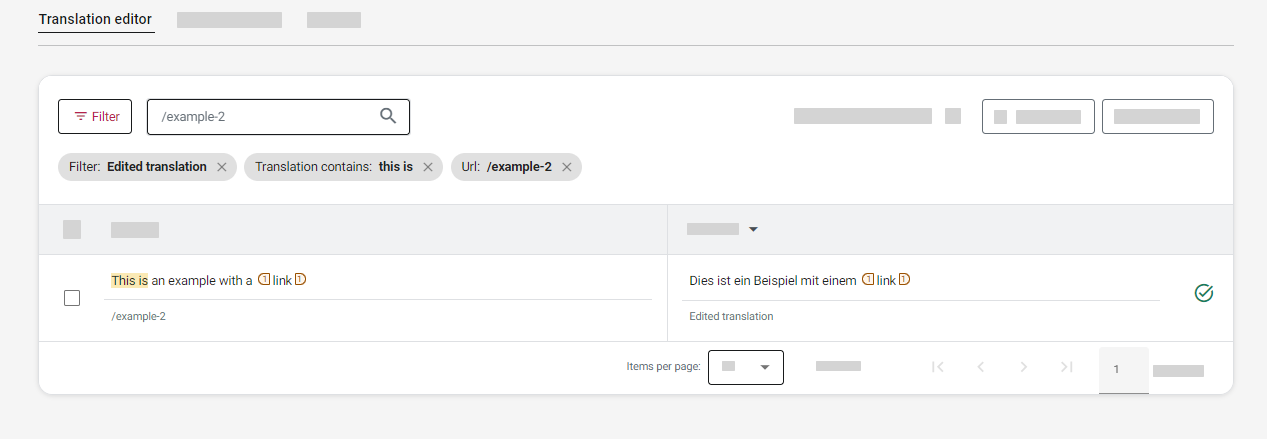
Using filters to find translations
Use filters to efficiently locate specific translations within the table based on various criteria.
Filter Options:
- By Text: Type a word or phrase into the main search field and press
Enter. Searches both source and target text. - By URL: Type a full or partial page URL (e.g.,
/pages/my-page) into the main search field and pressEnter. - By Translation Type: Use the filter dropdown menu to select Machine translation or Edited translation.
- By Translation Status: Use the filter dropdown menu to select Unconfirmed or Confirmed.
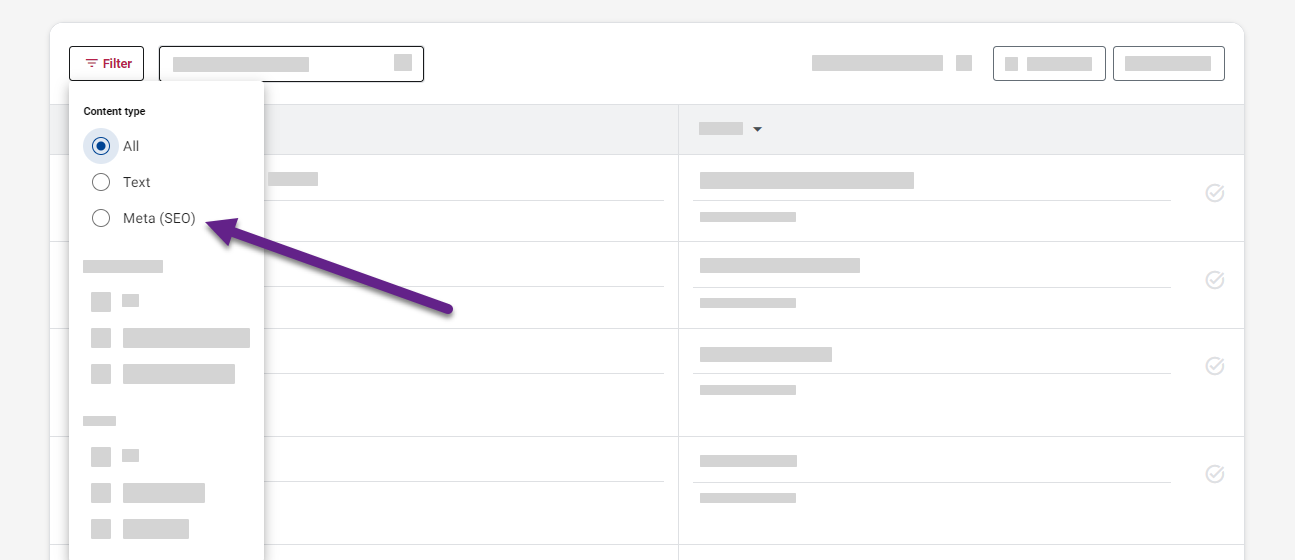
- By Content Type: Use the filter dropdown menu to select Text (regular page content) or Meta (SEO). See also Working with SEO Content.
Editing translation text
Review and edit machine translations for better accuracy, style, or cultural fit.
- Find the desired translation in the editor table (using filters if needed).
- Click anywhere on the row to activate the editor.
- Modify the text in the translation field.
- Click Save.
The edited translation is saved and automatically marked as "Confirmed".
To see your edits live on your website, refresh the web page. Alternatively, switch the language selector to another language and then back to the edited language.

Handling HTML tags in translations
The editor represents HTML tags (for formatting, links, etc.) as numbered, color-coded placeholders. Maintaining these tags correctly is crucial.
Understanding Text Formatting Tags
Text formatting, links, and other tags are represented in the editor as color-coded placeholders. These tags are essential for maintaining correct text formatting in the translation.
Color-coding and numbering help you track the order and pairing of opening and closing tags. It's crucial to include all original tags in your translation to preserve the text's structure.


Paired tags: These tags work in pairs, such as <b> and </b> for bold text. The opening tag indicates the start of the formatting, while the closing tag marks its end.
Single tags: These tags don't require a closing tag. For instance, <br> inserts a line break in HTML.
- Insert/Reorder Tags: Click a tag icon below the editor field to insert it at the cursor's position. Drag and drop tags within the field to reorder them.
- Tag Errors: The editor will highlight missing or mismatched tags below the translation field. Ensure tag consistency between the source and target text.

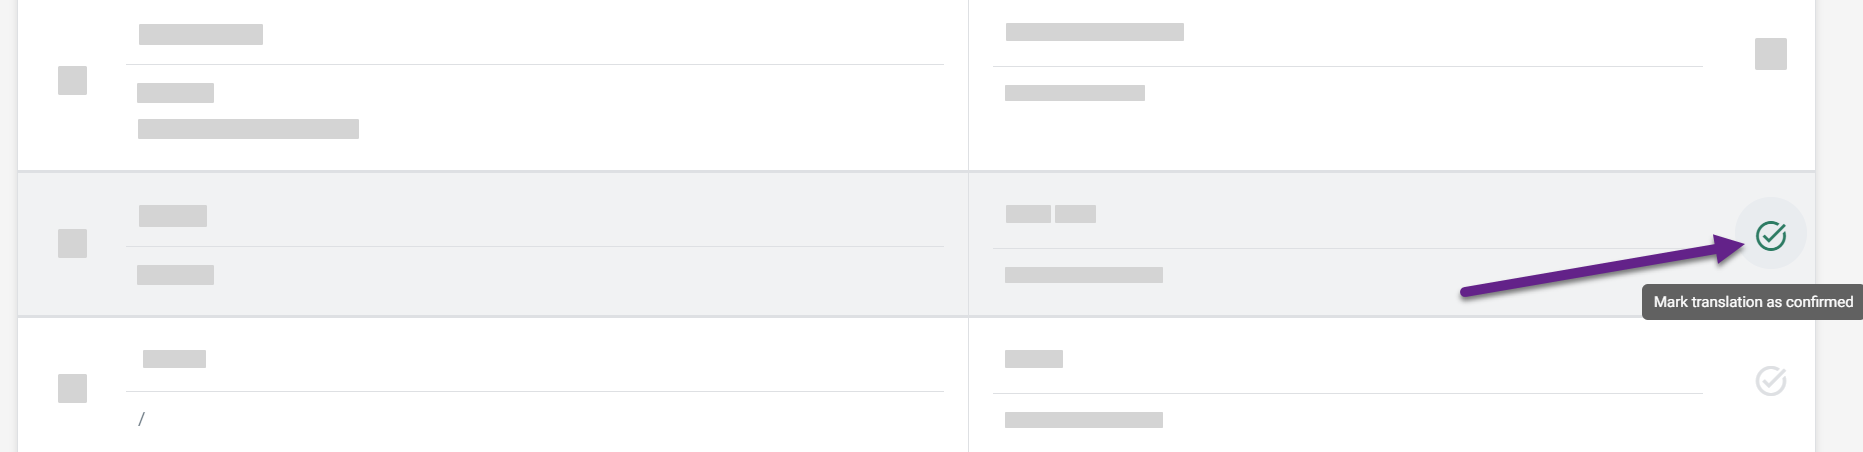
Confirming reviewed translations
Use the "Confirmed" status to track which translations have been reviewed. Saving an edit automatically confirms a translation.
To manually confirm a translation without editing:
- Locate the translation in the table.
- Click the ✔️ check-mark icon at the end of the row.
Both confirmed and unconfirmed translations are used on your website. The status is primarily for your workflow management to identify reviewed content. You can filter by status to find unreviewed items easily.
Working with SEO content
Website Translator automatically translates SEO-related content like meta titles, descriptions, alt text, ARIA labels, and social media tags (og:, twitter:).
You can edit these translations in the Translation Editor just like regular text:
- Use the Content type filter and select Meta (SEO) to isolate SEO translations.
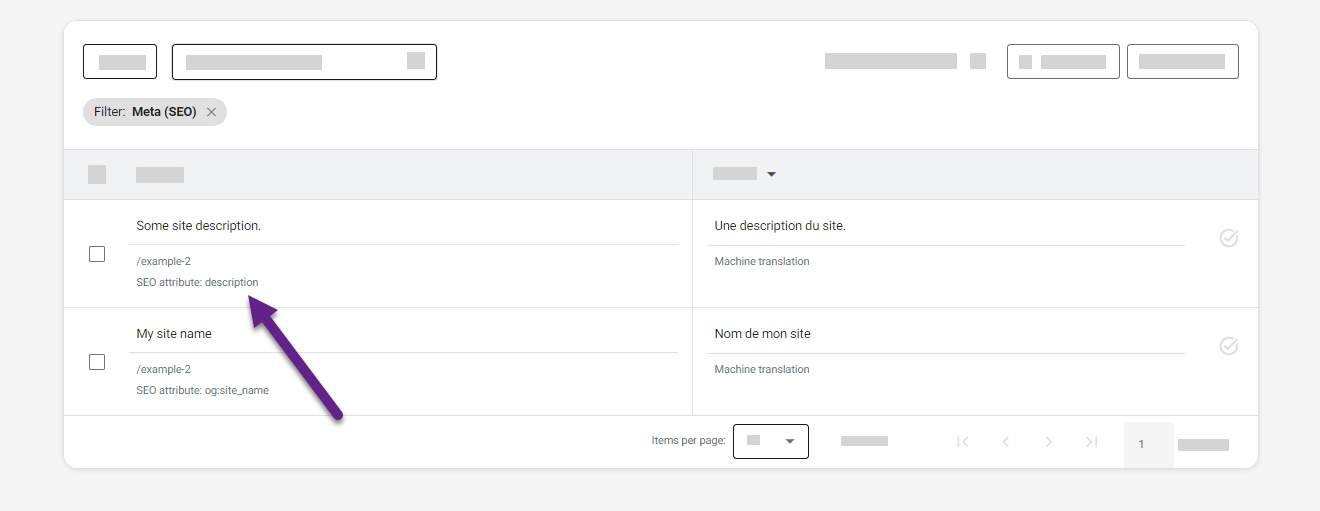
- SEO entries are identifiable by the "SEO attribute:..." label displayed beneath the page URL.
- Find the segment you want to edit, click the row, modify the text, and click Save.