Machine Translation
memoQ
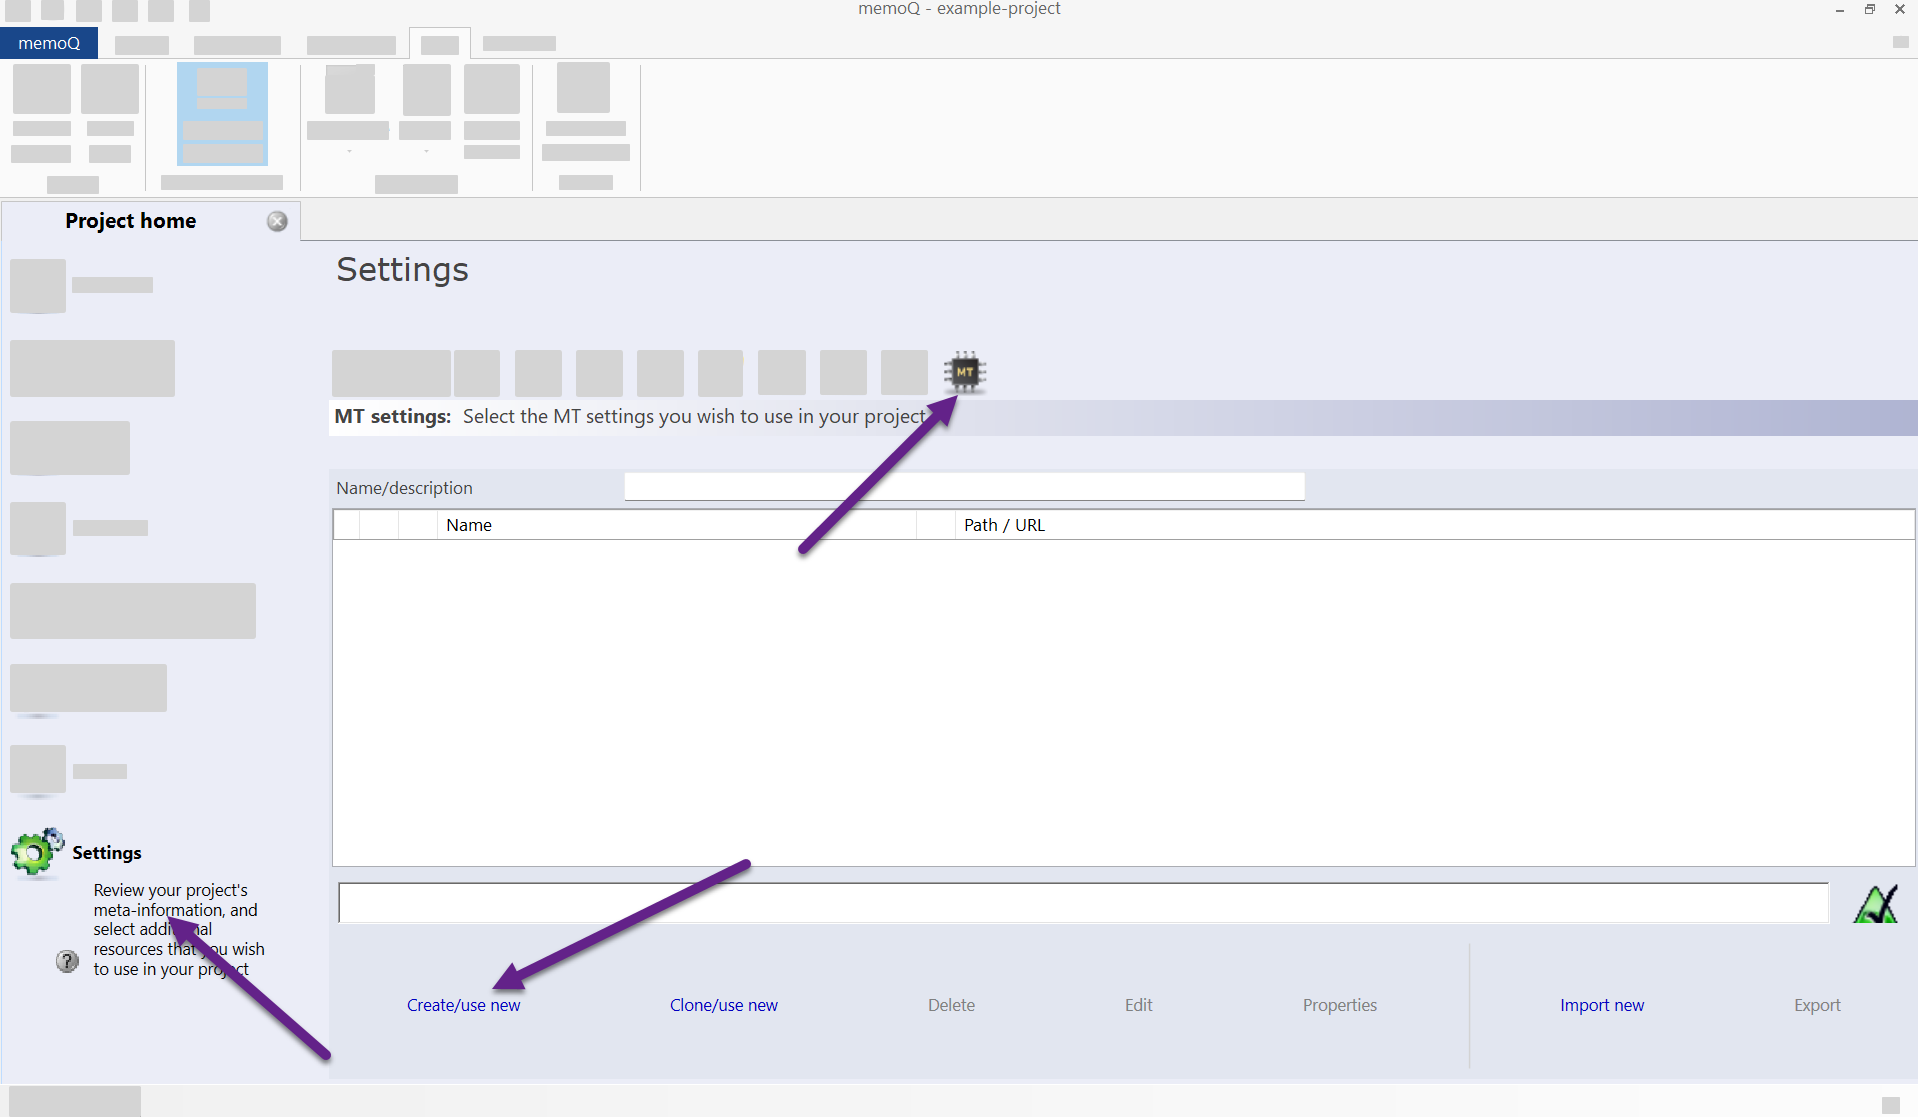
Figure 1. Project settings view. 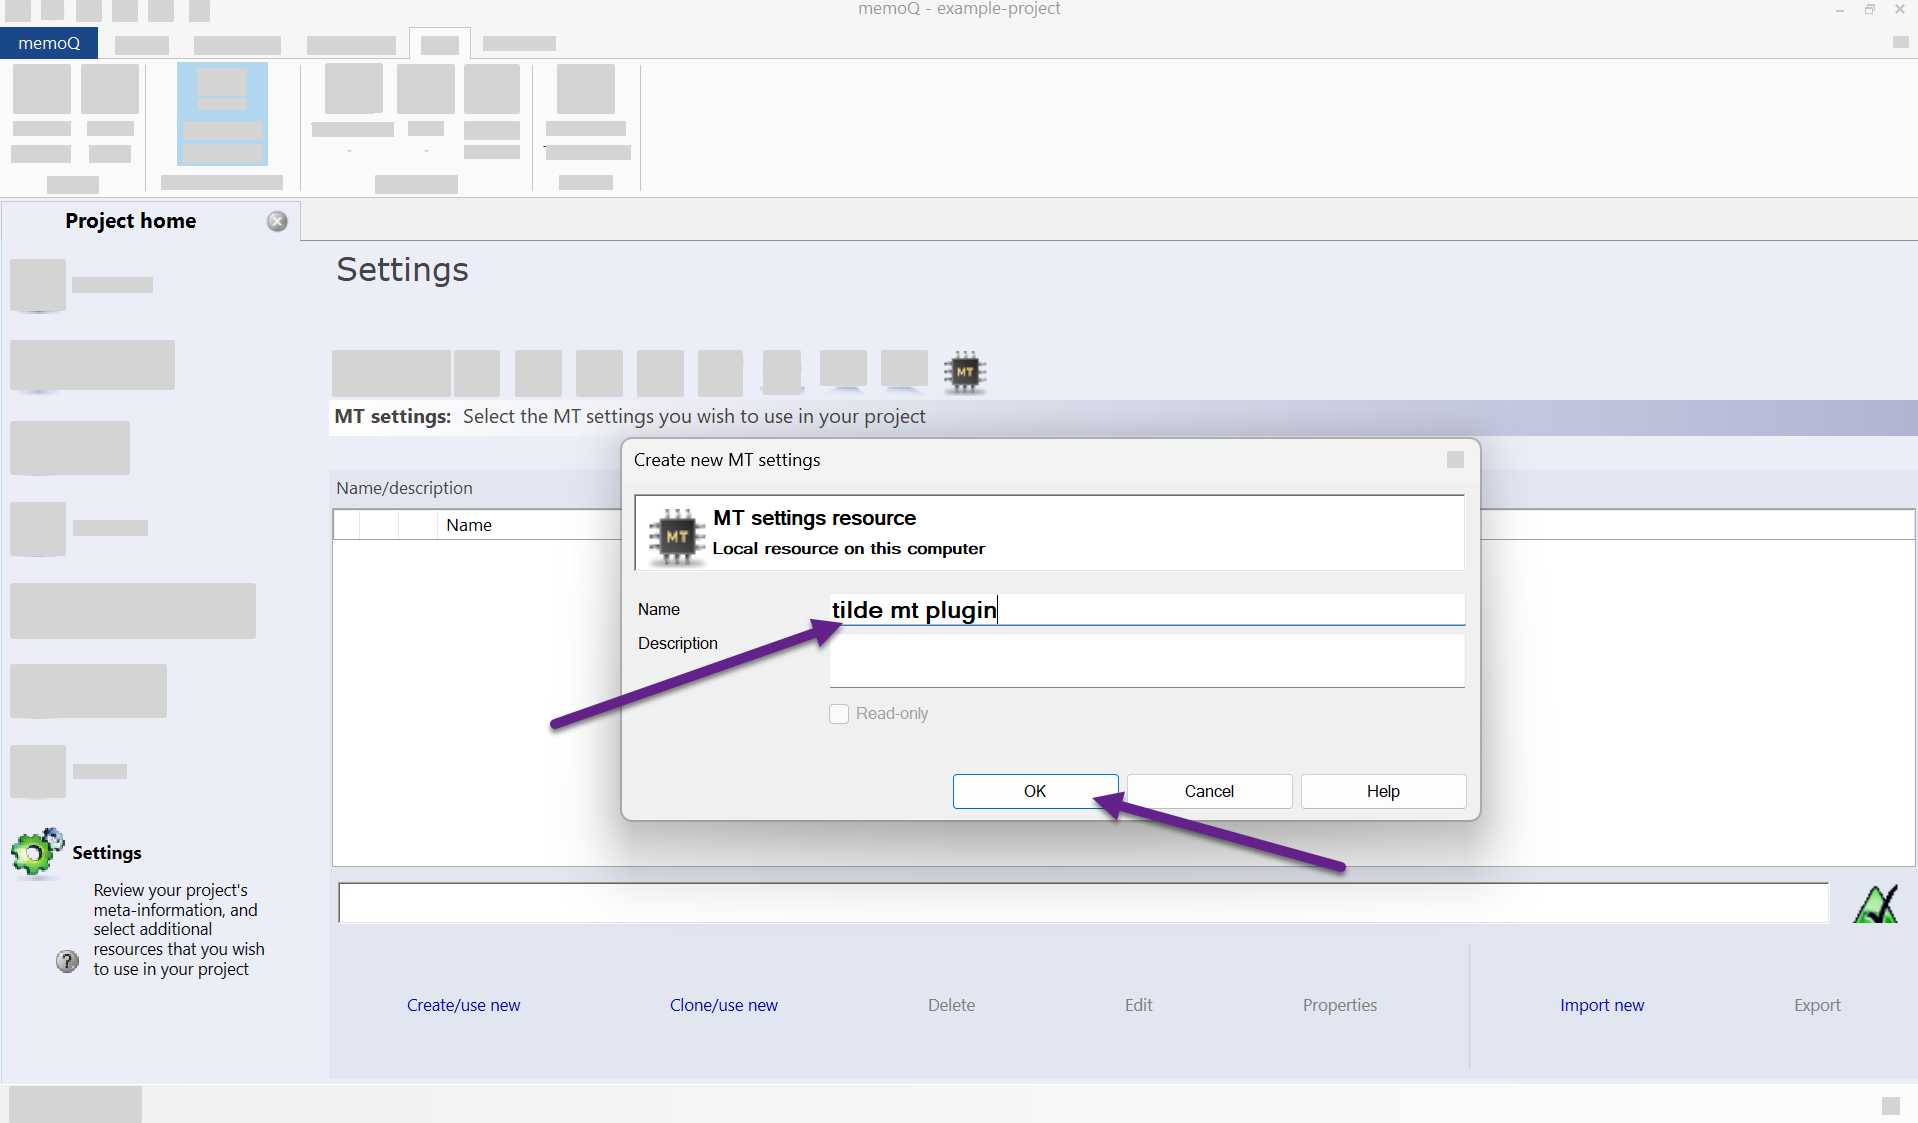
Figure 2. MT settings resource creation. 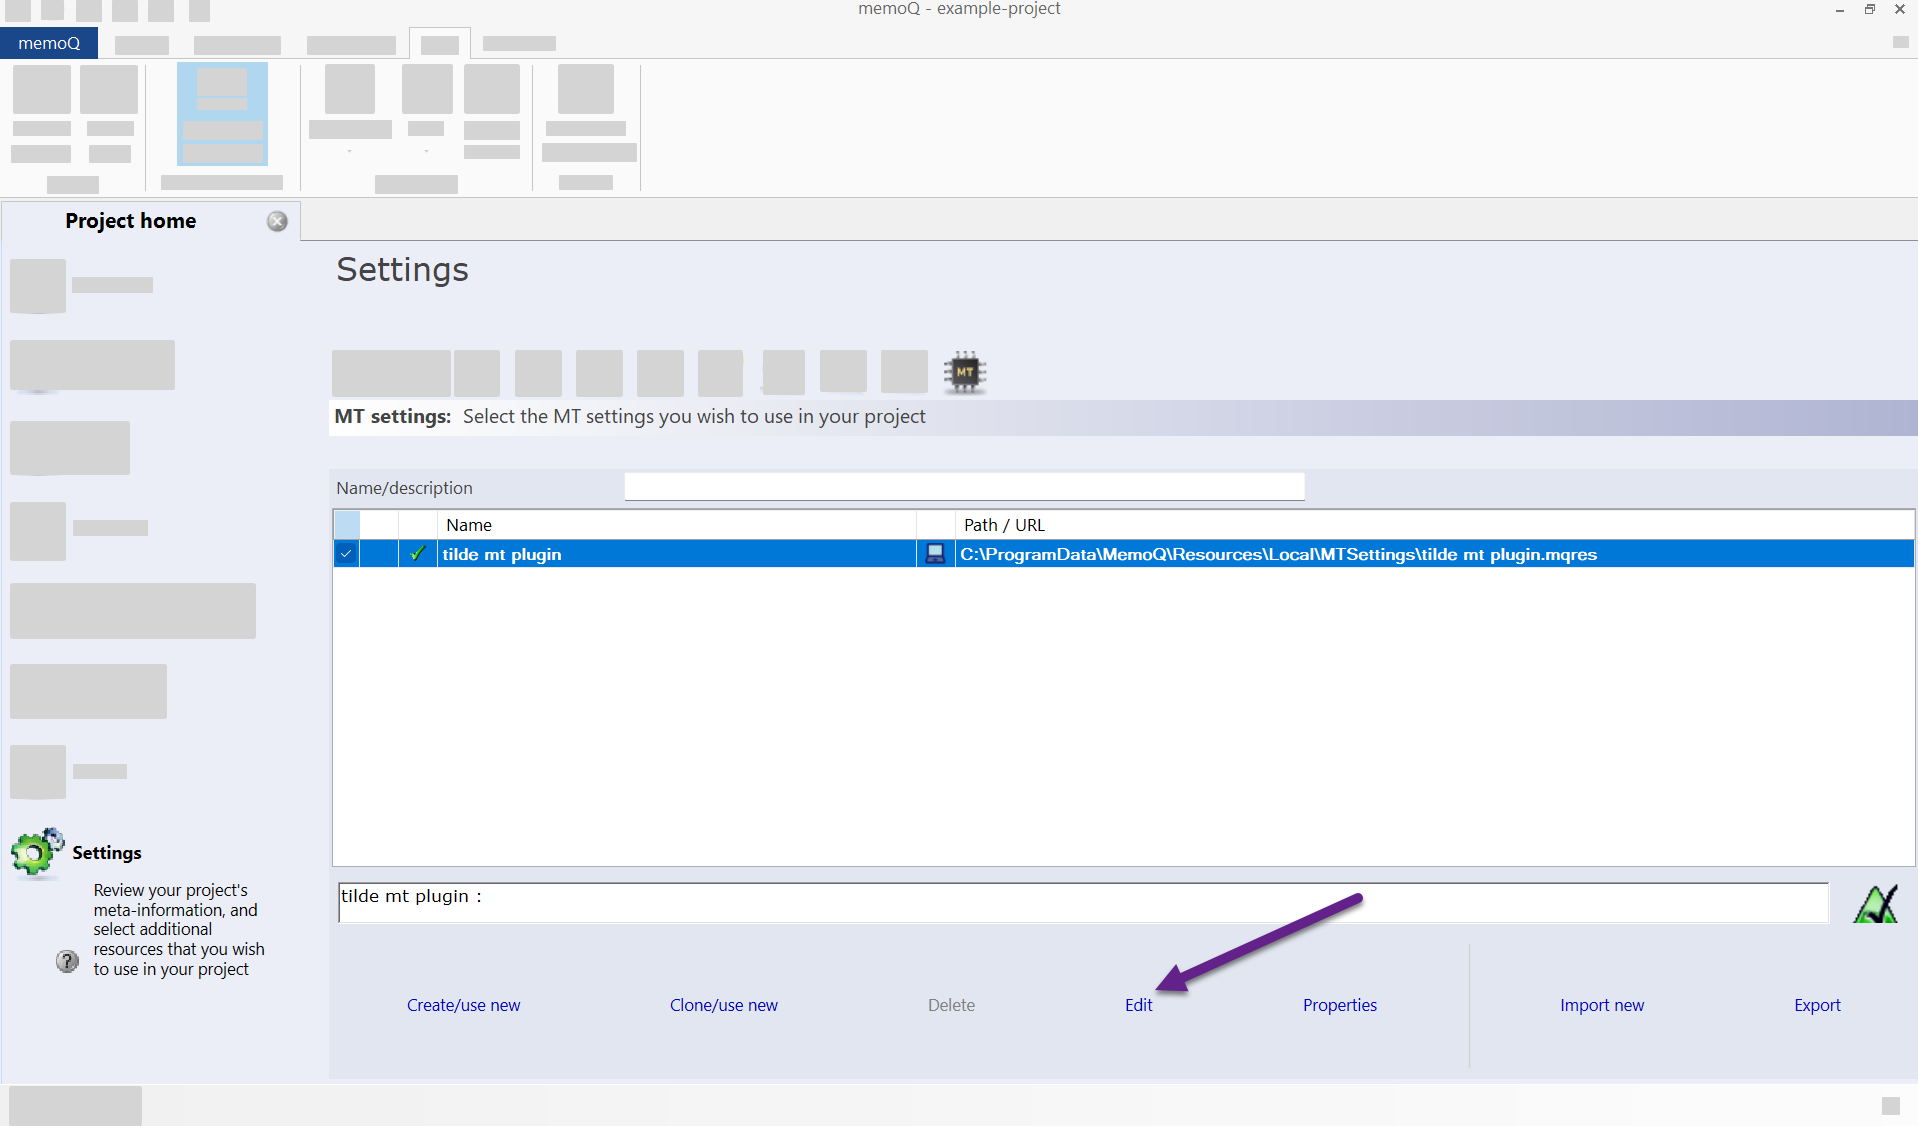
Figure 3. Edit MT resource details. 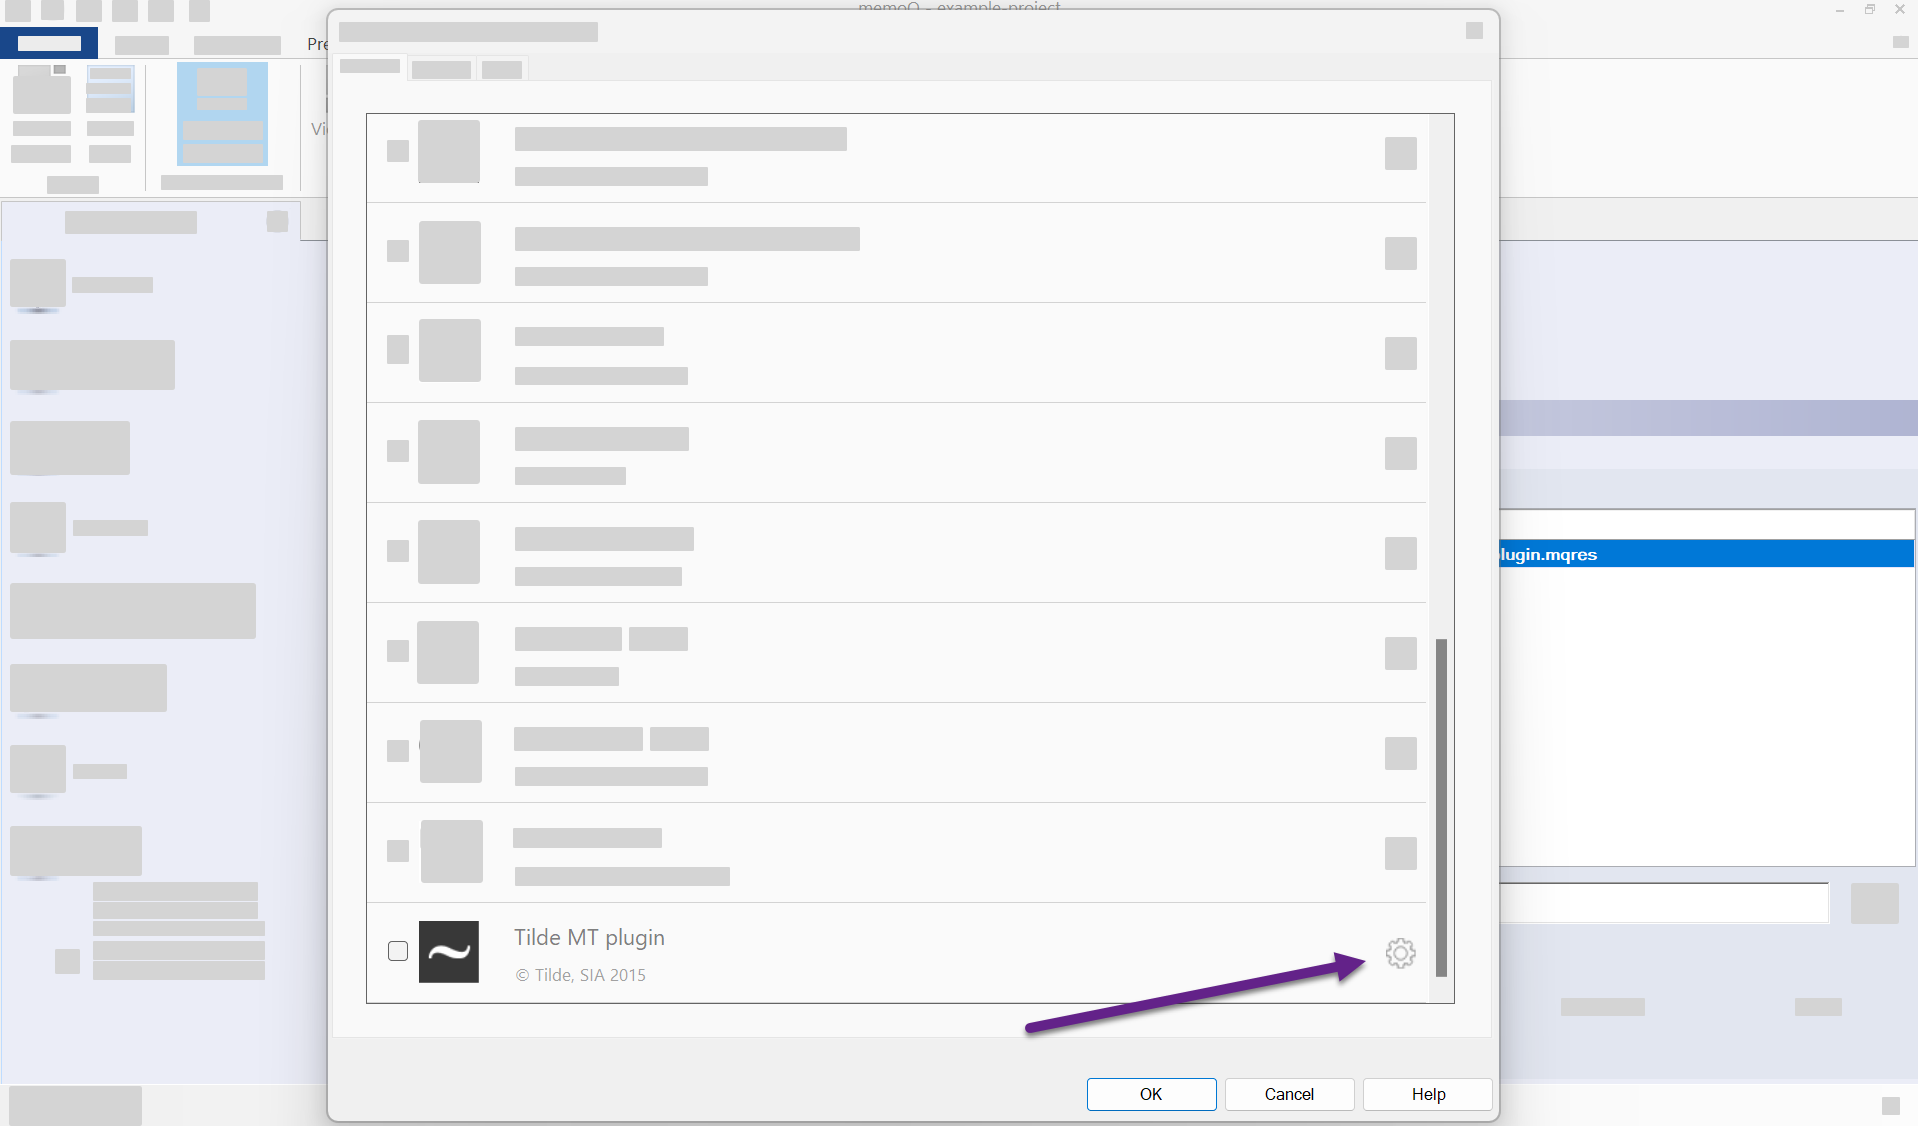
Figure 4. Enable the plugin. 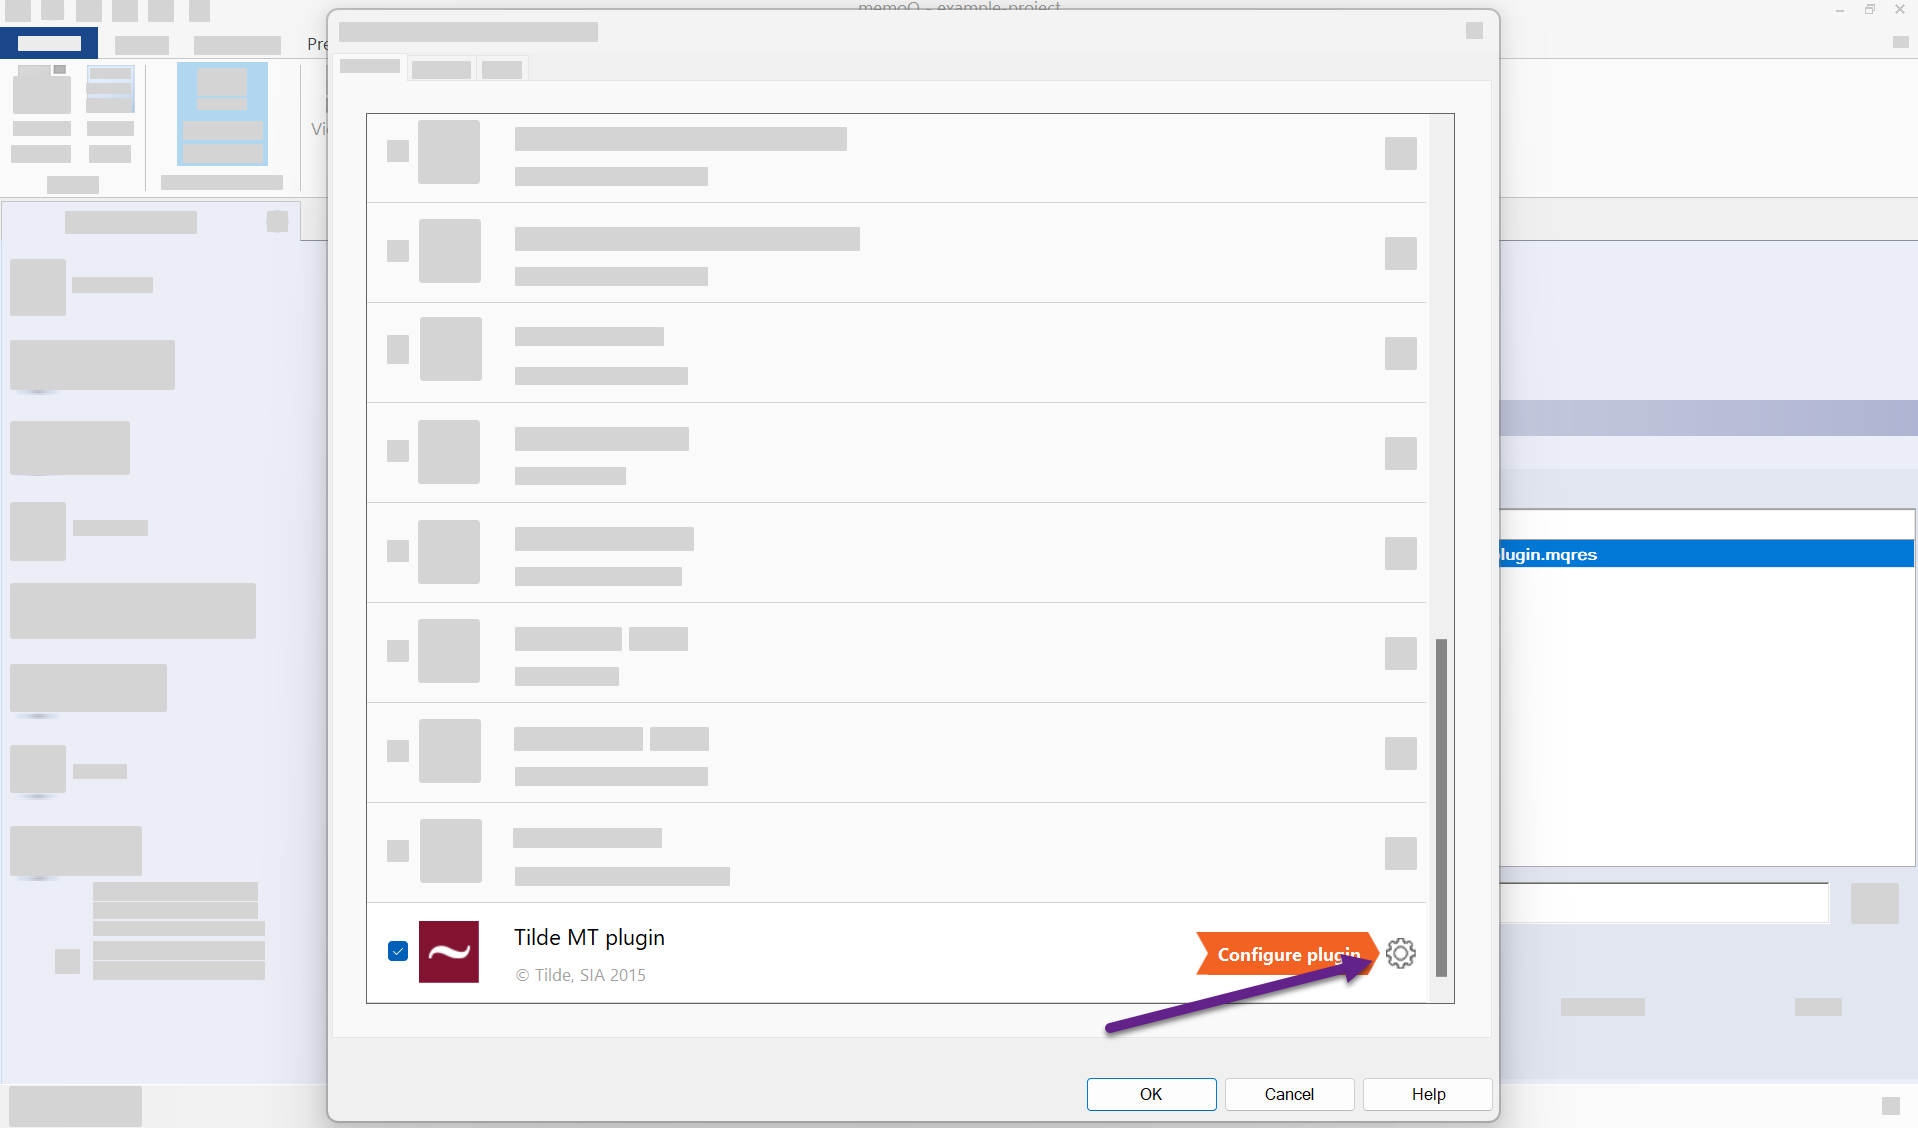
Figure 5. Configure the plugin. 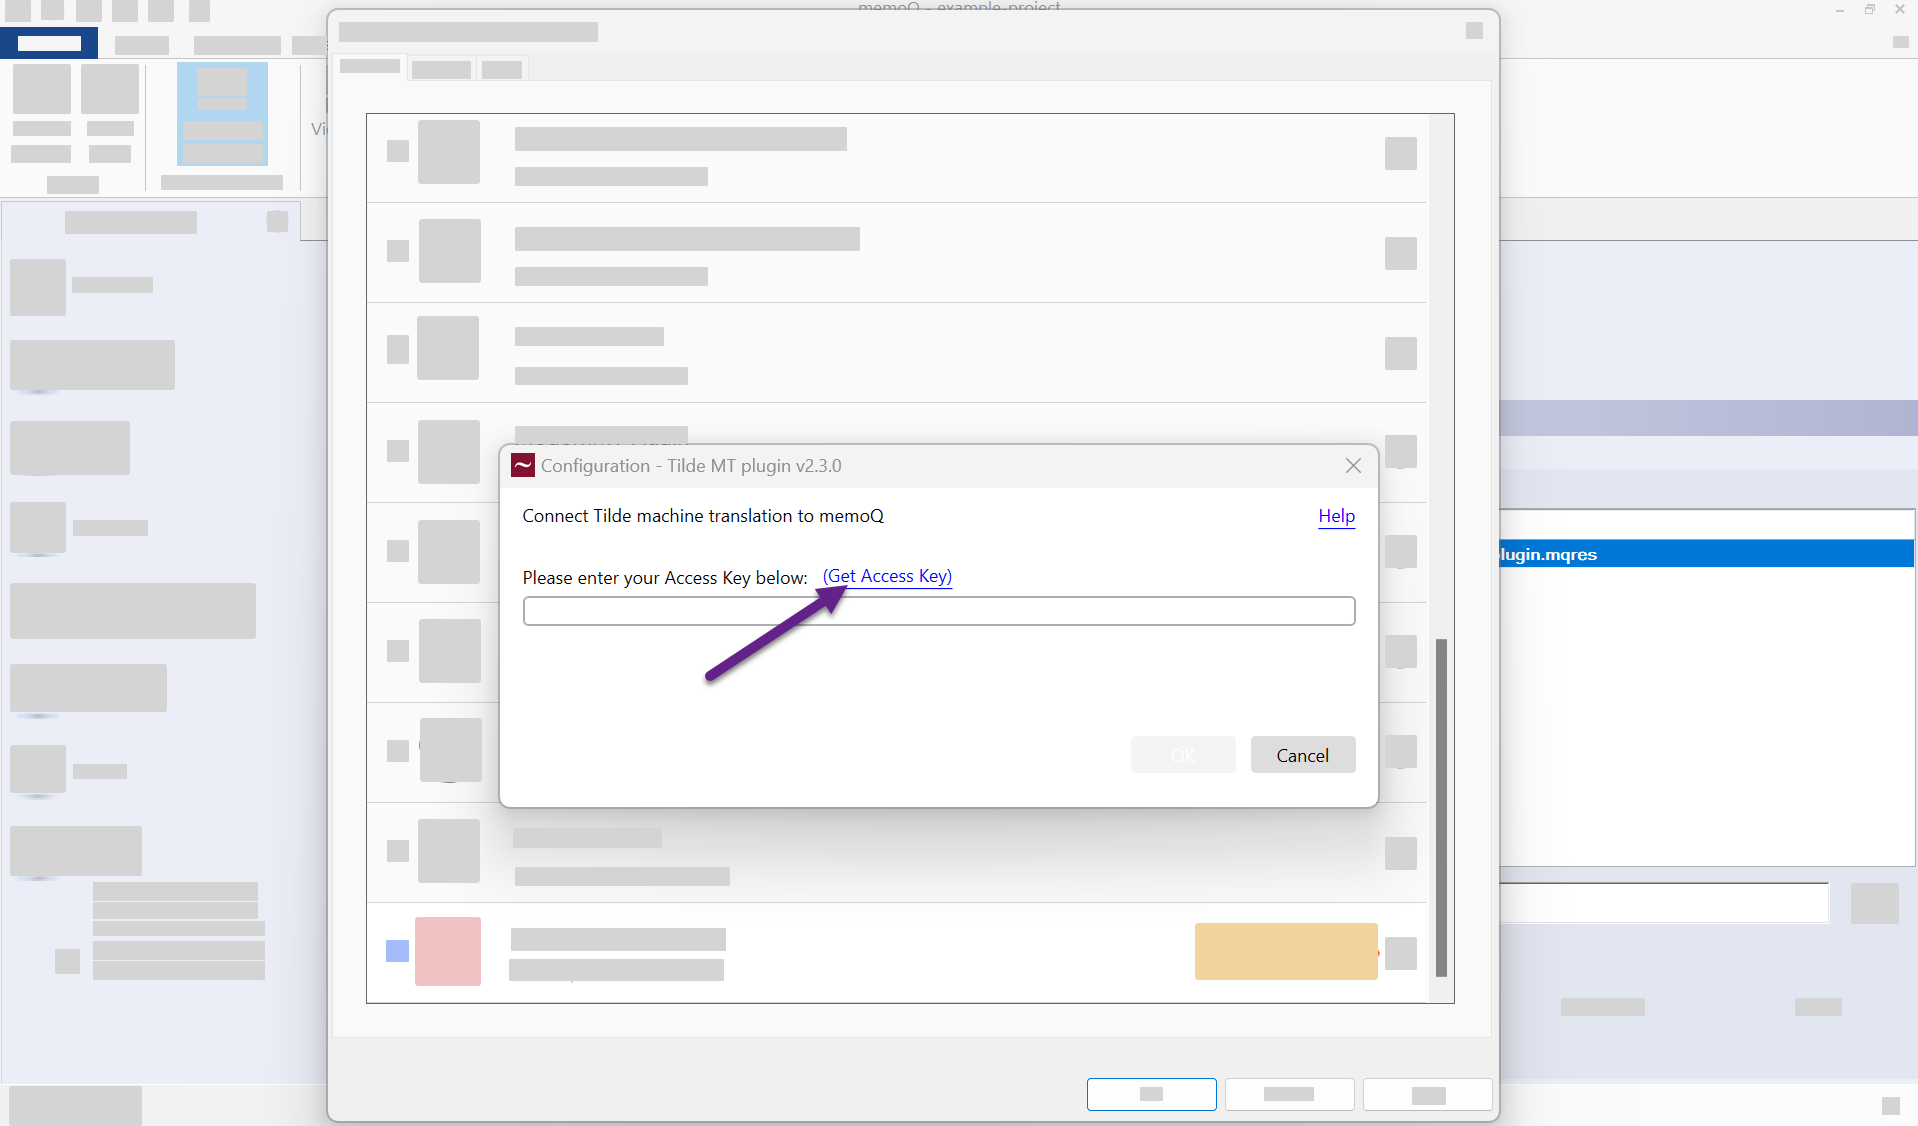
Figure 6. Enter the access key. 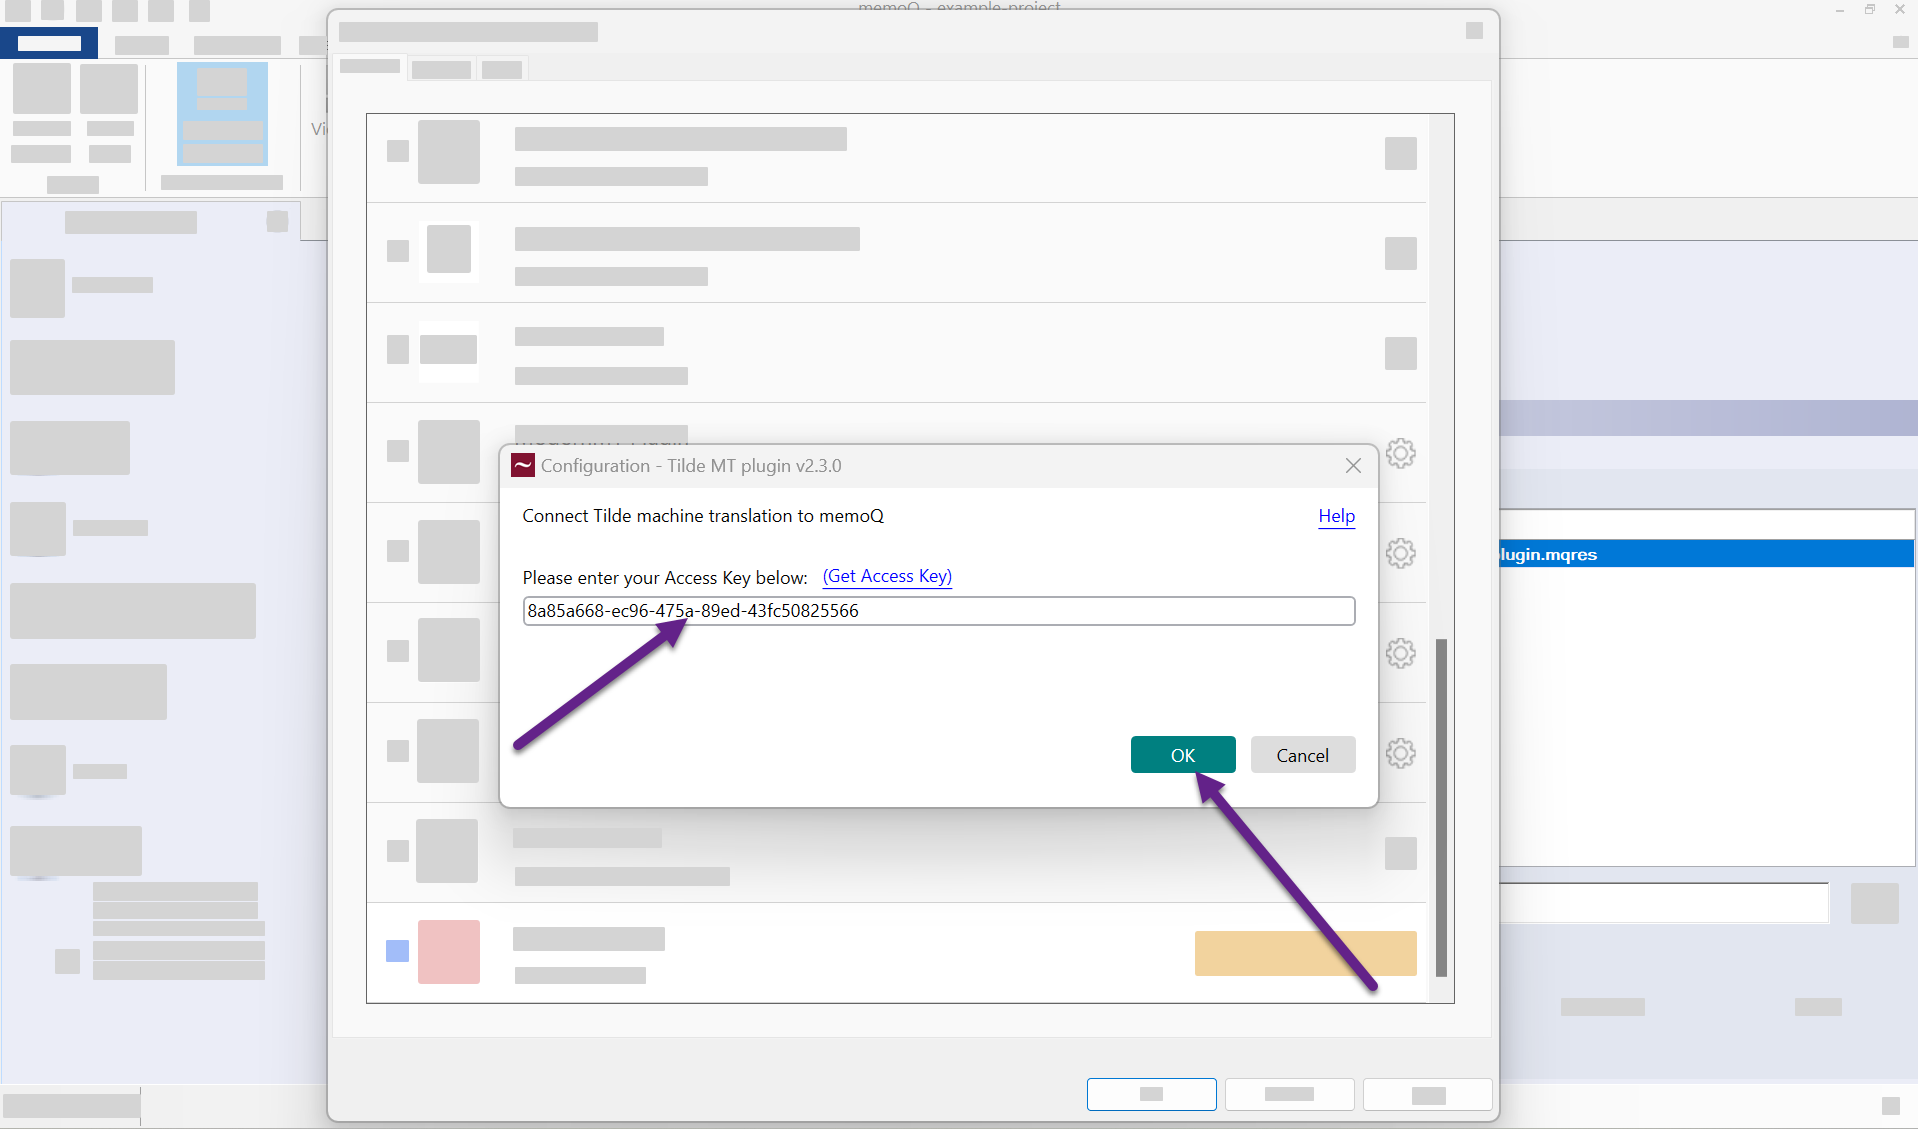
Figure 7. Confirm the entered access key. Figure 1. Project settings view. Figure 2. MT settings resource creation. Figure 3. Edit MT resource details. Figure 4. Enable the plugin. Figure 5. Configure the plugin. 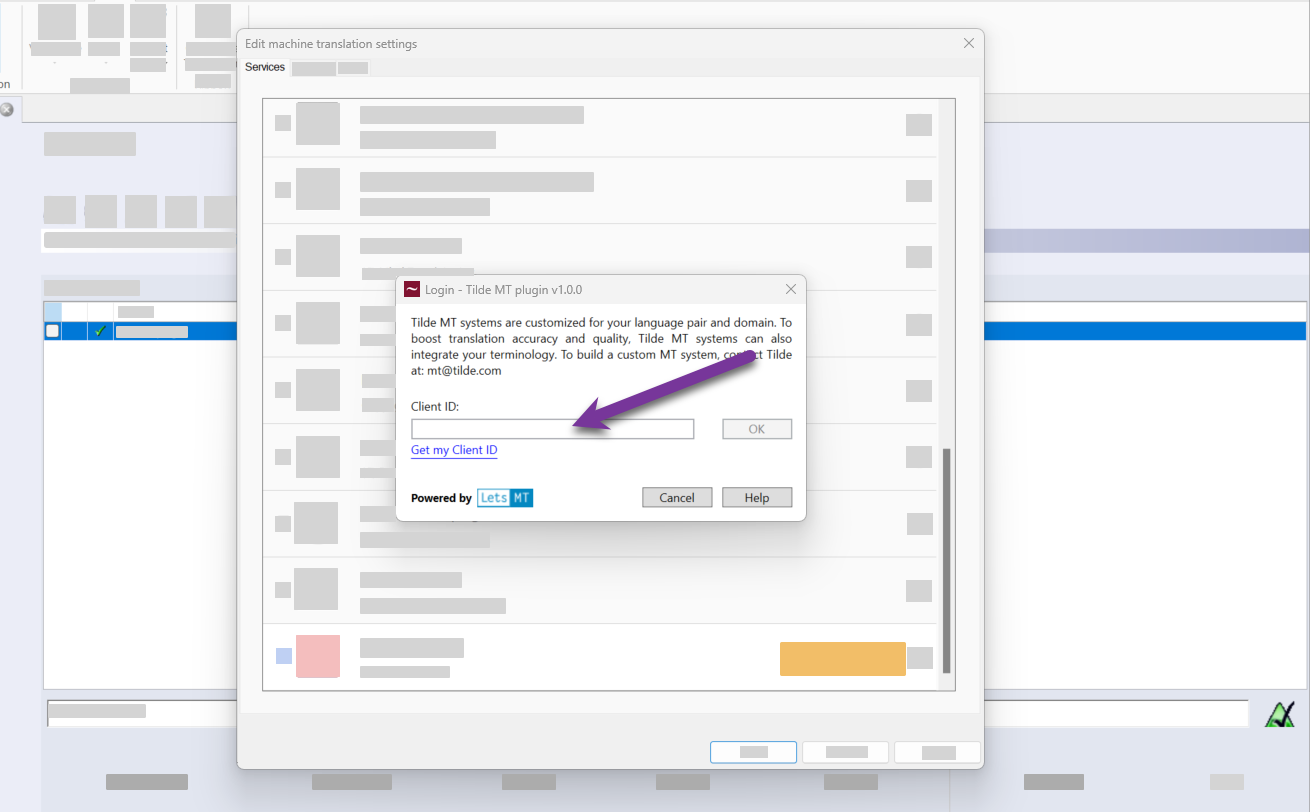
Figure 6. Enter the access key. 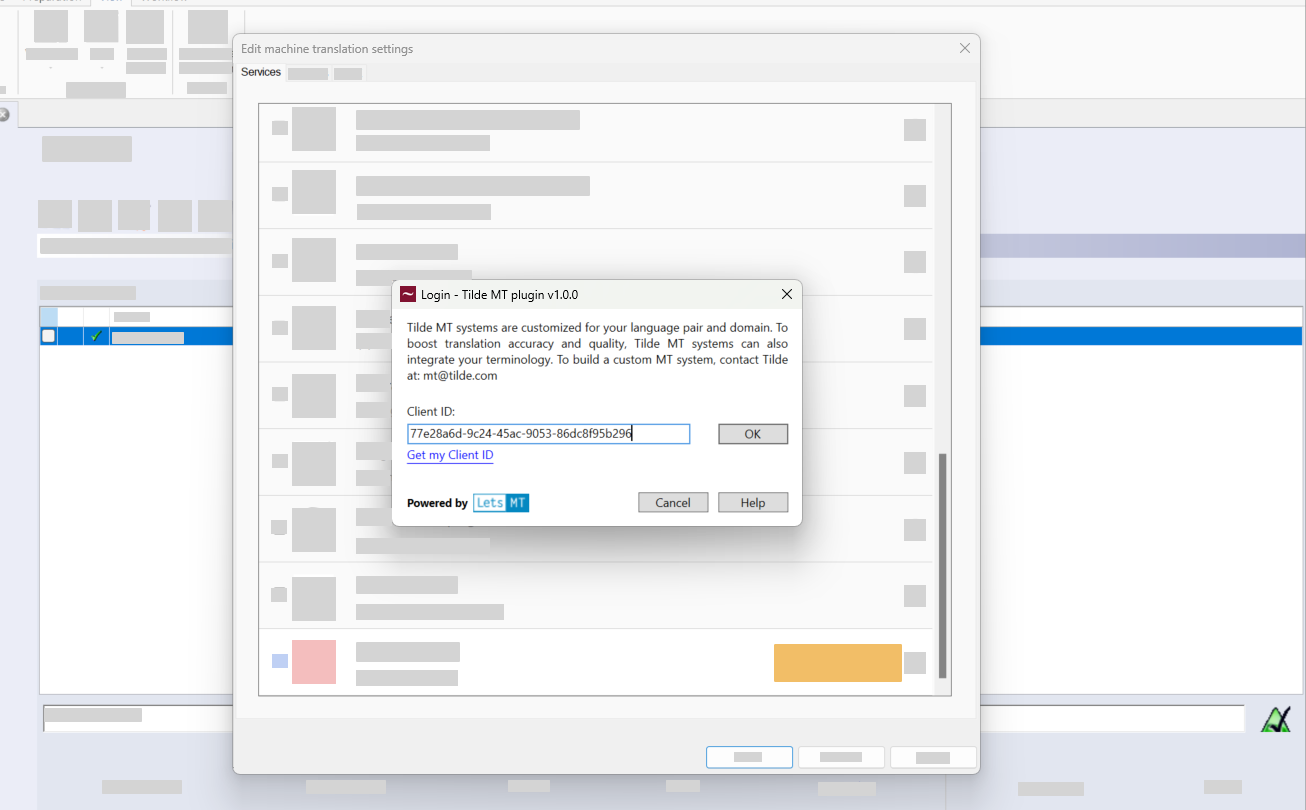
Figure 7. Click OK. 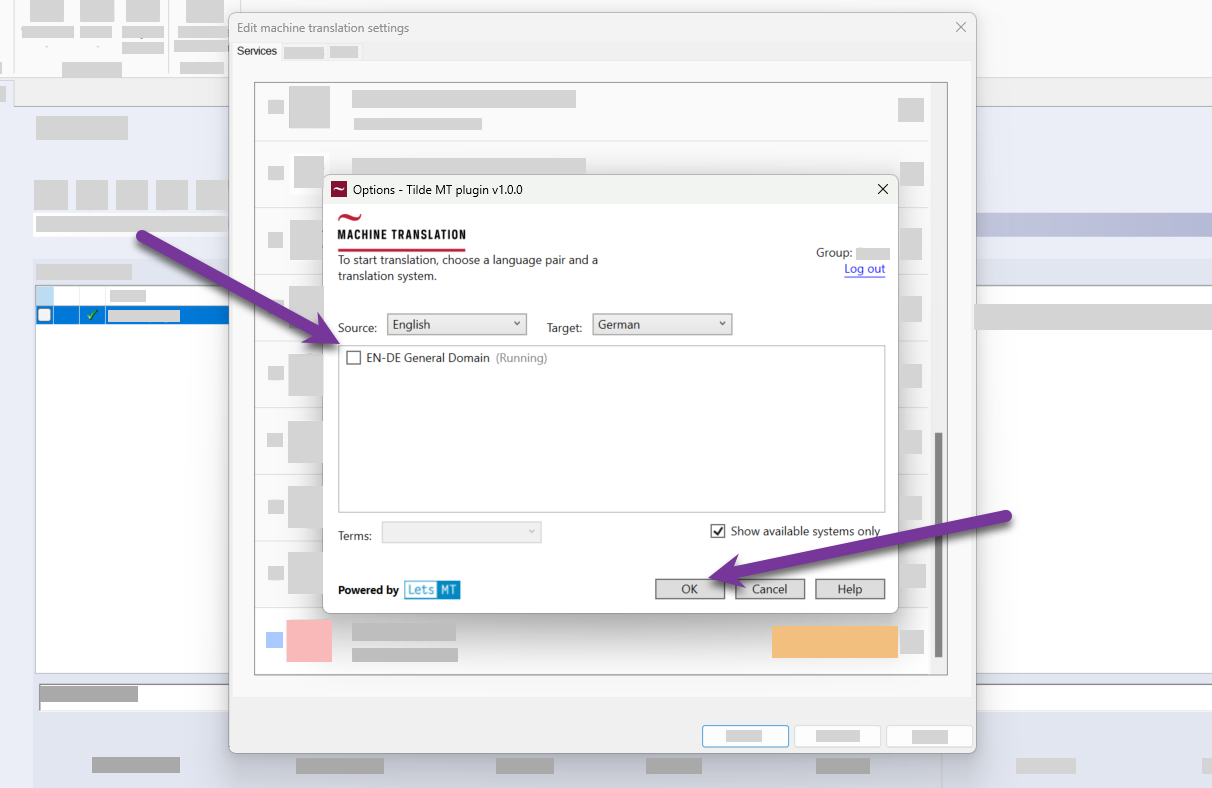
Figure 8. Select language direction and translation engine. 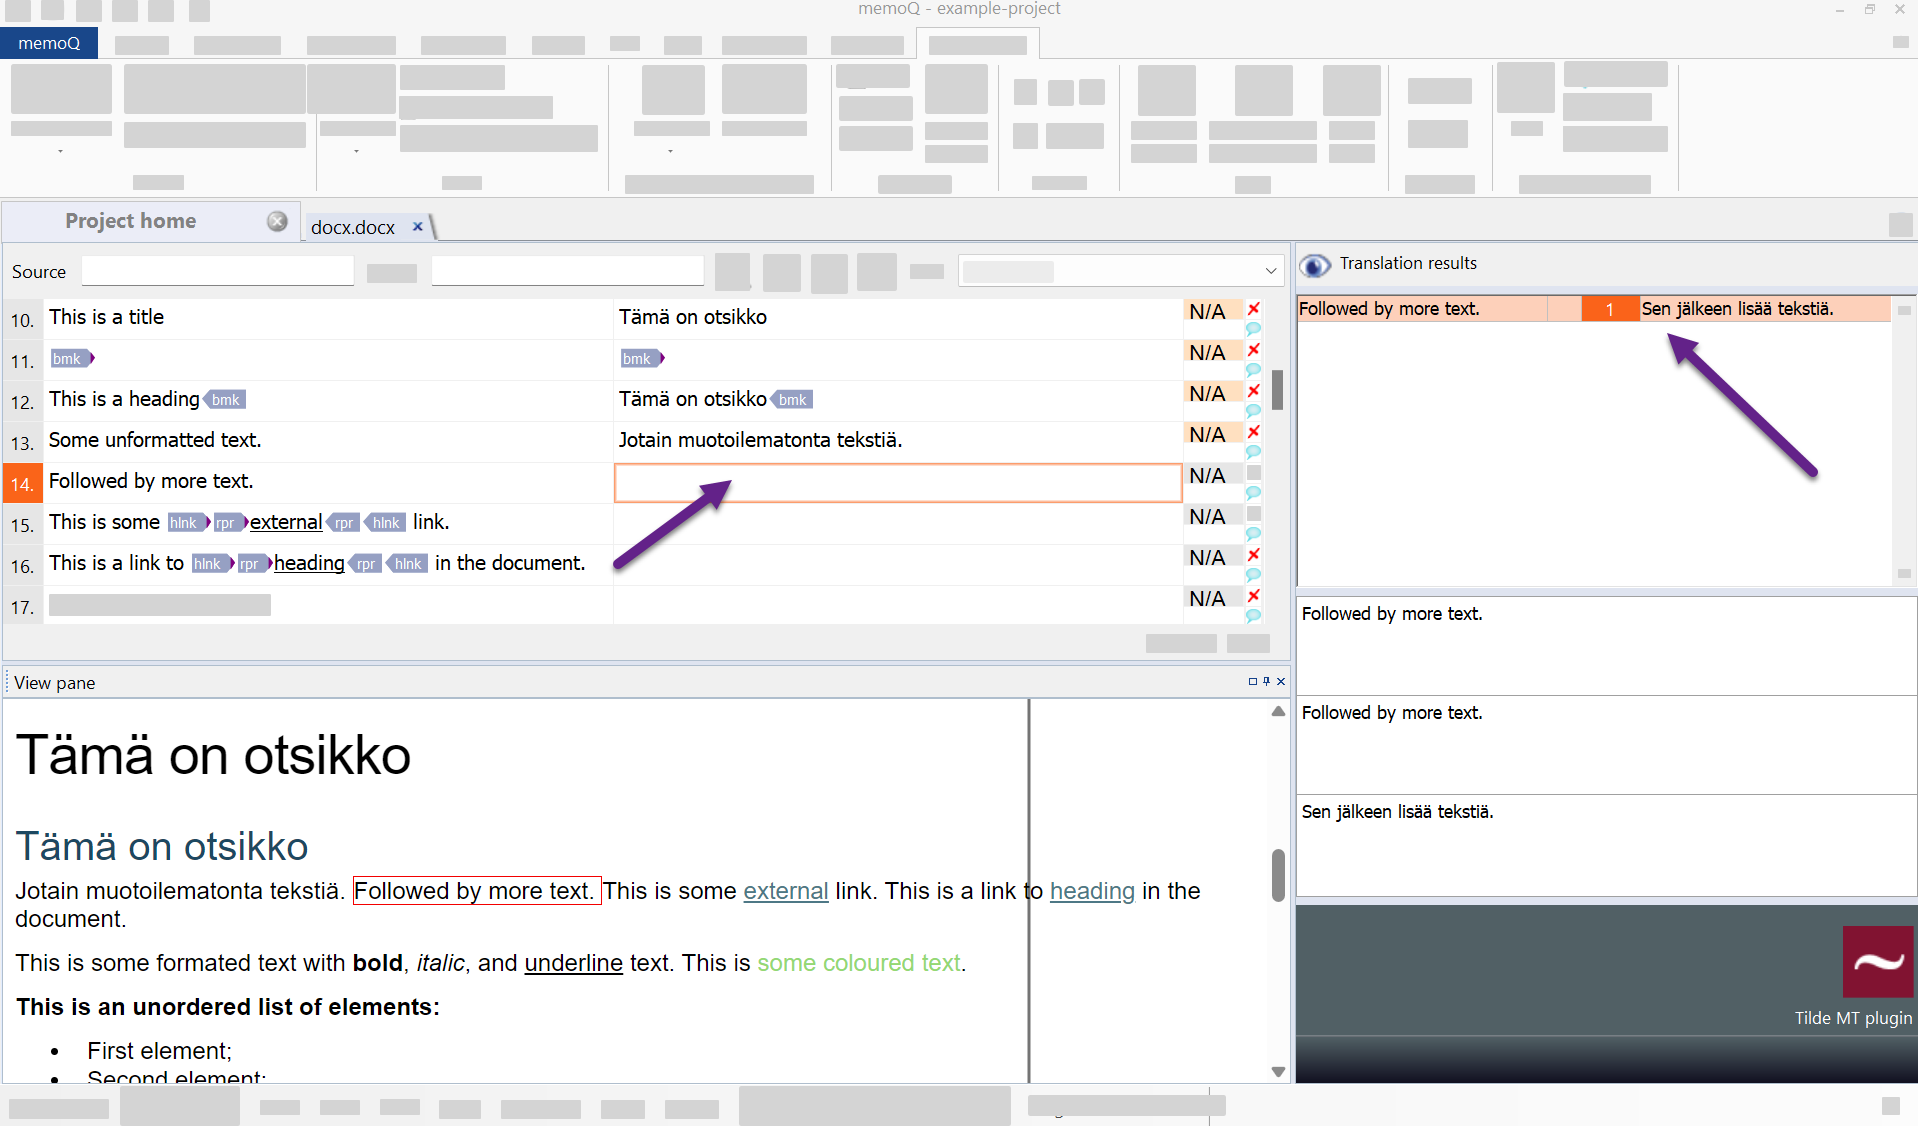
Figure 9. Memoq editor view.
Project setup and translation
Info
An access key is needed to connect the memoQ plugin with Tilde MT. You can reuse access keys for multiple projects or share the same one. Please see: Access keys
Step 1: Set up a project
- memoQ 11.3 and newer
- older versions
To setup a translation project with Tilde MT plugin:
- Create your project and click Settings in Project Home.
- Click MT Settings.
- Click Create/use new.
- Enter the name of the resource, for example "Tilde MT plugin".
- Click OK. The plugin will be added to the resource list.
- Click Edit.
- Find the Tilde MT plug-in in the list.
- Enable the plug-in by double-clicking the settings icon.
- Enter your access key or click Get access key.
- Click OK to log-in.
- Click OK again to close the plugins list.
- Open the editor view and start translating.
To setup a translation project with Tilde MT plugin:
- Create your project and click Settings in Project Home.
- Click MT Settings.
- Click Create/use new.
- Enter the name of the resource, for example "Tilde MT plugin".
- Click OK. The plugin will be added to the resource list.
- Click Edit.
- Find the Tilde MT plug-in in the list.
- Enable the plug-in by double-clicking the settings icon.
- Enter your access key (Client-ID).
- Click OK to log-in.
- Select language direction and translation engine and click OK.
- Click OK again to close the plugins list.
- Open the editor view and start translating.
Step 2: Translation
Plugin can be used to translate segment-by-segment or pre-translate the whole project and post-edit the translations.
Translate segment-by-segment
Translations for active segment appear on the right side panel. Click into a segment you want to translate.
Pre-translate
To pre-translate a project:
- Open editor.
- Click Preparation tab.
- Click Pre-translate.
- Select Scope and enable Machine translation.
- The default MT plug-in should appear under Use machine translation….
- Click OK.
- Pre-translation progress window will appear.
- When the process ends the opened document (or the previously chosen scope) should be filled with translations.