Advanced setup
You will learn:
- How to to access the Website Translator's settings
- How to add access key
- How to select translation languages
- How to verify that plugin is set-up correctly
- How to configure language switcher
- How to customize language names in language switcher
- How to customize machine translation notice bar
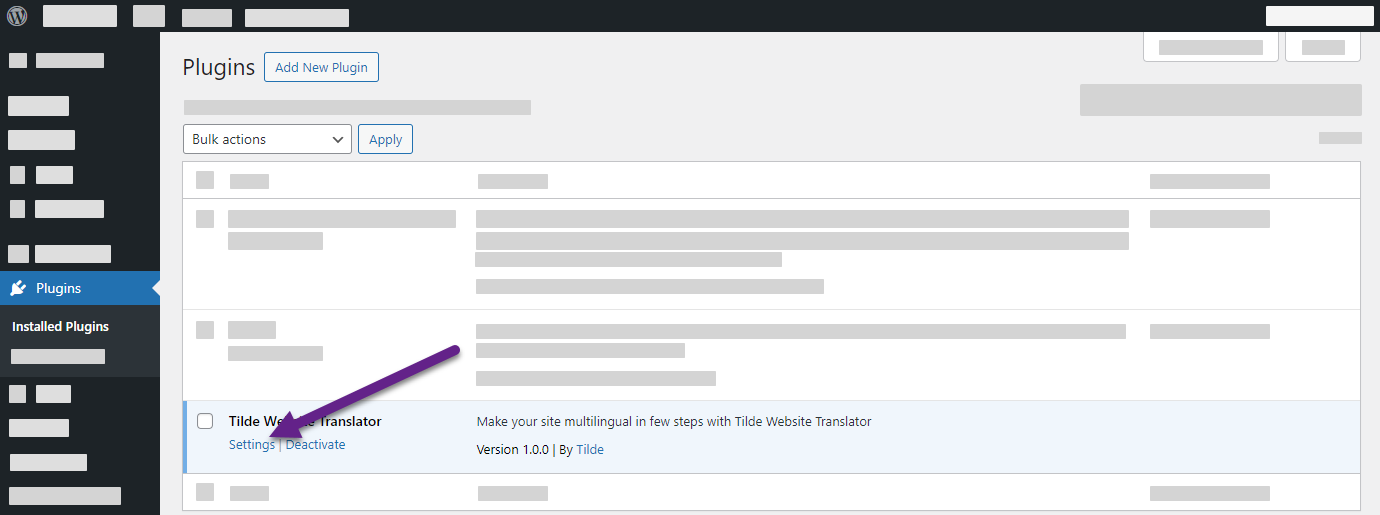
Step 1: How to get there?
- On the Wordpress administrator dashboard, open Plugins.
- In the list find "Tilde Website Translator".
- Click Settings.
Step 2: Add access key
To enable machine translation, input your access key (provided by our Sales team) into the plugin settings.
To add the access key:
- On the Wordpress administrator dashboard, open Plugins > Tilde Website Translator > Settings.
- In plugins settings, open Automated Translation tab.
- Enter your access key.
- Click Save Changes at the bottom of the page.

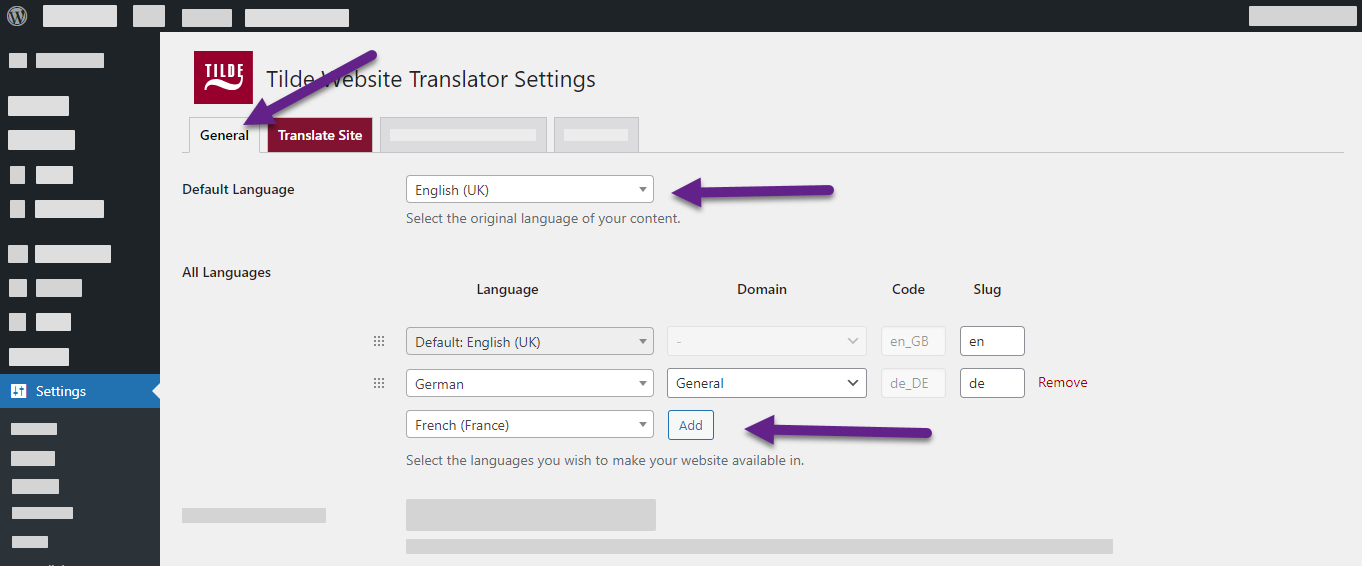
Step 3: Select translation languages
To select the translation languages:
- Open the Tilde Website Translator plugins Settings.
- In the General tab, set the default language of your website.
- In the All Languages section, select the language(-es) and domains, and click Add.
- At the bottom of the page, click Save Changes.
- Adjust the language order by dragging and dropping.
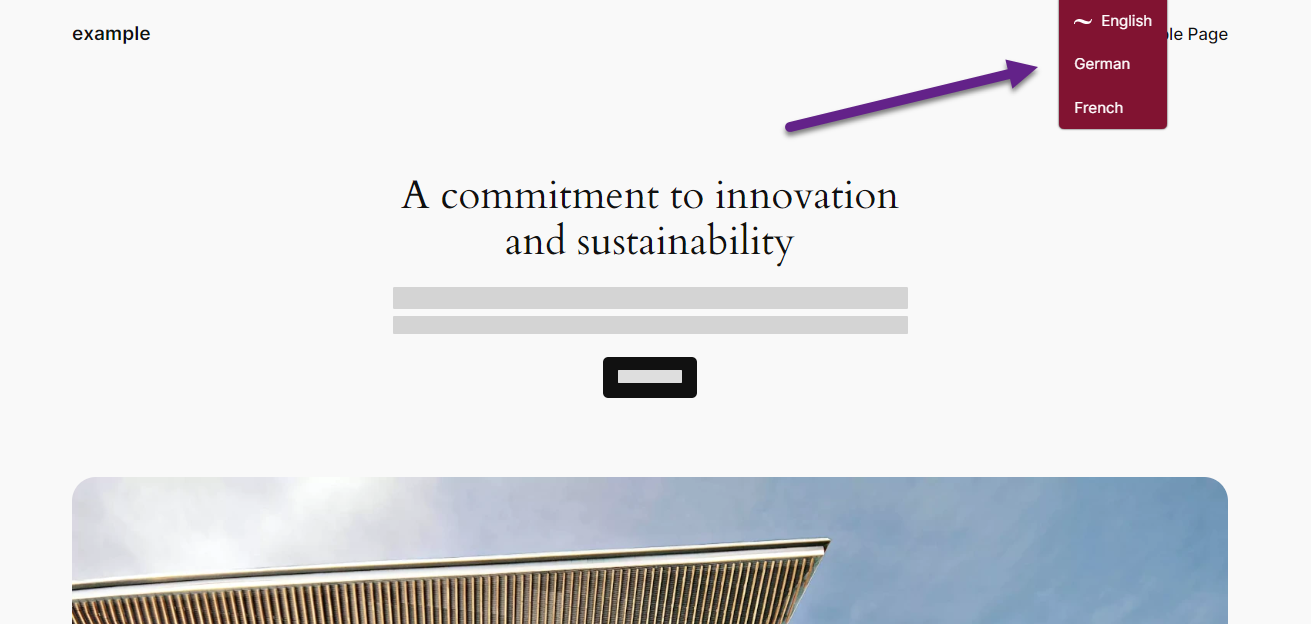
Step 4: Verify plugin is set-up correctly
To verify that the plugin is set-up correctly:
- Open your website.
- Look for the floating language selector at the top of the page.
- Select a translation language.
- The page will reload, displaying the translated content.
- A translation notice bar should appear.
Step 5: Configure language switcher
The language switcher offers three display options:
- Floating selection: Positioned at the top right corner of the page (default).
- Shortcode: Embedded directly into your page content.
- Menu item: Integrated into your website's navigation menu.
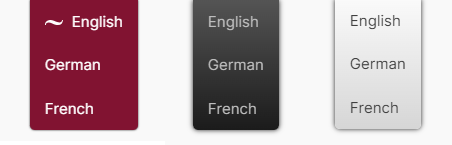
Floating language selection
The floating language switcher offers three themes: default (dark red), dark, and light. Choose from four placement options: top right, top left, bottom right, or bottom left.
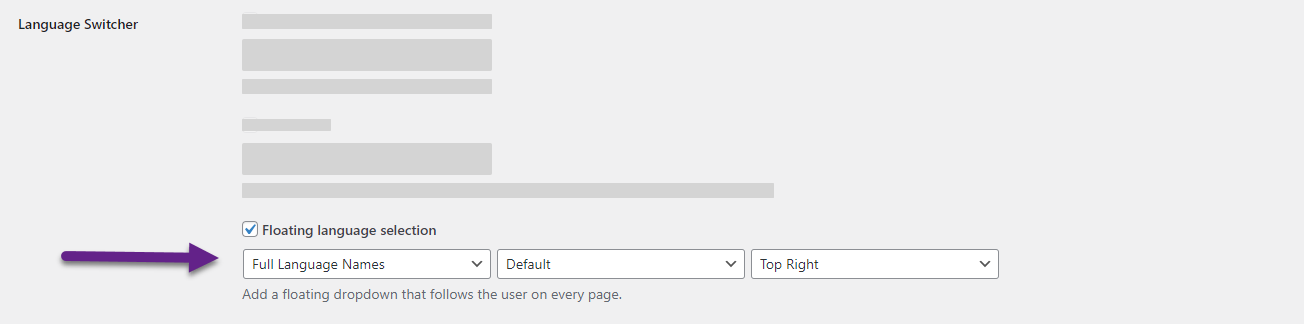
To change the floating language menu appearance:
- In the plugin’s settings, open the General tab.
- At the bottom of the page, find the Language switcher section.
- Under Floating language selection, select:
- How to display the language names.
- The theme: Light, Dark, Default.
- Position where to display it: Bottom right, Bottom left, Top right, Top left.
- Click Save Changes.
Disable default floating language switcher
When using the shortcode or menu item language switchers, the default floating language switcher can be hidden.
To disable the floating language selection:
- In the plugin’s settings, open the General tab.
- At the bottom of the page, find the Language switcher section.
- Unselect Floating language selection.
- Click Save Changes.
Shortcode
Add a language switcher to any page using the [language-switcher] shortcode. Depending on your WordPress theme and version, you may need to add it as a widget or customize your theme's template.
Add to a page
To add a shortcode language switcher to a single page:
- In the editor, open the page you want to edit.
- Add a text block and type “[language-switcher]”.
- At the top of the page, click Update.
Edit widget
To add a shortcode language switcher to footer, header, or sidebar:
- On the WordPress dashboard, open Appearance > Widgets.
- Find the header/footer/sidebar widget.
- Click “+” and add a text block.
- Type “[language-switcher]”.
- At the top of the page, click Update.
Edit theme
👉Theme confguration steps might differ depending on your theme.
To edit the theme and add the shortcode:
- On the WordPress dashboard, open Appearance > Themes.
- Click Customize for your selected theme.
- Click Patterns.
- Select Header or Footer.
- Add a shortcode block and type “[language-switcher]”.
- At the top of the page, click Save.

Menu item
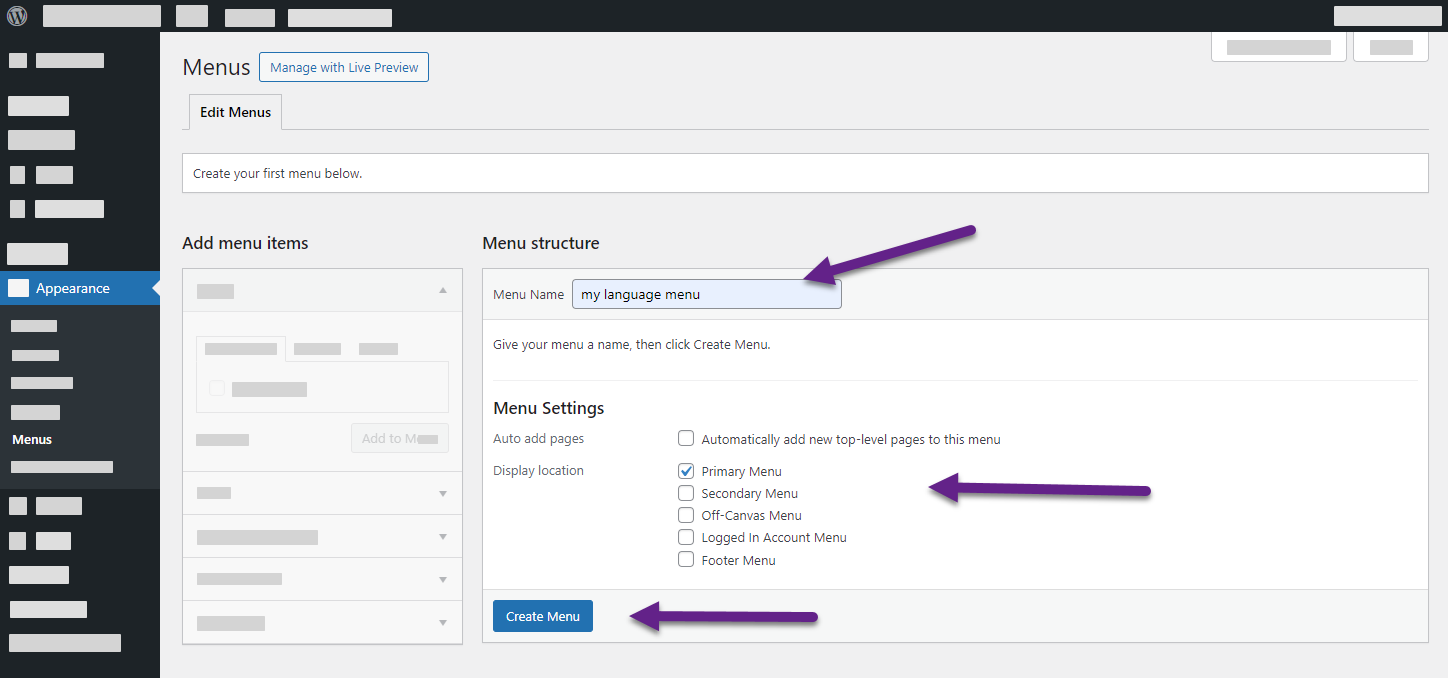
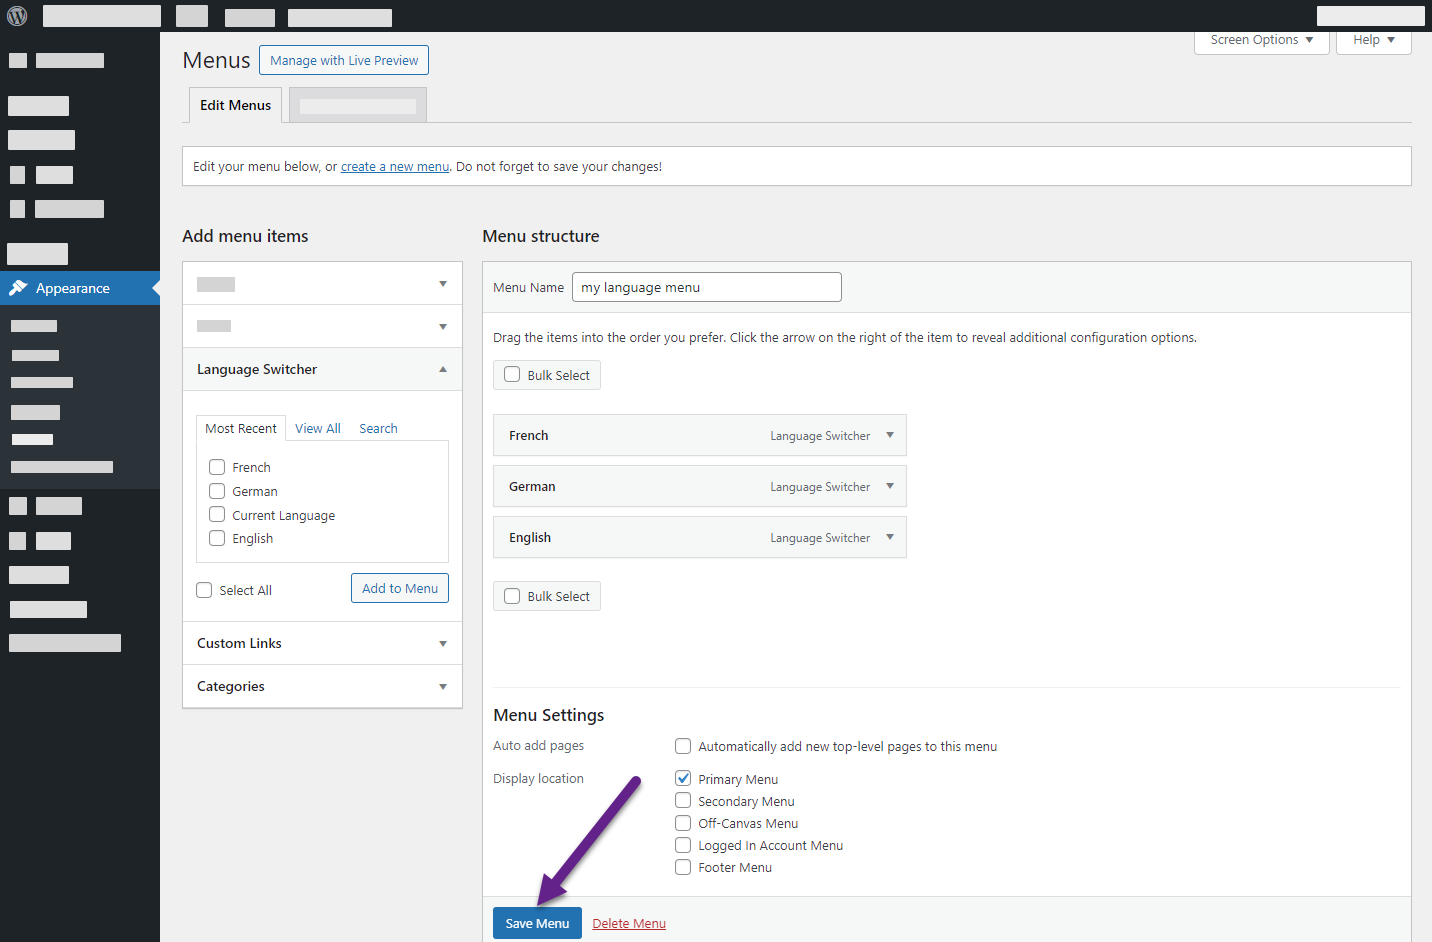
To add the language switcher to any menu:
- On the WordPress dashboard, open Appearance > Menus.
- Create a new menu or edit an existing one.
- Select display location of the menu.
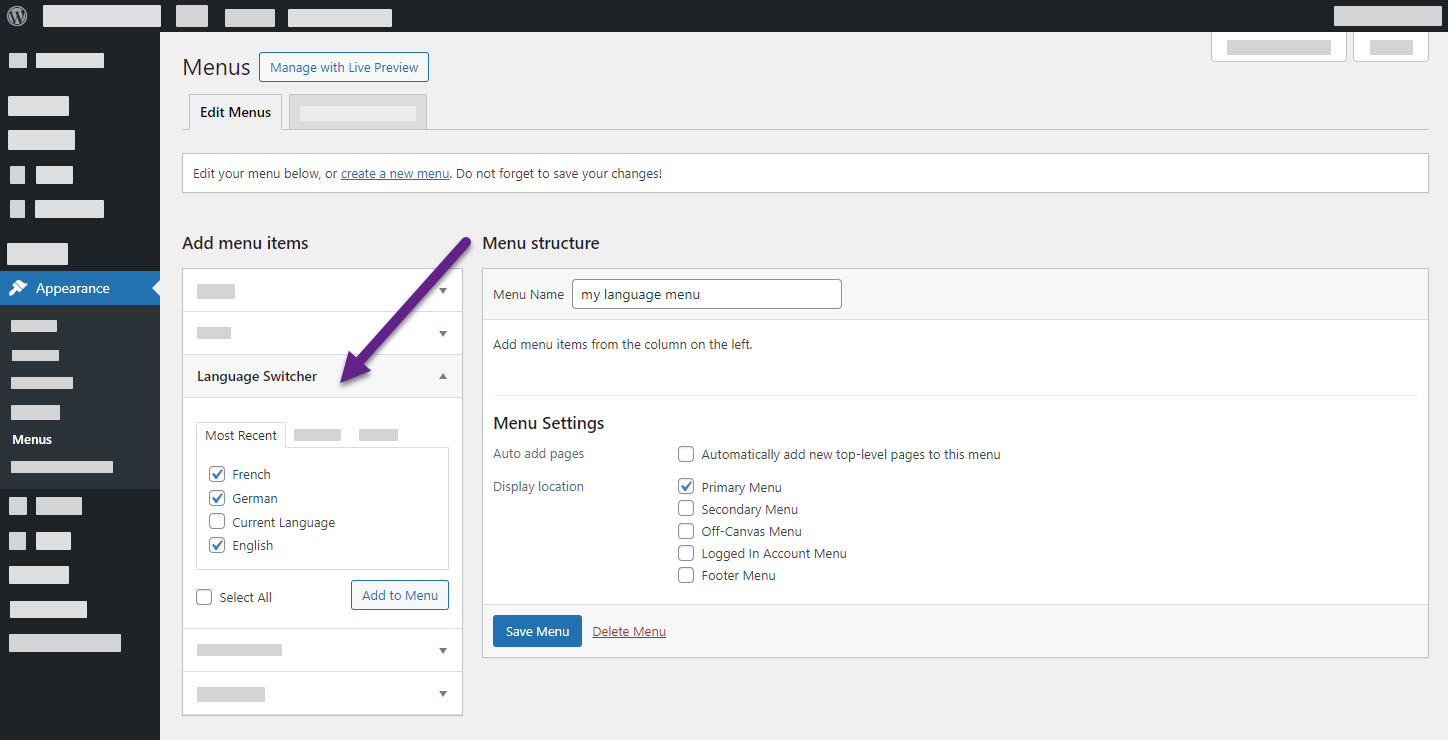
- Under Add menu items, expand Language switcher.
- Select the languages.
- Click Add to menu.
- Reorder the languages by dragging, if needed.
- Save changes.
Language switcher is added to website header:

Step 6: Customize language names in language switcher
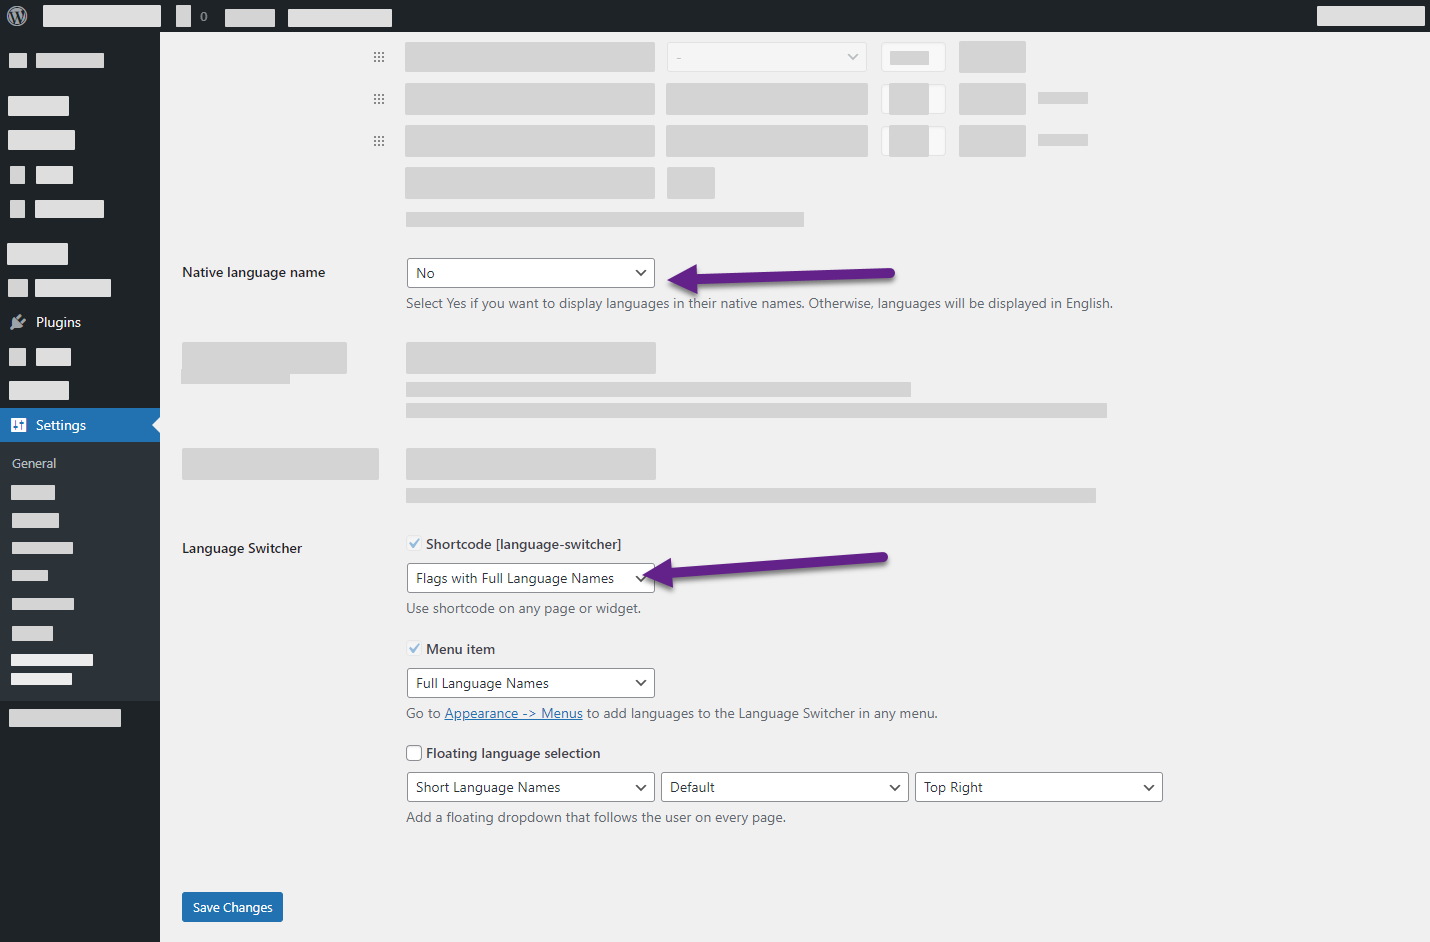
Customize language display in the plugin's Settings > General tab. Choose between English or native language names for languages in the language switcher.
- Next to Native language name, select “Yes” or “No” from the dropdown.
To change how the languages are displayed:
- At the bottom of the page, find the Language switcher section.
- Under the language switcher you are using, select the language appearance:
- Full Language Names,
- Short Language Names,
- Flags with Full Language Names,
- Flags with Short Language Names,
- Only Flags.
- Click Save Changes.
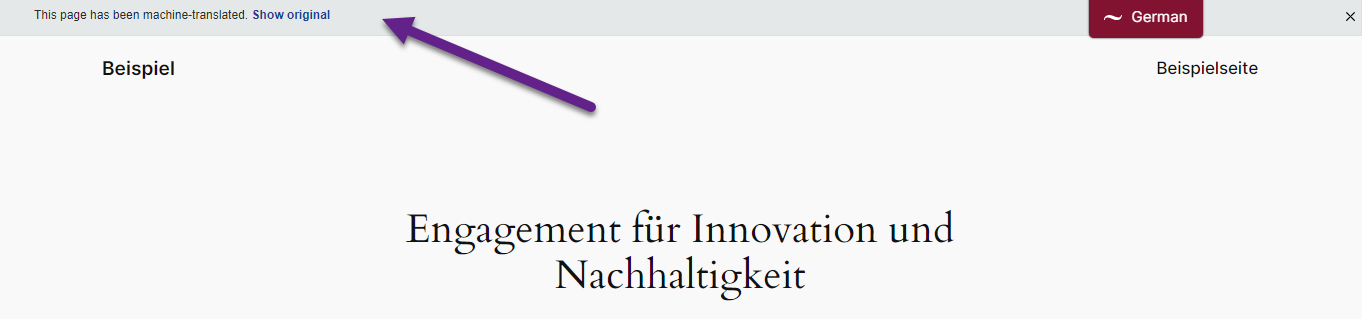
Step 7: Customize machine translation notice bar
A default notice bar appears at the top of machine-translated pages, informing visitors of the translation and offering an option to restore the original language. The notice bar message is also machine translated.
Change display position
Translation notice can be displayed at the top or bottom of the page.
To change the display position:
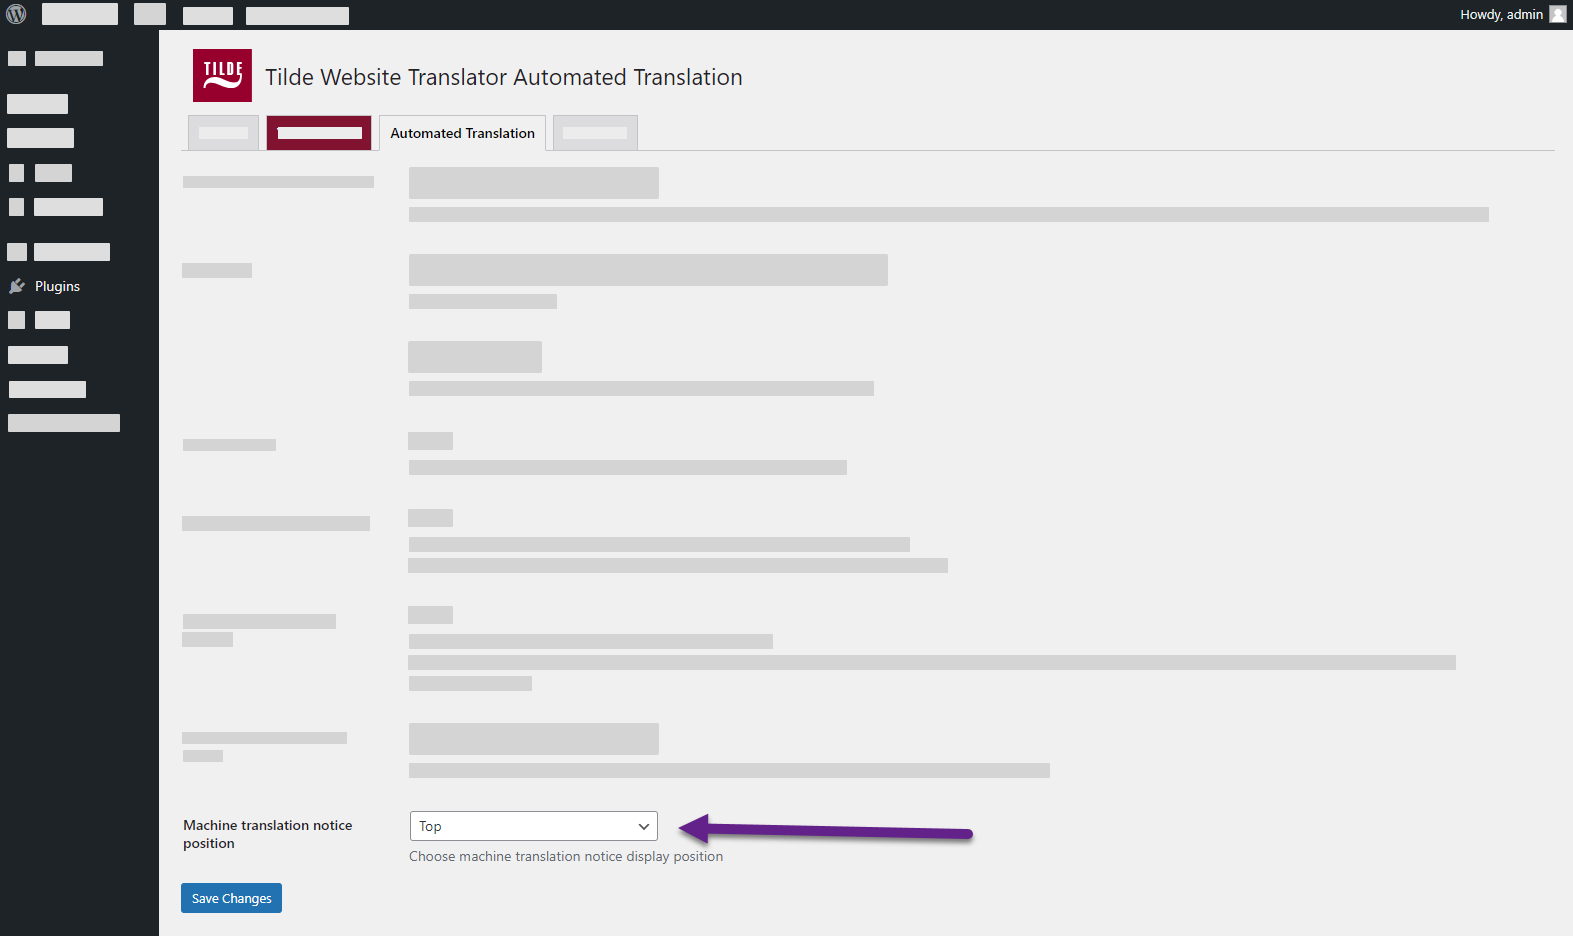
- In the plugin’s settings, open the Automated translation tab.
- Next to Machine translation notice position, select “Top” or “Bottom”.
- At the bottom of the page, click Save Changes.
Edit the translation notice text
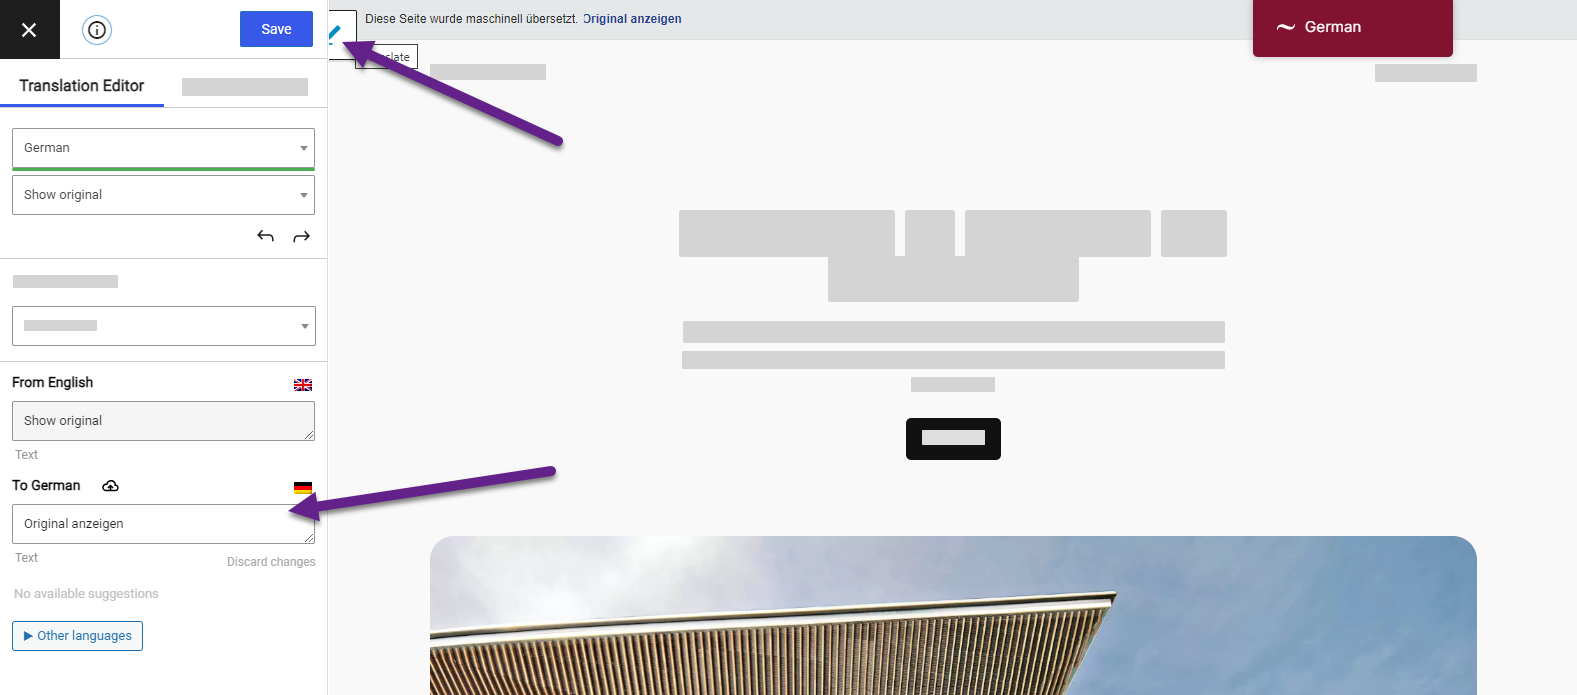
To edit the translation notice bar message:
- Open the Translation editor.
- Hover over the notice bar and click the edit icon.
- Edit the translation.
- At the top of the page, click Save translation.
Display translation notice in English
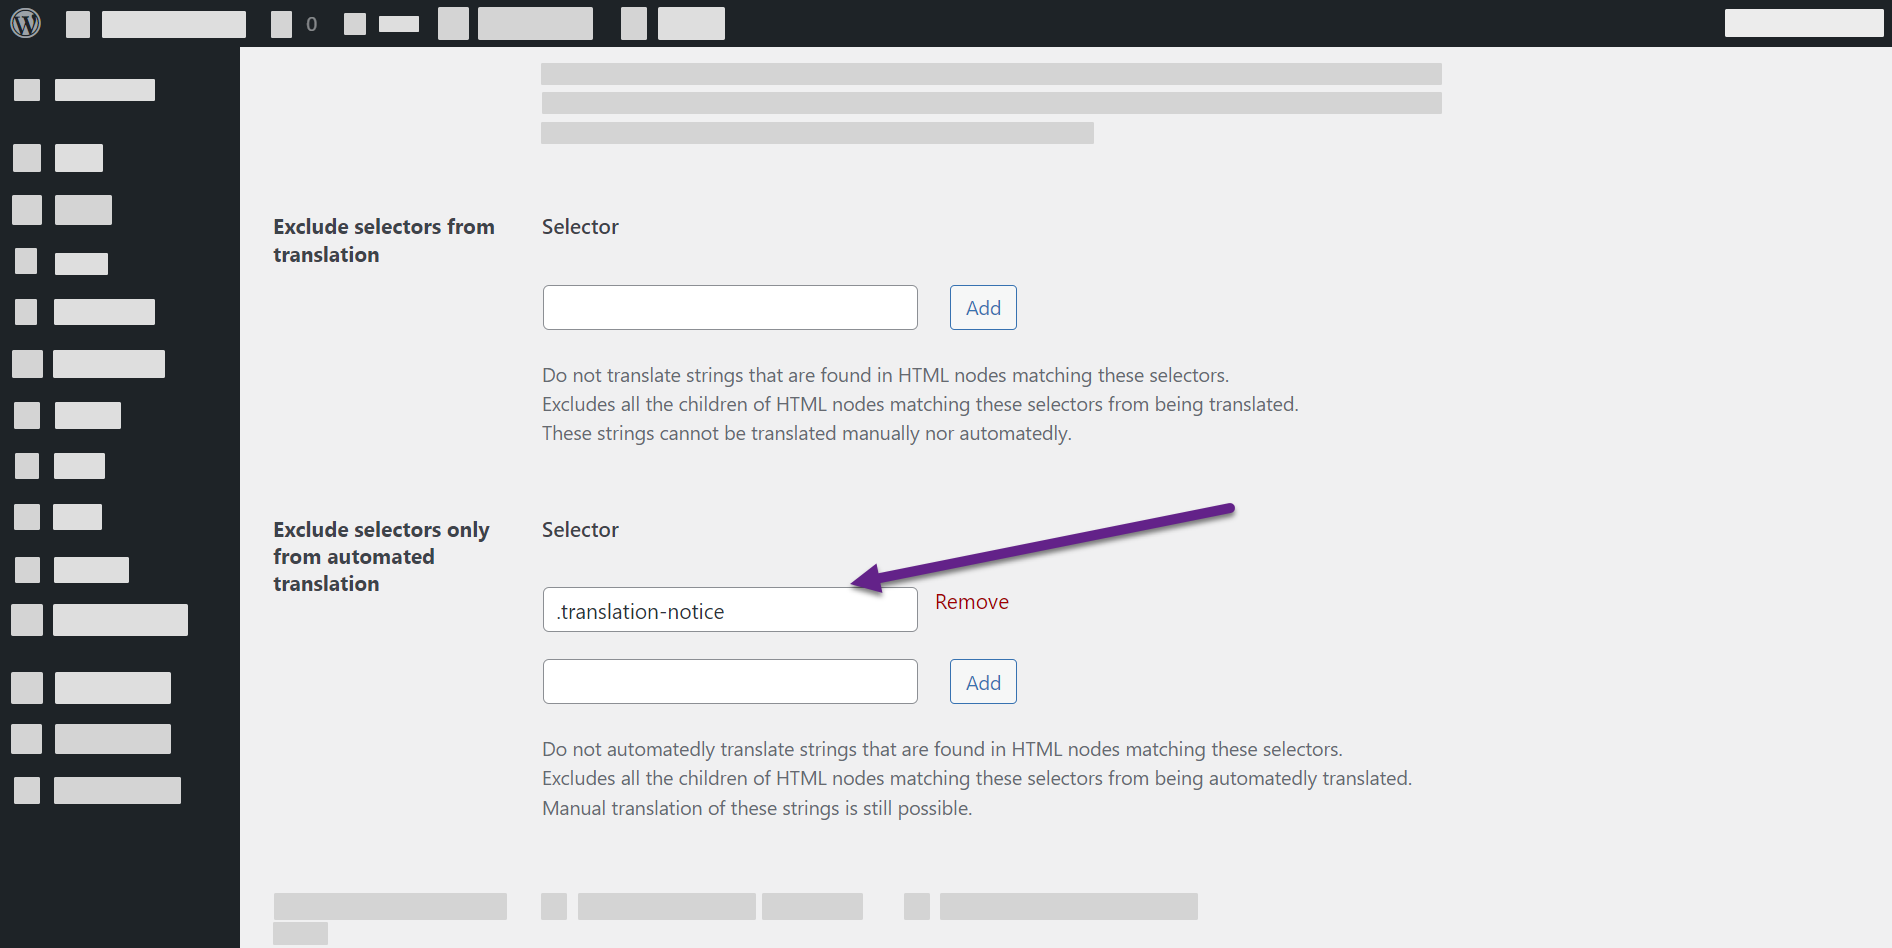
To display the notice in English for website visitors:
- In the plugin’s settings, open the Advanced tab.
- Find the Exclude strings section.
- Under Exclude selectors only from automated translation, add “.translation-notice” to the selectors.
- At the bottom of the page, click Save Changes.

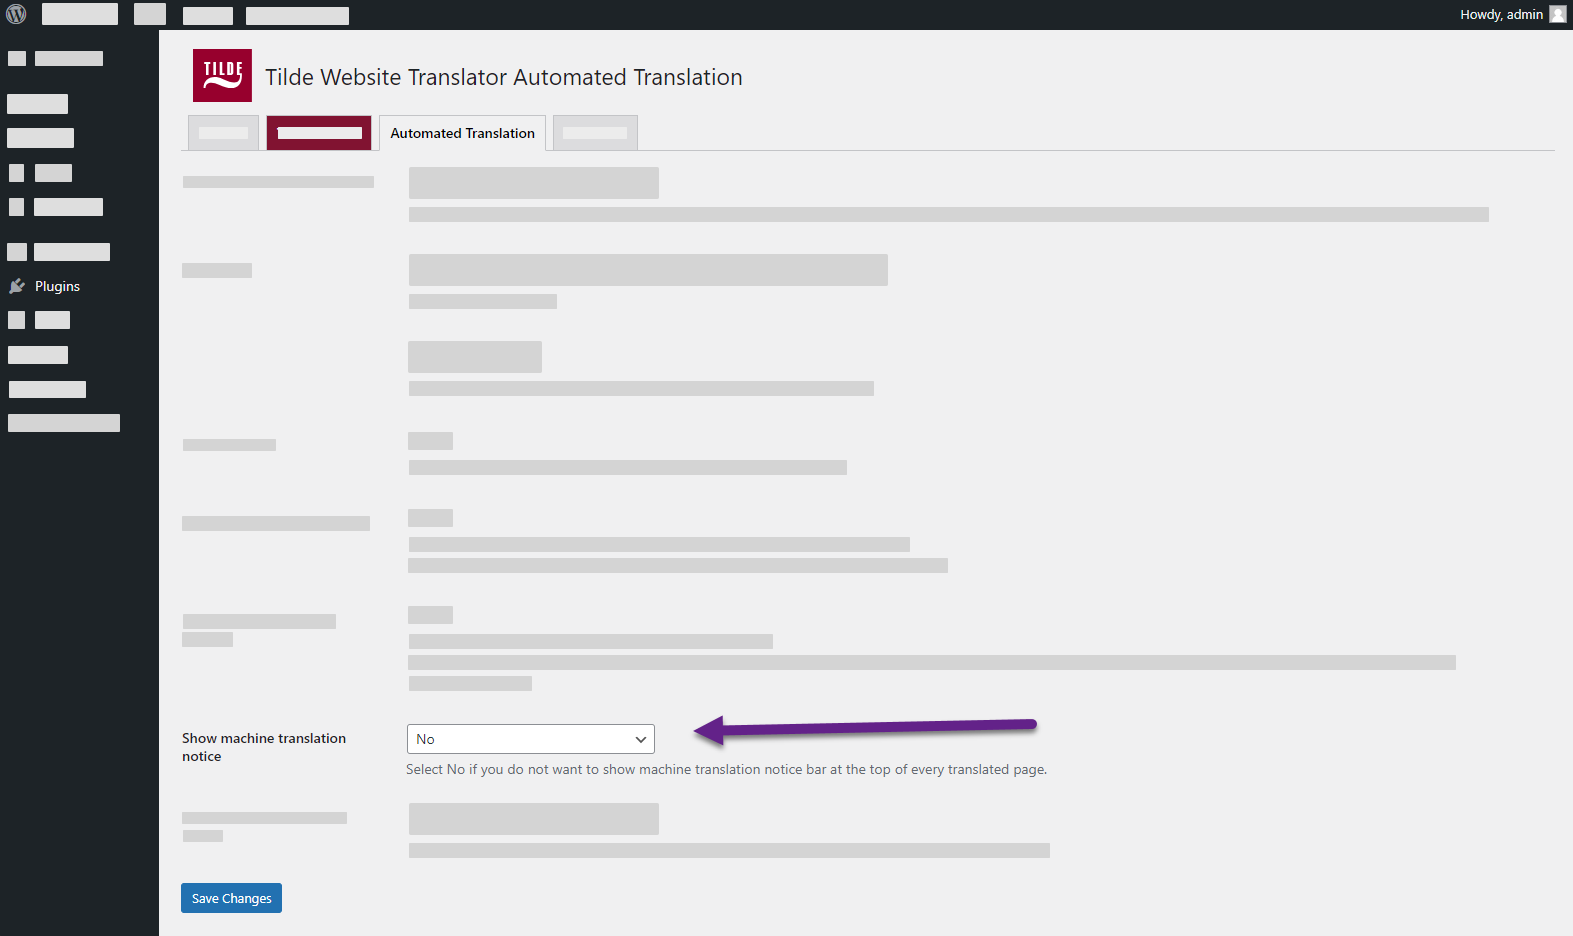
Hide the translation notice bar
To disable the notice bar completely:
- In the plugin’s settings, open the Automated translation tab.
- Next to Show machine translation notice, select “No”.
- At the bottom of the page, click Save Changes.