Speech-to-text Real-time event transcription

Create new event

Head over to Tilde Event Assistant platform to create and manage your events. You will need an account to log-in.

Step 1: Set-up new event

To create and set-up new event:

  1. Click Create event.
  2. Add your event name/title.
  3. Choose the language(s) used by your speakers.
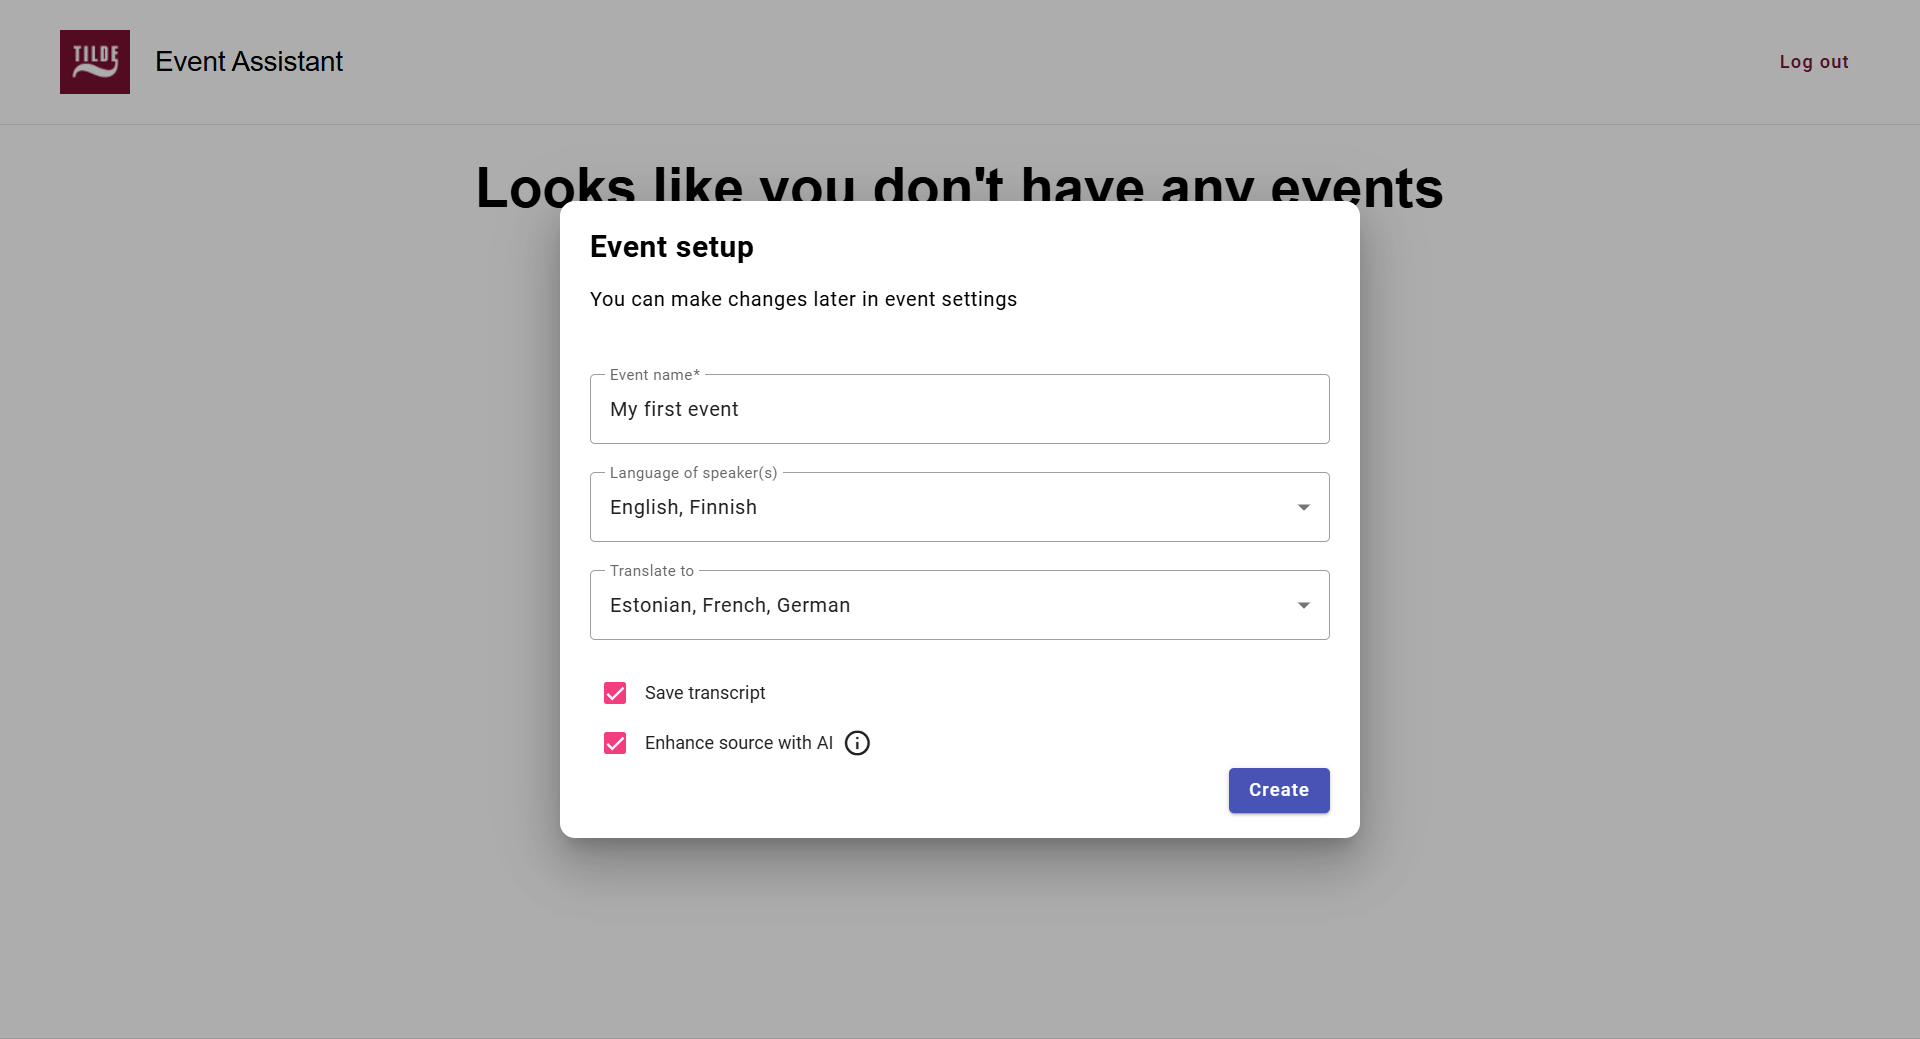
  4. If you want to translate the event, select translation language/s. Attendees will be able to choose their preferred language.
  5. Keep the Save transcript option enabled if you want to save the transcript. This allows you to download the transcript and generate summaries.
  6. Keep the Enhance source with AI option enabled if you want to improve the clarity and readability of the speaker's text by automatically removing filler words and refining the language for a more polished transcript.
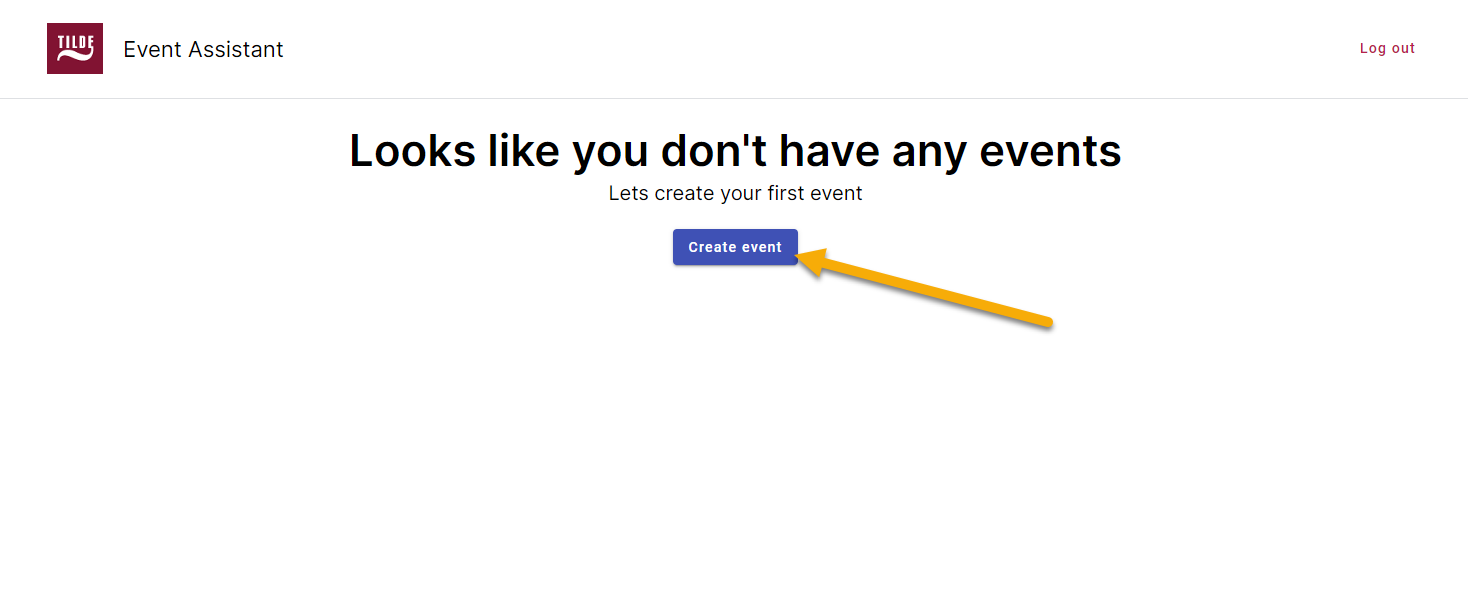
  7. Click Create.

You can update any of this information later in event settings.

Figure 1. Your events will appear here.
Figure 2. New event setup.
Figure 3. Your event is created.

Step 2: Edit additional settings

Open Settings to configure additional settings, see Edit event settings.

To get the link to your event:

  1. Click Share transcription.
  2. In the popup, copy the link.
Figure 4. Share access to the transcription.
Figure 5. Copy the link and/or the QR code and share it with the event atendees.

Step 4: Start transcribing

To start transcribing:

  1. Click Start transcribing.
  2. Allow Event Assistant to use your microphone.
  3. Select the input microphone.
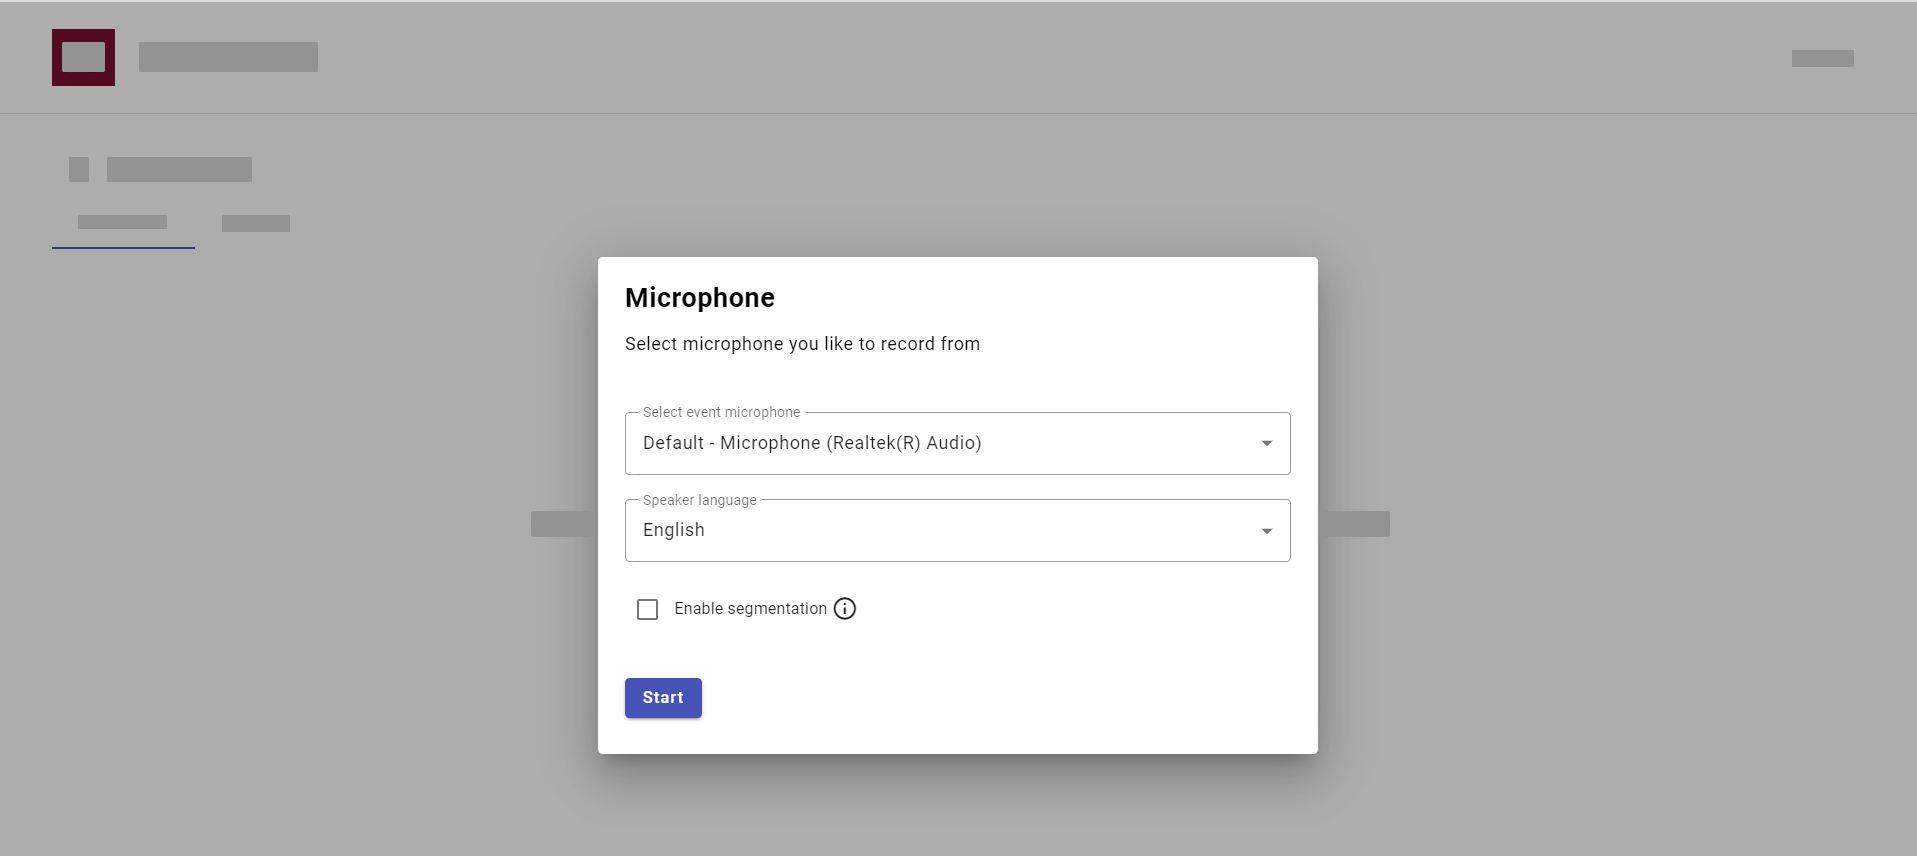
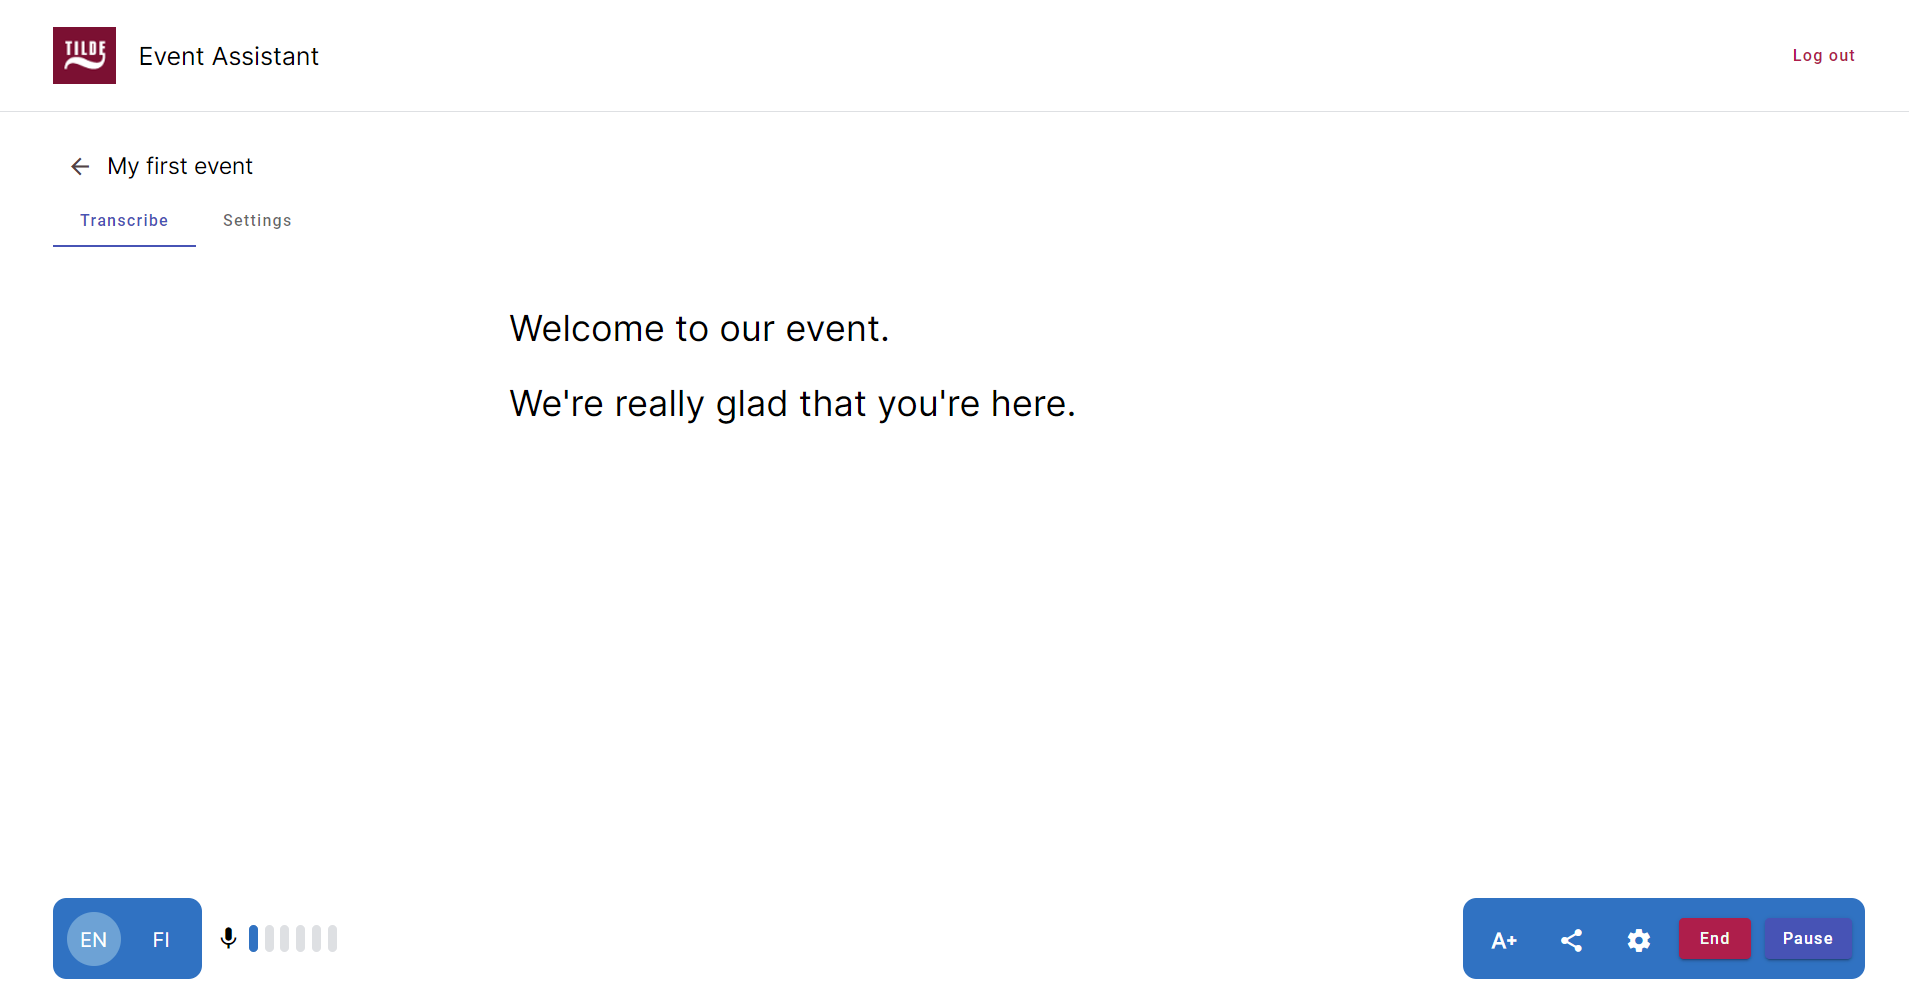
  4. Speak into your microphone. You will see a microphone/speech indicator in the bottom left corner.
Info

Enable segmentation is an experimental feature. It breaks up long paragraphs into smaller, easier-to-read sections, similar to subtitles. Works only for Latvian, Lithuanian, Estonian and Russian.

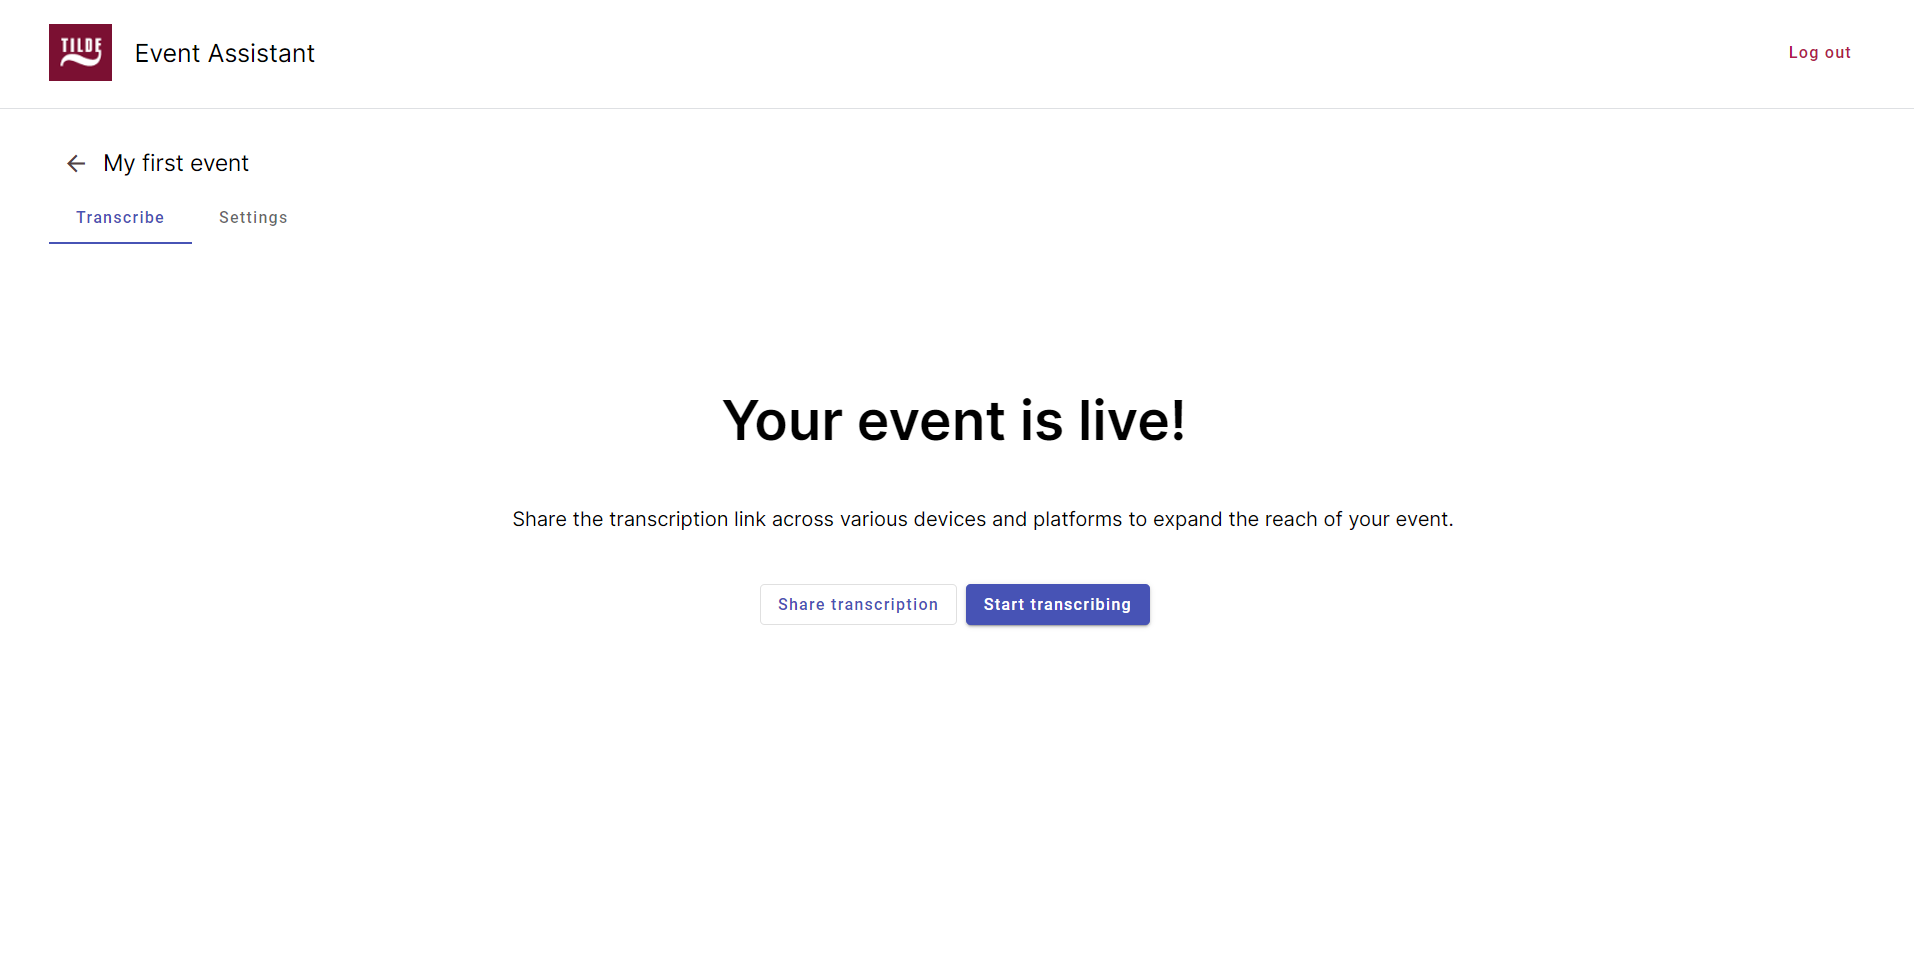
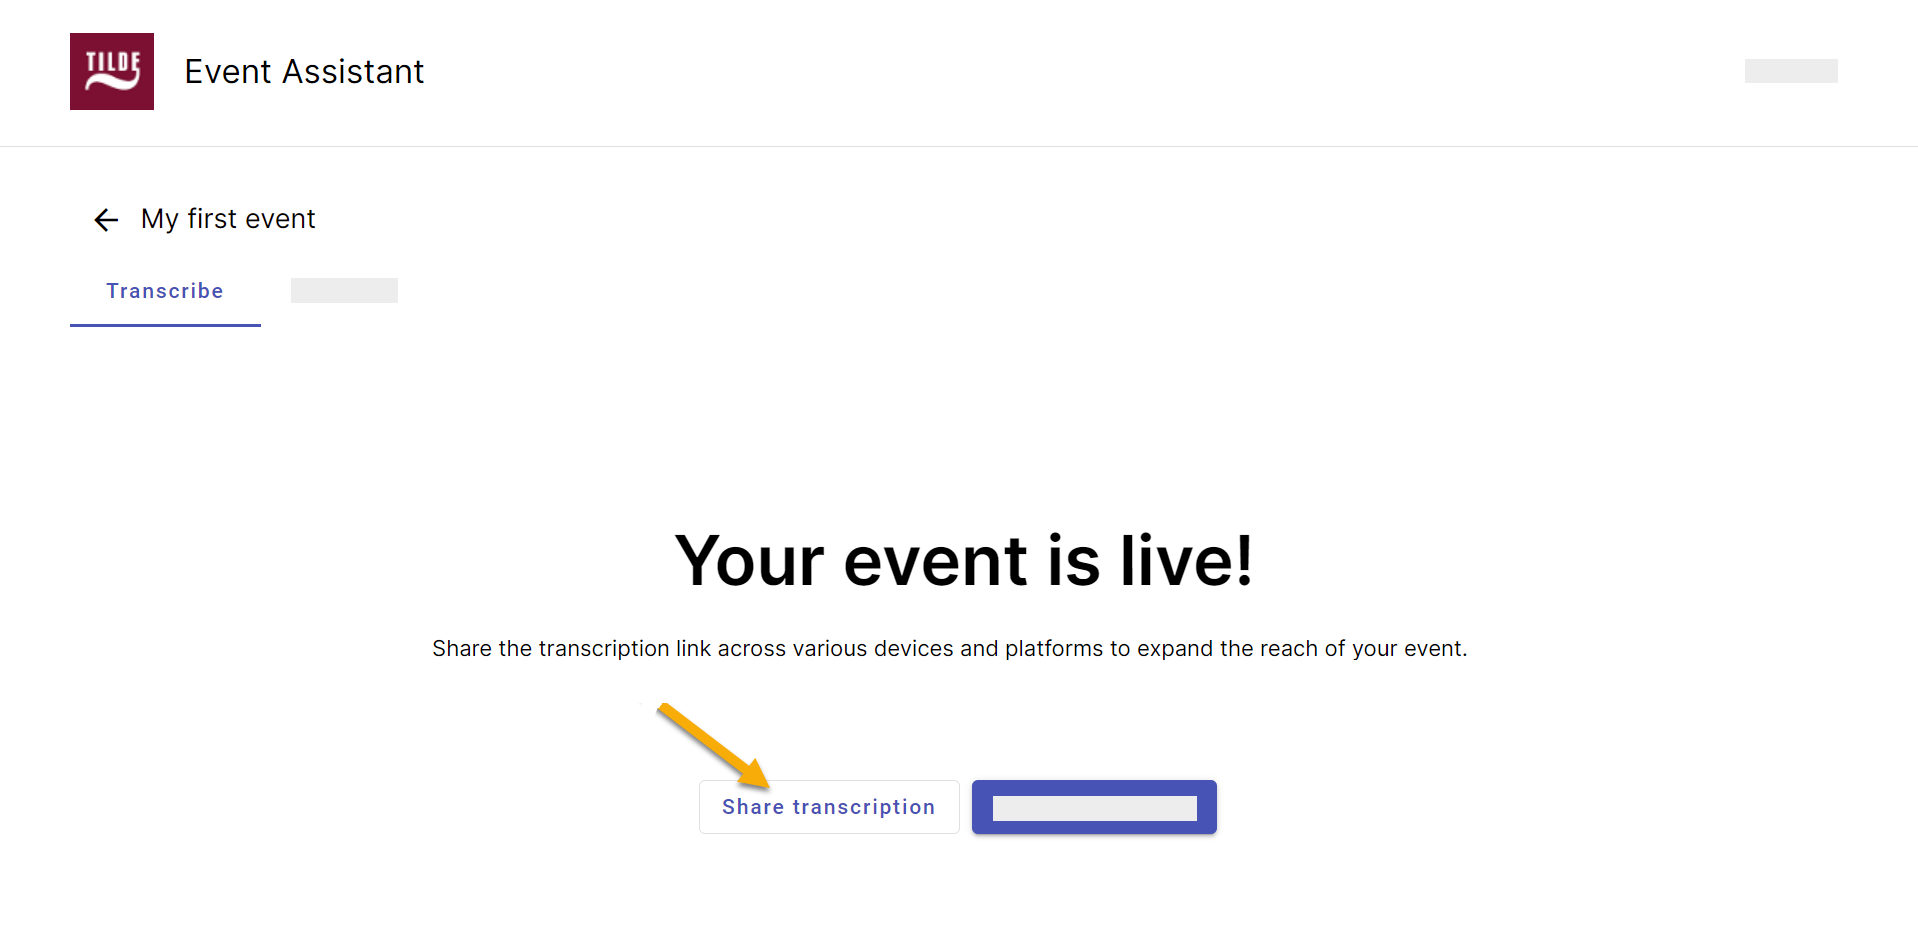
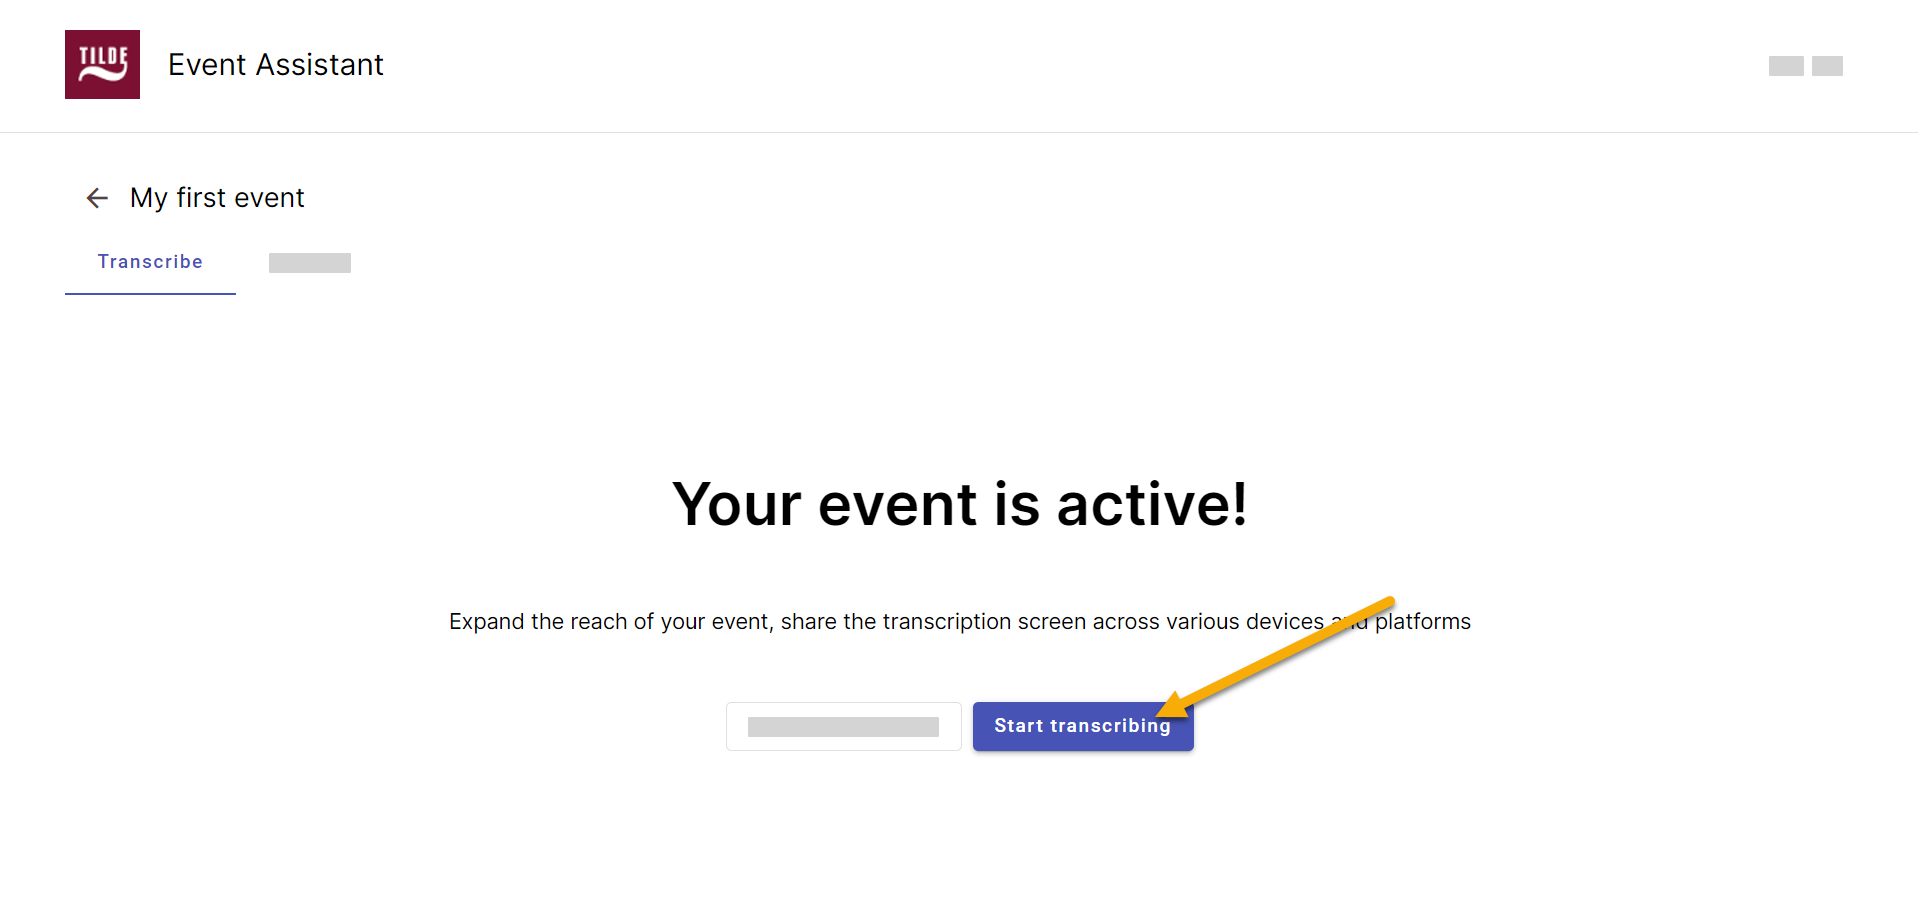
Figure 6. Launch the transcription.
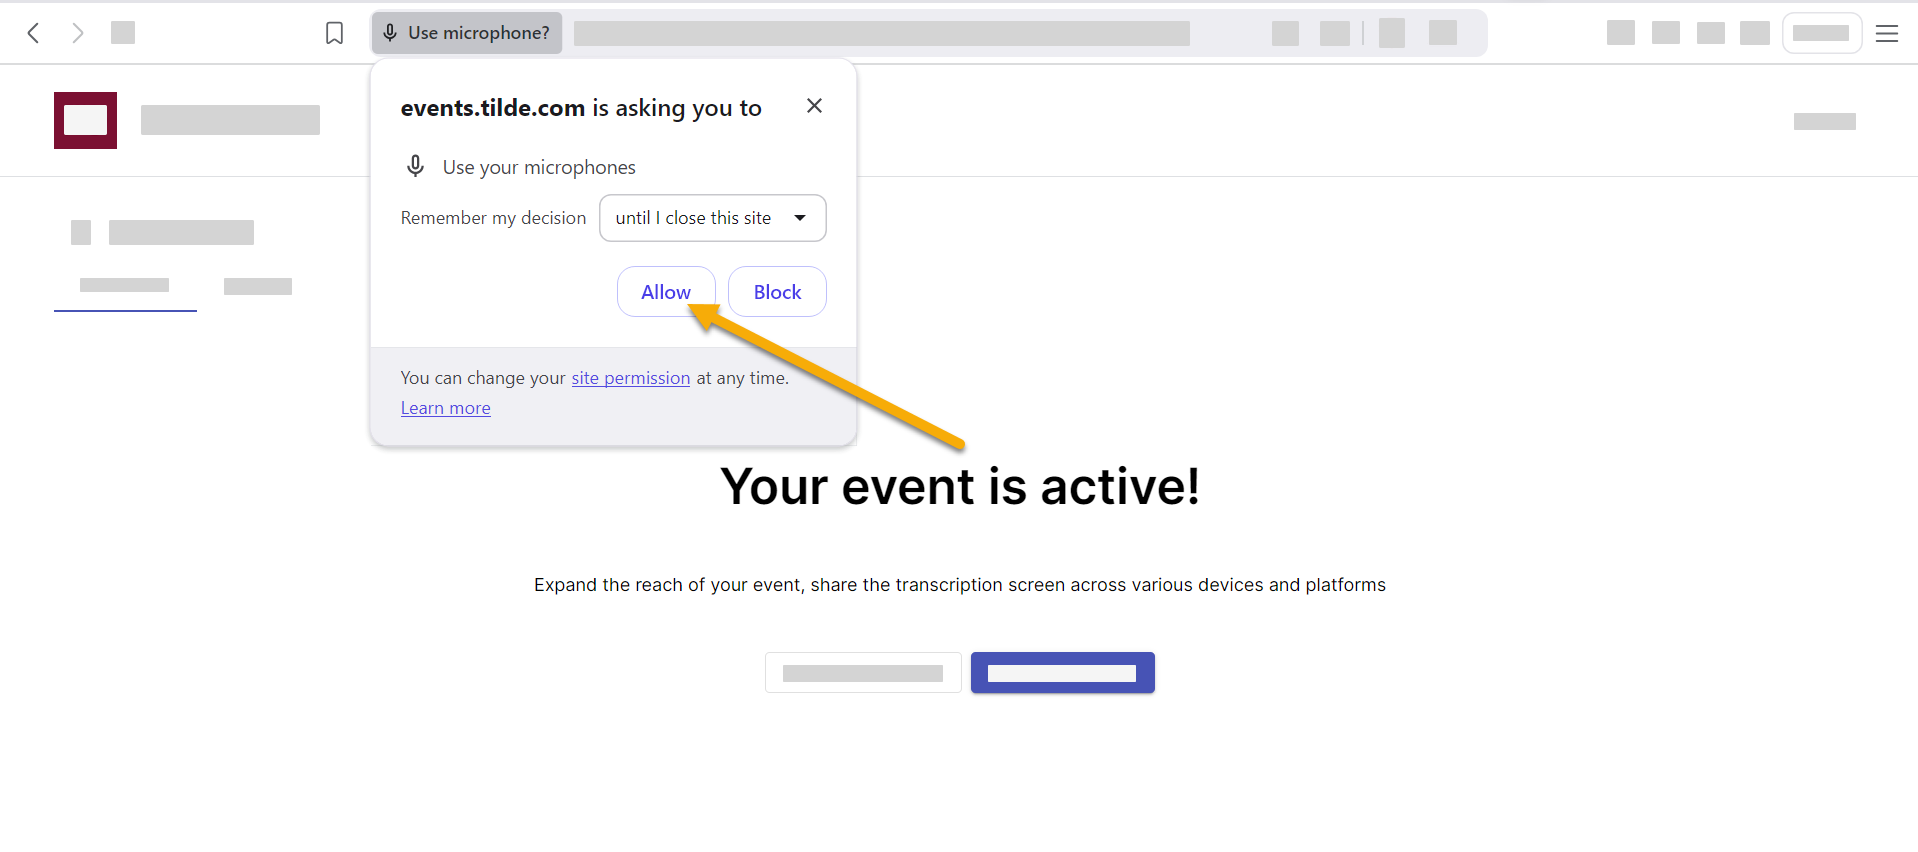
Figure 7. Allow your browser to use microphone.
Figure 8. Select the microphone you are going to use for the event and the language of the speaker.
Figure 9. Live transcription view on organizer's side.
At the bottom, you will find options to:
  1. Change transcription text size.
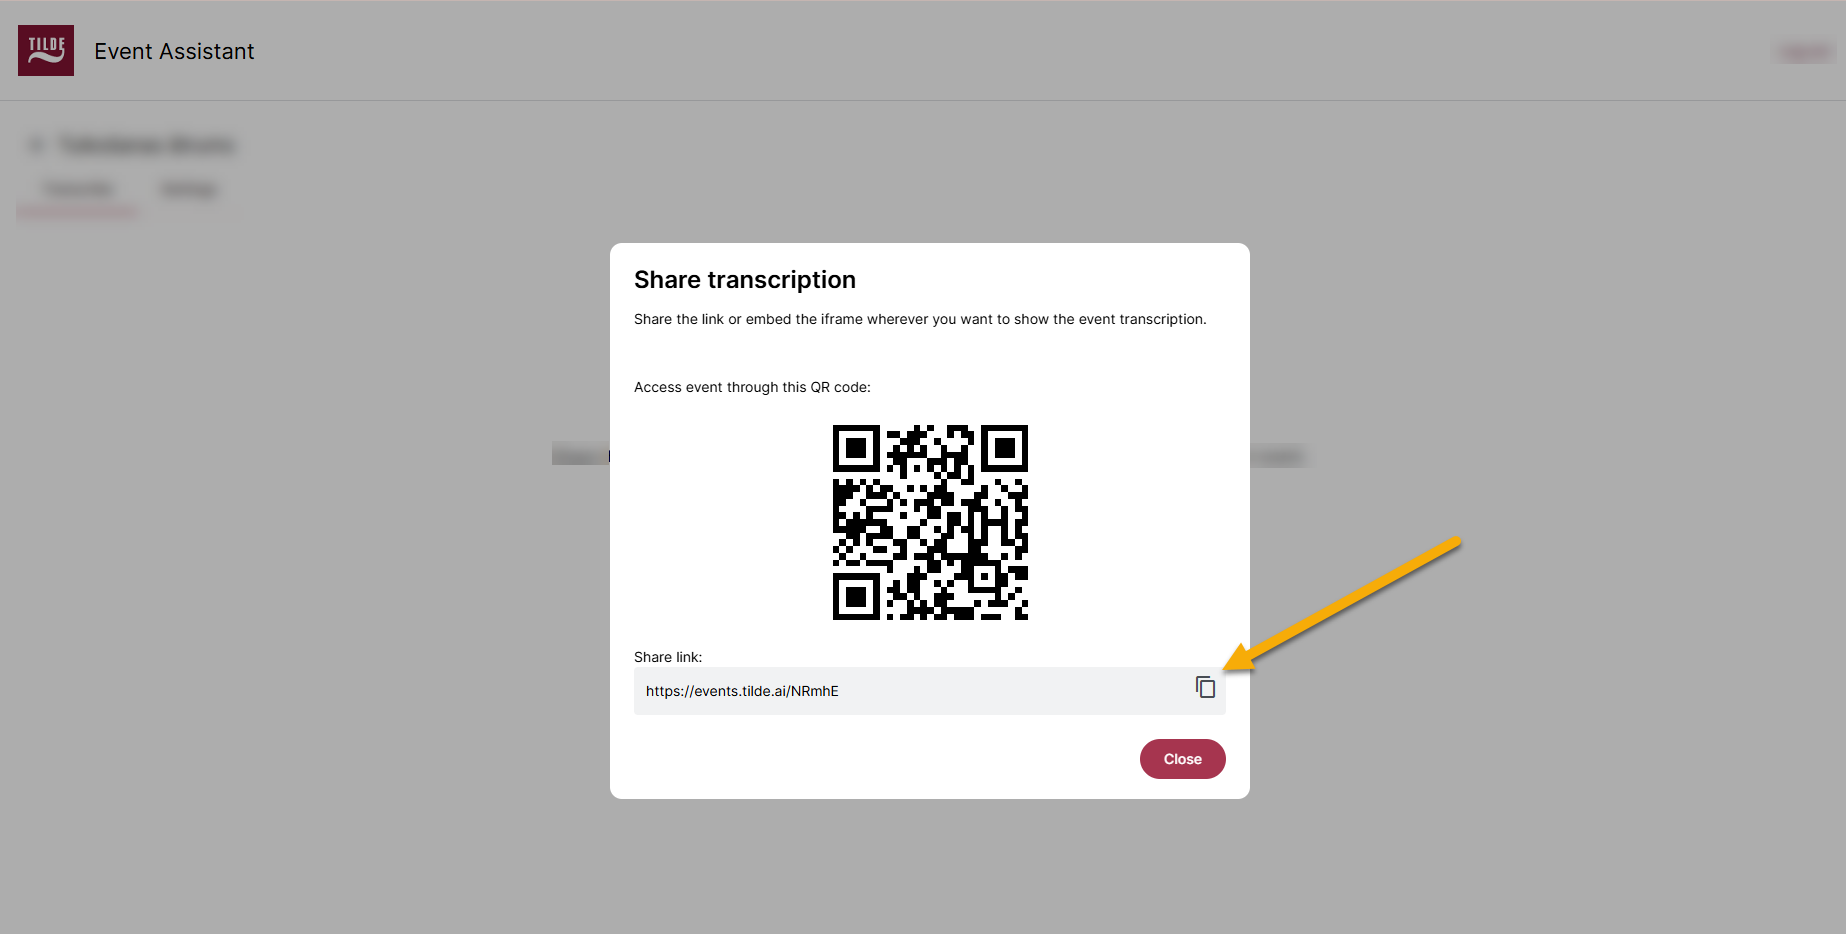
  2. Share a link and/or QR code to the event.
  3. Settings to enable/ disable dark mode or full screen.
  4. End the event.
  5. Pause the event.

Step 5: Experience the Event attendee view

To get a firsthand look at what your guests will see, check out the Event attendee view section. This will give you a clear understanding of the user interface and features they'll interact with.