Managing terms using the Term table
The Term table view is your primary interface within the Tilde Term platform for working with the terms in a specific collection.
You will learn:
- How to access Term Table
- How to search and filter terms
- How to add terms and details
- How to view, edit, and delete terms
- How to understand term states (approved/draft)
- How to use comments (discussion)
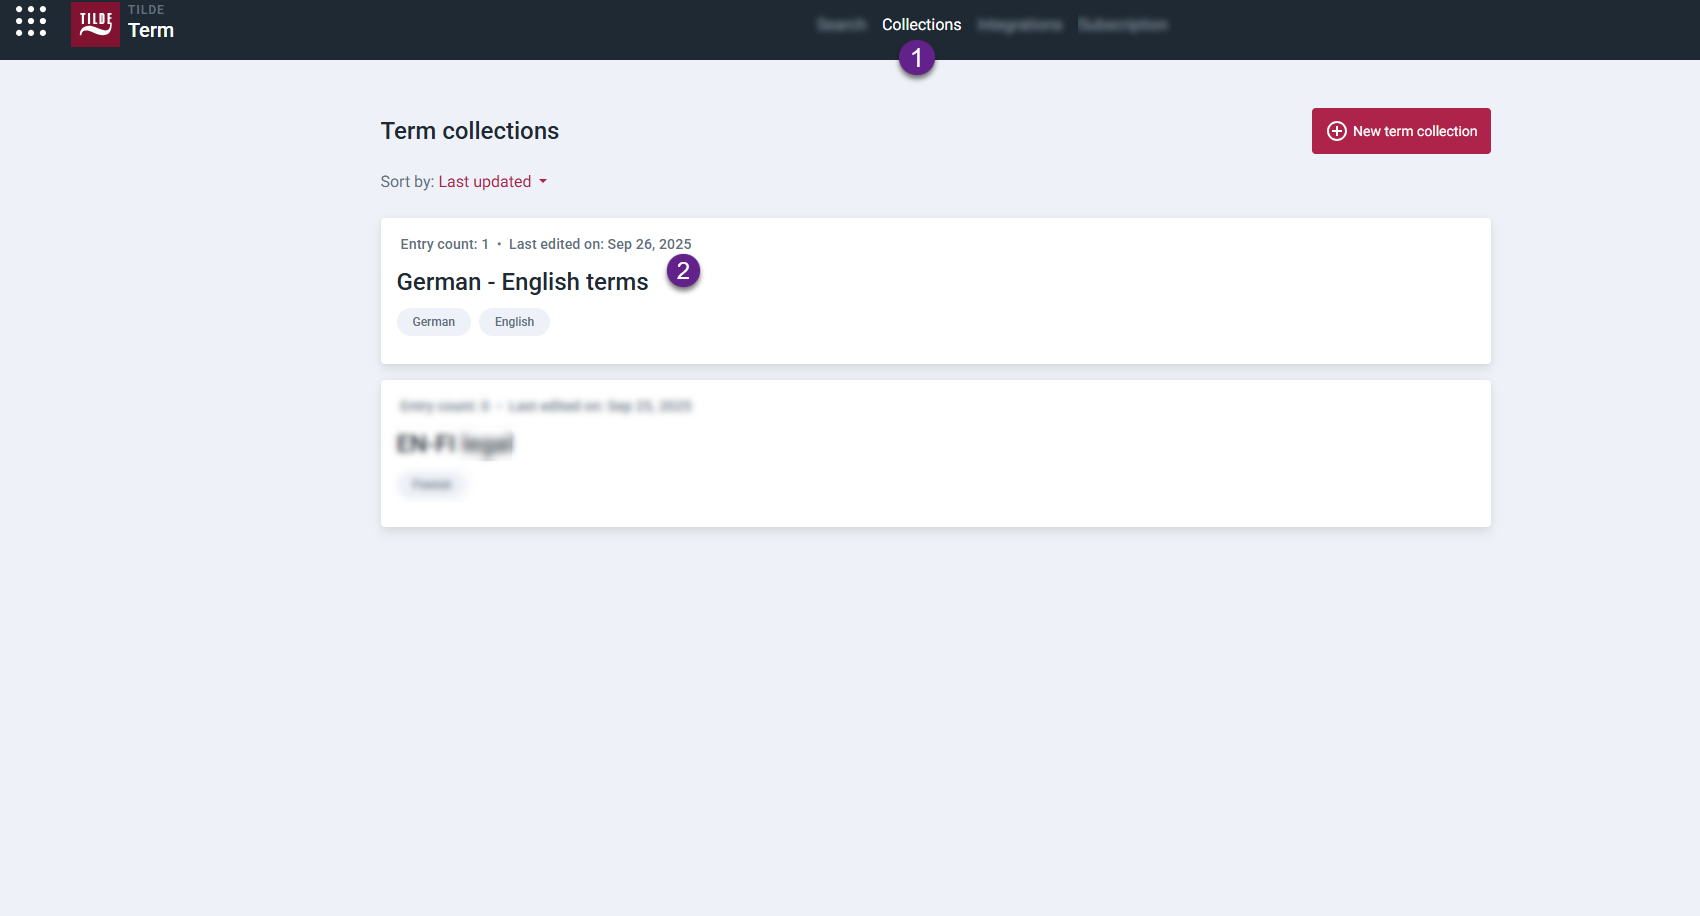
Accessing the Term table
- You can find all your collections in the Collections section.
- Click on the card to open the collection.
The Term Table view will be opened by default.
Layout and features
The Term Table allows you to:
- Search and filter for specific terms.
- Add new multilingual term entries with detailed information.
- View, edit, and manage existing terms.
Visual Cues in the Table:
- Term rows with Draft status have an orange background.
- A comment icon (💬) with a count appears at the end of rows containing discussion comments.
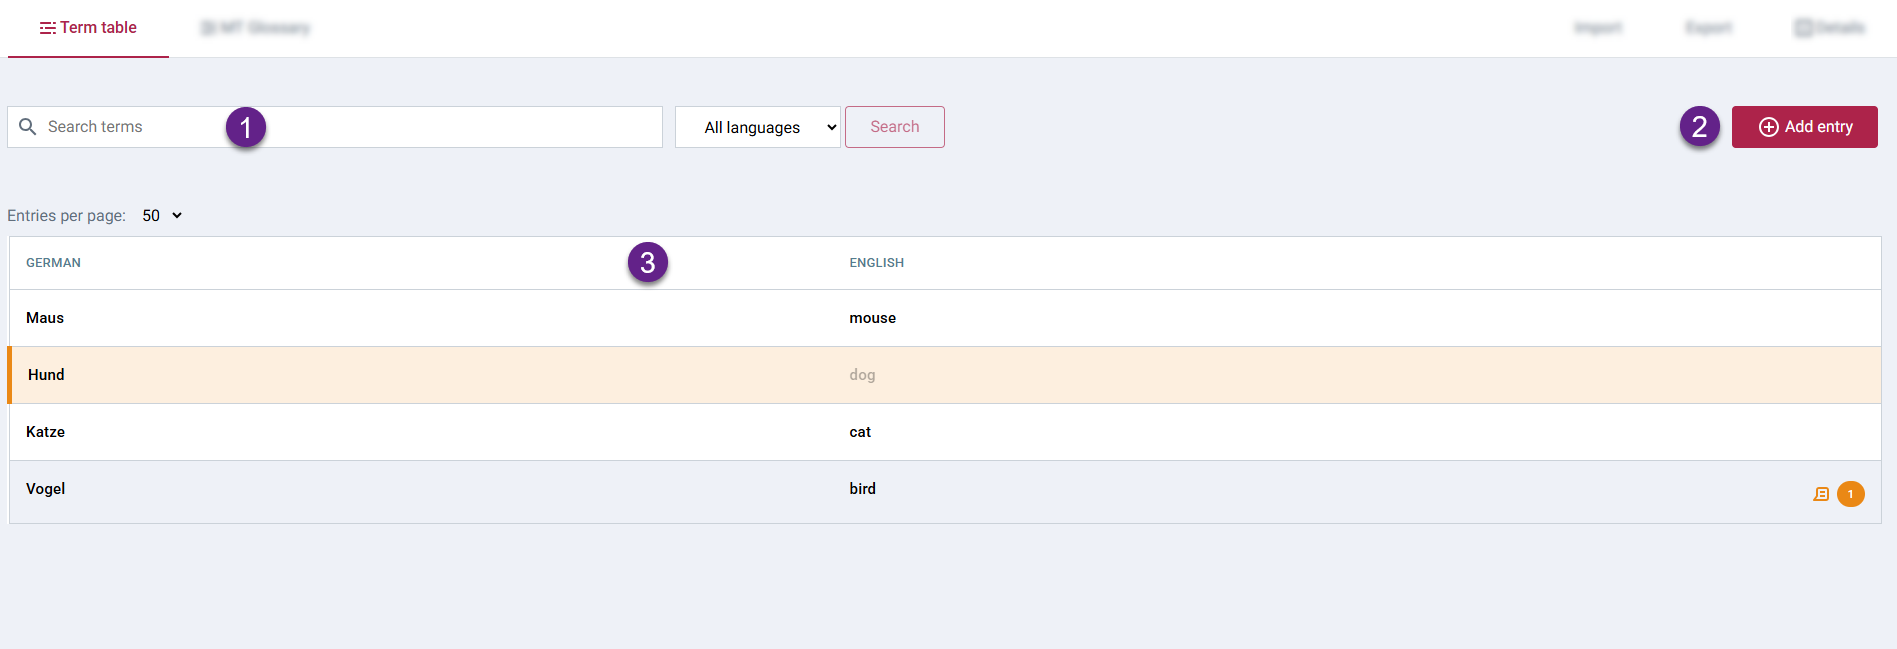
Searching and filtering terms
Quickly find specific terms within your collection using the search and filter options located above the term list (as shown in Figure 2).
- Search: Type keywords into the search bar to find matching text within the terms across all languages in the collection.
- Filtering: Use available dropdown to filter the table based on language.
Adding terms and details
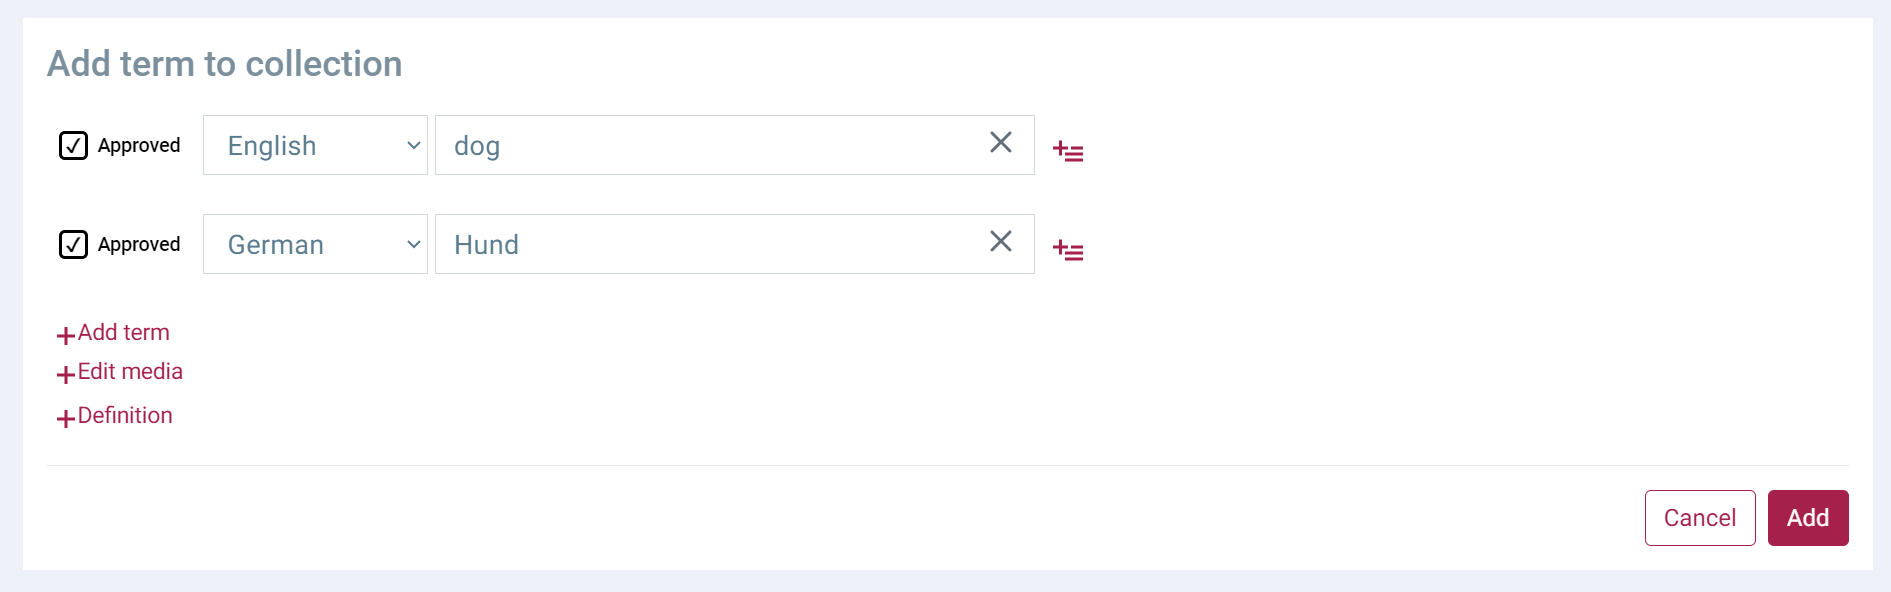
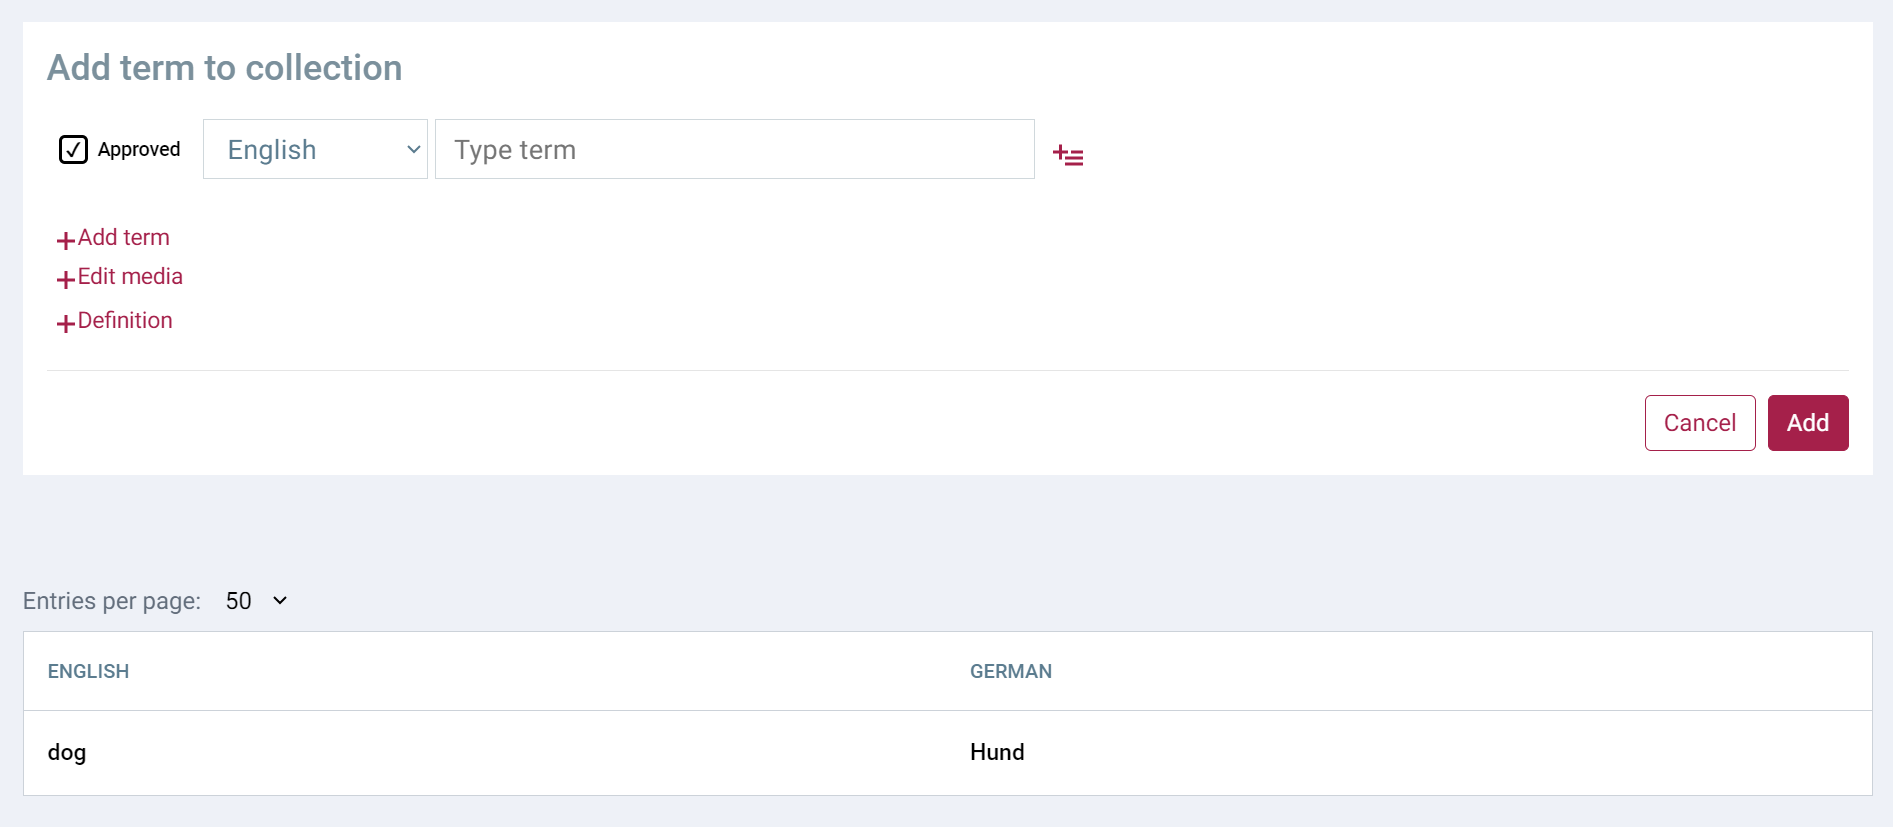
Adding a new term entry
- Click the Add entry button to open the new entry form.
- Select the Language for your first term and type the term.
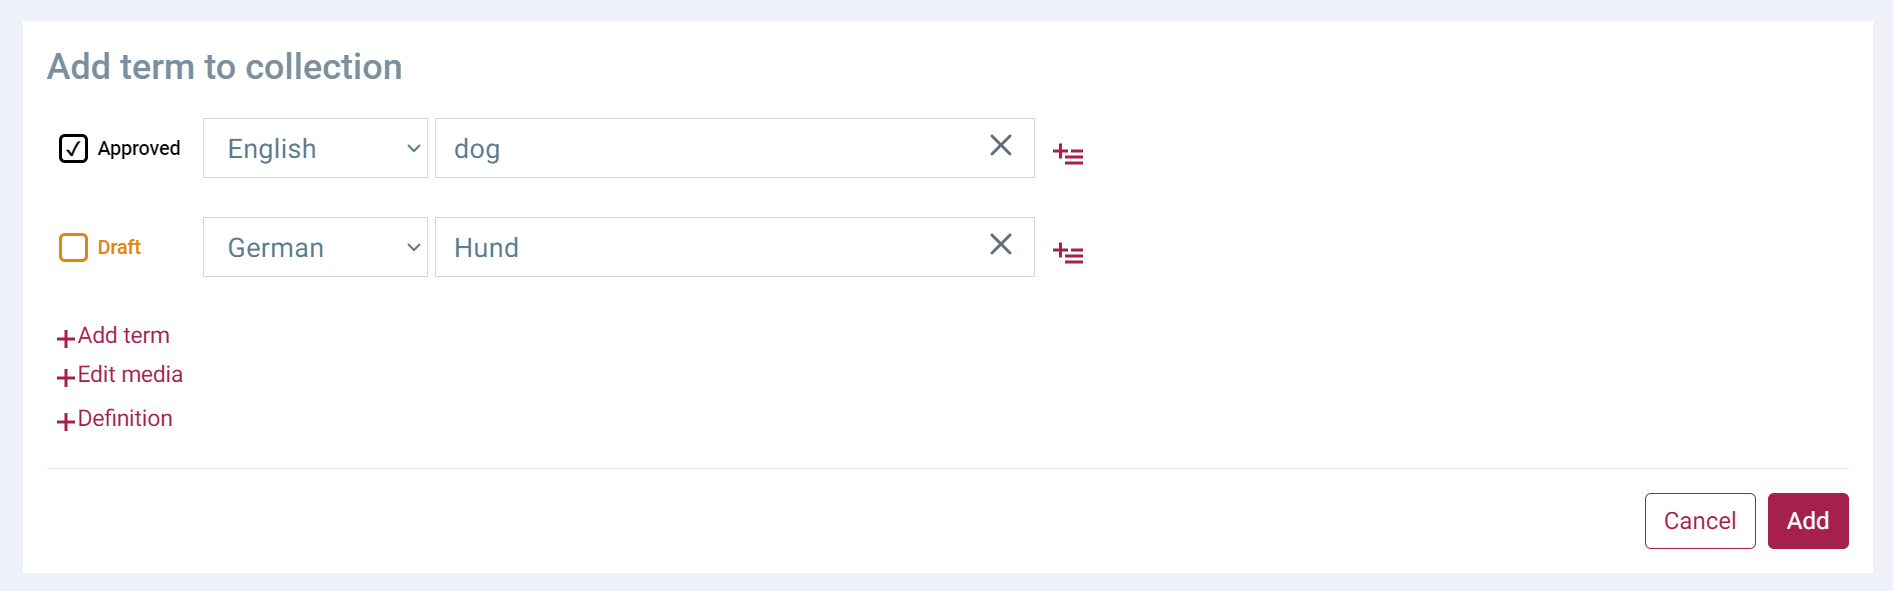
- (Optional) Set the initial Status for this term: Approved or Draft. (See 'Understanding term states' below).
- (Optional) Add synonyms or equivalent terms in other languages by clicking Add term. Repeat previous steps for each additional term.
- (Optional) Enhance the entry with details:
- Click the details icon to add specific metadata.
- Click Definition to add one or more definitions.
- Click Edit media to link images or videos (see below).
You can add various details to terms, including:
- Free text fields: Context example, Usage note, Source, Notes.
- Predefined values: Grammatical gender, Number, Part of speech, Term type, Administrative status, Approval status, Temporal qualifier, Register. (Availability may depend on configuration).

Adding media links to a term entry
Provide visual context by linking to publicly hosted images and videos. Direct media file uploads are not supported.
- While creating or editing a term entry, click Edit media.
- For images: Enter an Image title and paste the URL (web link) of the image.
- For videos: Enter a Video title and paste the URL (web link) of the video (e.g., from YouTube, Vimeo).
- Click Save (if editing an existing entry).
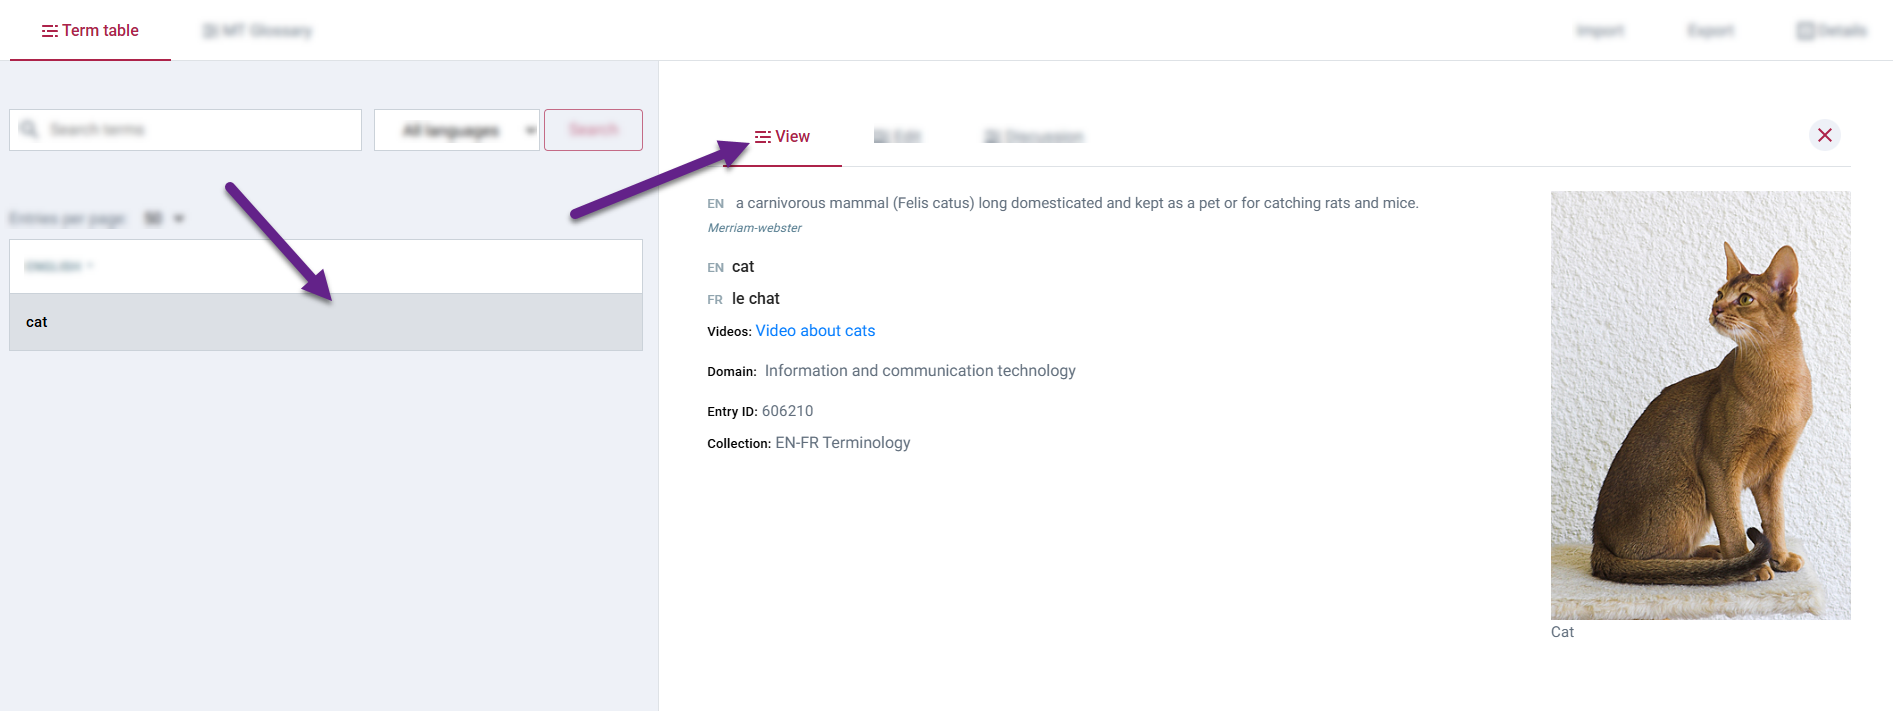
Viewing, editing, and deleting terms
Most actions on existing terms involve opening a detailed side panel.
Opening the Details Panel:
- In the Term table view: Click anywhere on the row of the term entry.
- In the MT Glossary view: Click the More button at the end of the row. (Note: The MT Glossary view typically only shows 'Approved' terms intended for machine translation tools).
Viewing term entry details
- Open the details panel as described above.
- Ensure the View tab is selected (usually default). All saved information for the entry will be displayed.
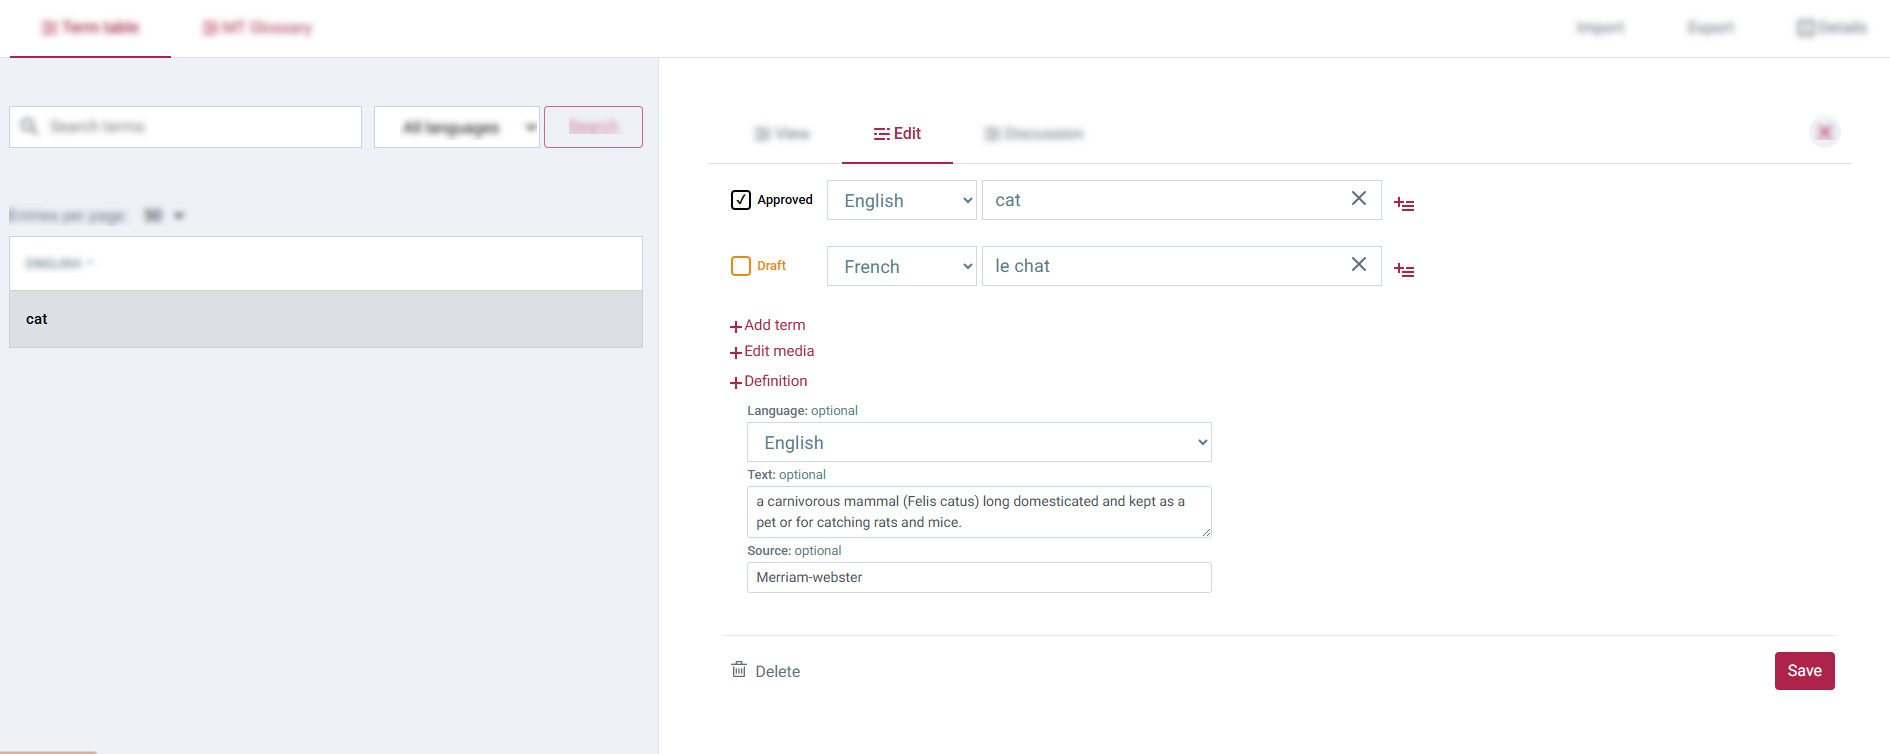
Edit an existing term entry
To edit a term entry:
- Open Term table or MT Glossary view.
- Click on a term row (for MT Glossary, click More at the end of the row).
- In the side panel, click Edit.
- Add new terms, change languages, or edit term details.
- Click Save.
Delete a term entry
To delete a term entry:
- Open Term table or MT Glossary view.
- Click on a term row (for MT Glossary click More at the end of the row).
- In the side panel, click Edit.
- On the bottom, click Delete.
Delete a single term from an entry
To delete a term from a term entry:
- Open Term table or MT Glossary view.
- Click on a term row (for MT Glossary click More at the end of the row).
- In the side panel, click Edit.
- Find the term you want to delete.
- Click X to remove.
- Click Save.
Understanding term states (approved/draft)
Each term within an entry has a status:
- Approved: Considered finalized and ready for use. Approved terms appear in the MT Glossary view and can potentially be used by integrated tools like machine translation.
- Draft: Considered preliminary, under review, or incomplete. Draft terms appear in the main Term table (highlighted with an orange background) but are excluded from the MT Glossary view.
You set the initial state when adding a term. To change the state later:
- Open the details panel for the entry and go to Edit tab.
- Find the specific term whose state you want to change.
- Modify its status using by clicking the checkbox in front of the term.
- Click Save.
To change the state of an existing term:
- Open the Term table or the MT Glossary view.
- Click on a term row (for the MT Glossary click More at the end of the row).
- In the side panel, click Edit.
- Find the term and change the state by clicking the checkbox in front of it.
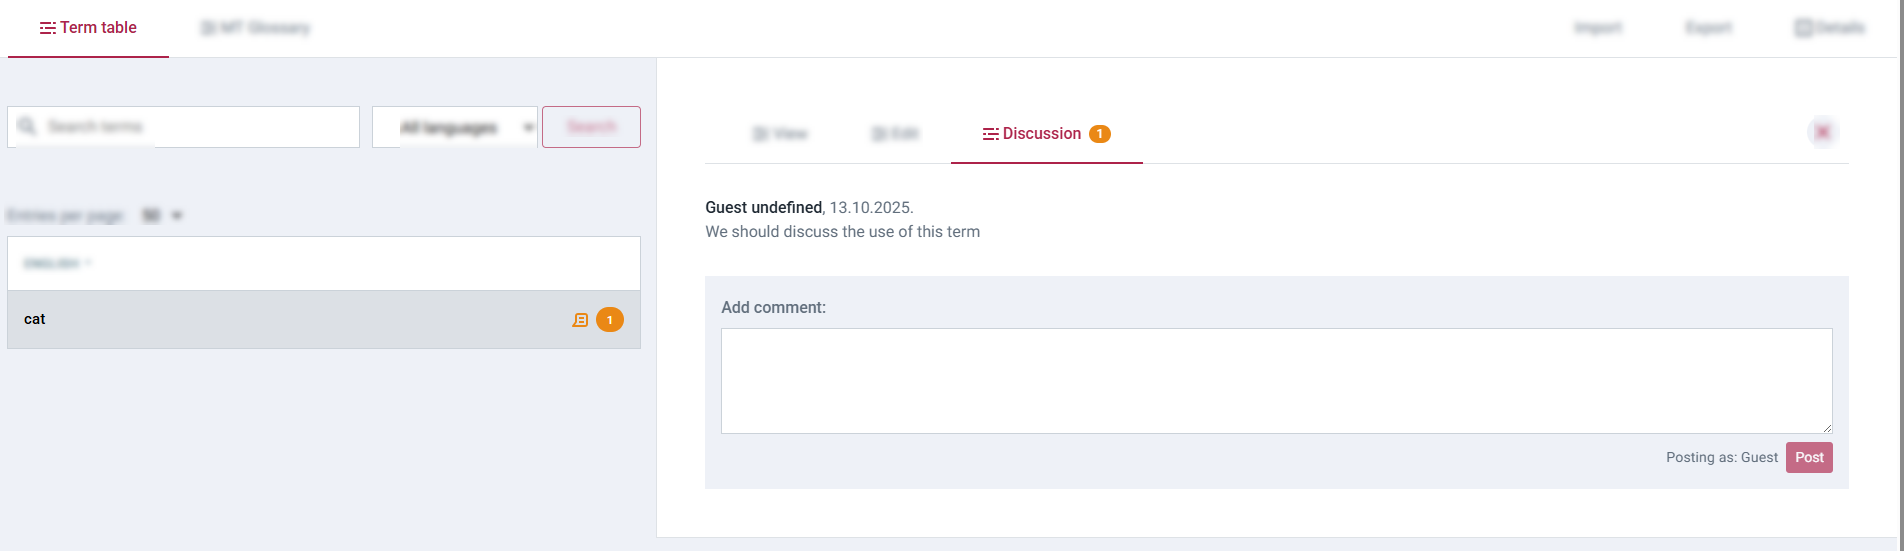
Comments (Discussion)
To add a comment:
- Open Term table or MT Glossary view.
- Click on a term row (for the MT Glossary click More at the end of the row).
- In the side panel, click Discussion.
- Type your comment and click Post. The term row will be marked with a comment icon and a comment counter.