Create collection and add terms
You will learn how to:
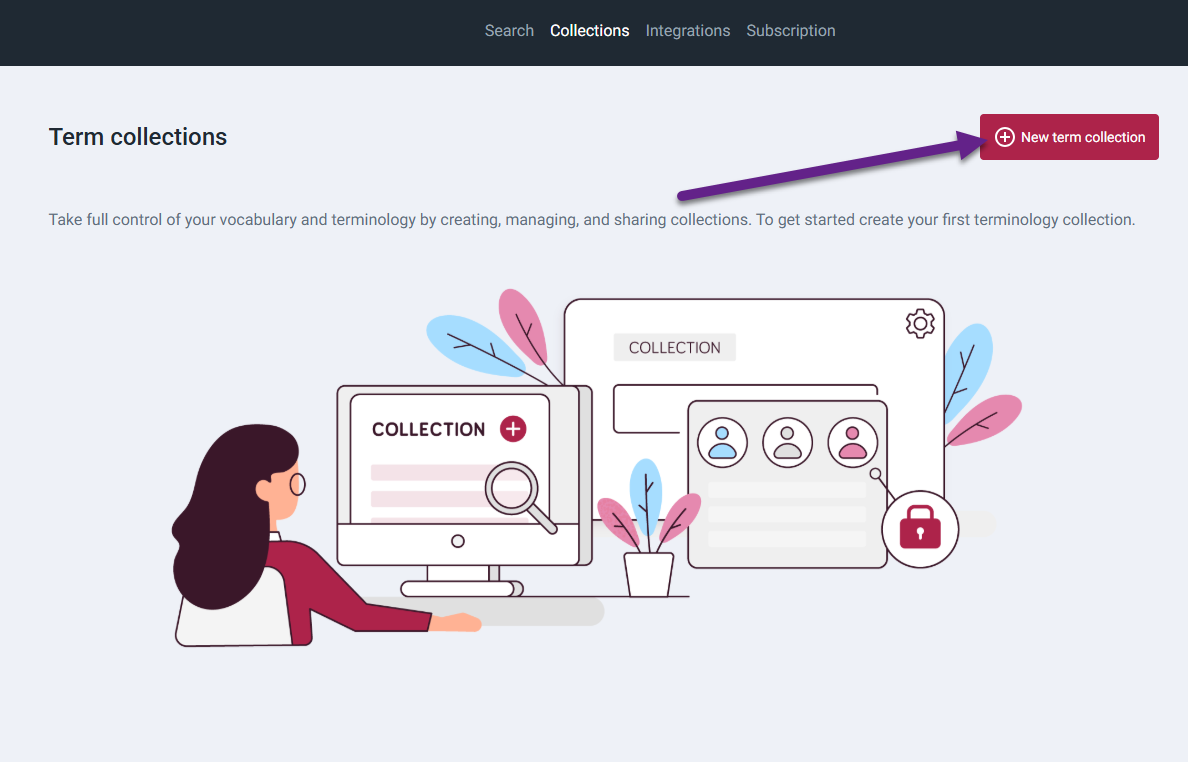
Step 1: Creating a new collection
To create a new collection:
- On Tilde Term, open collection list and click New term collection.
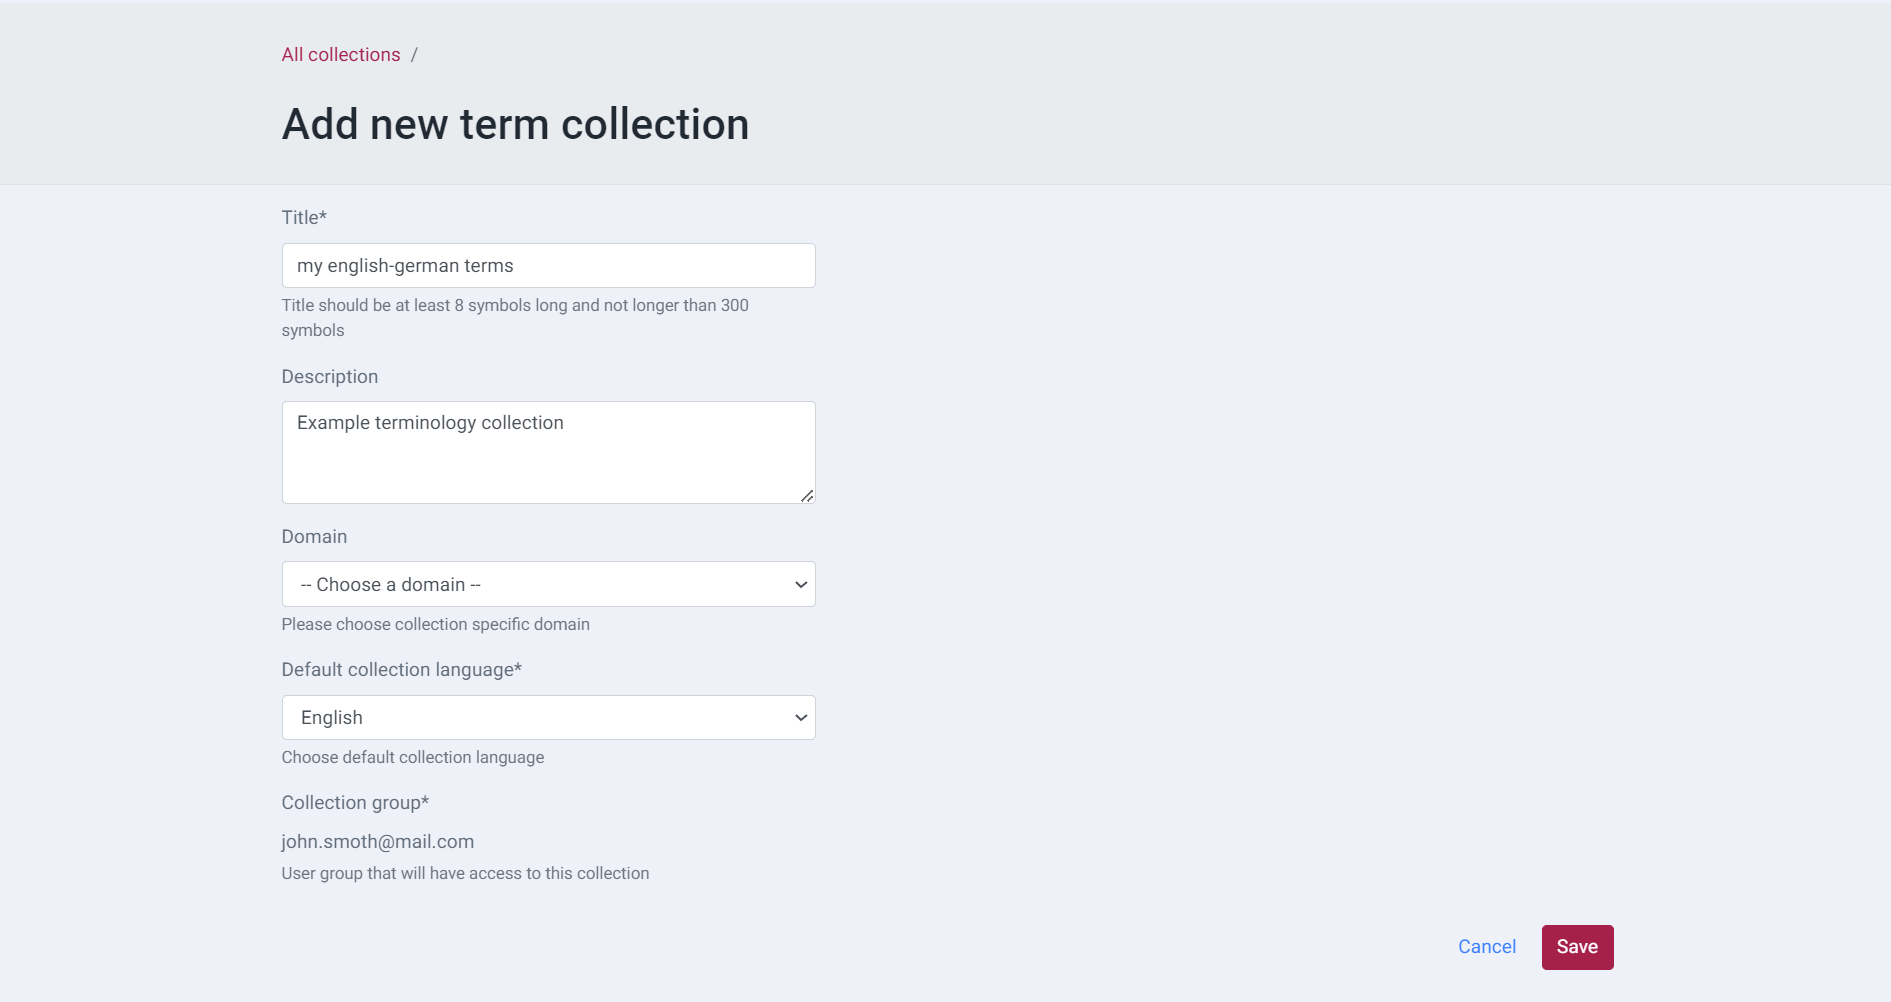
- Fill the required collection info (title, domain etc) and click Save.
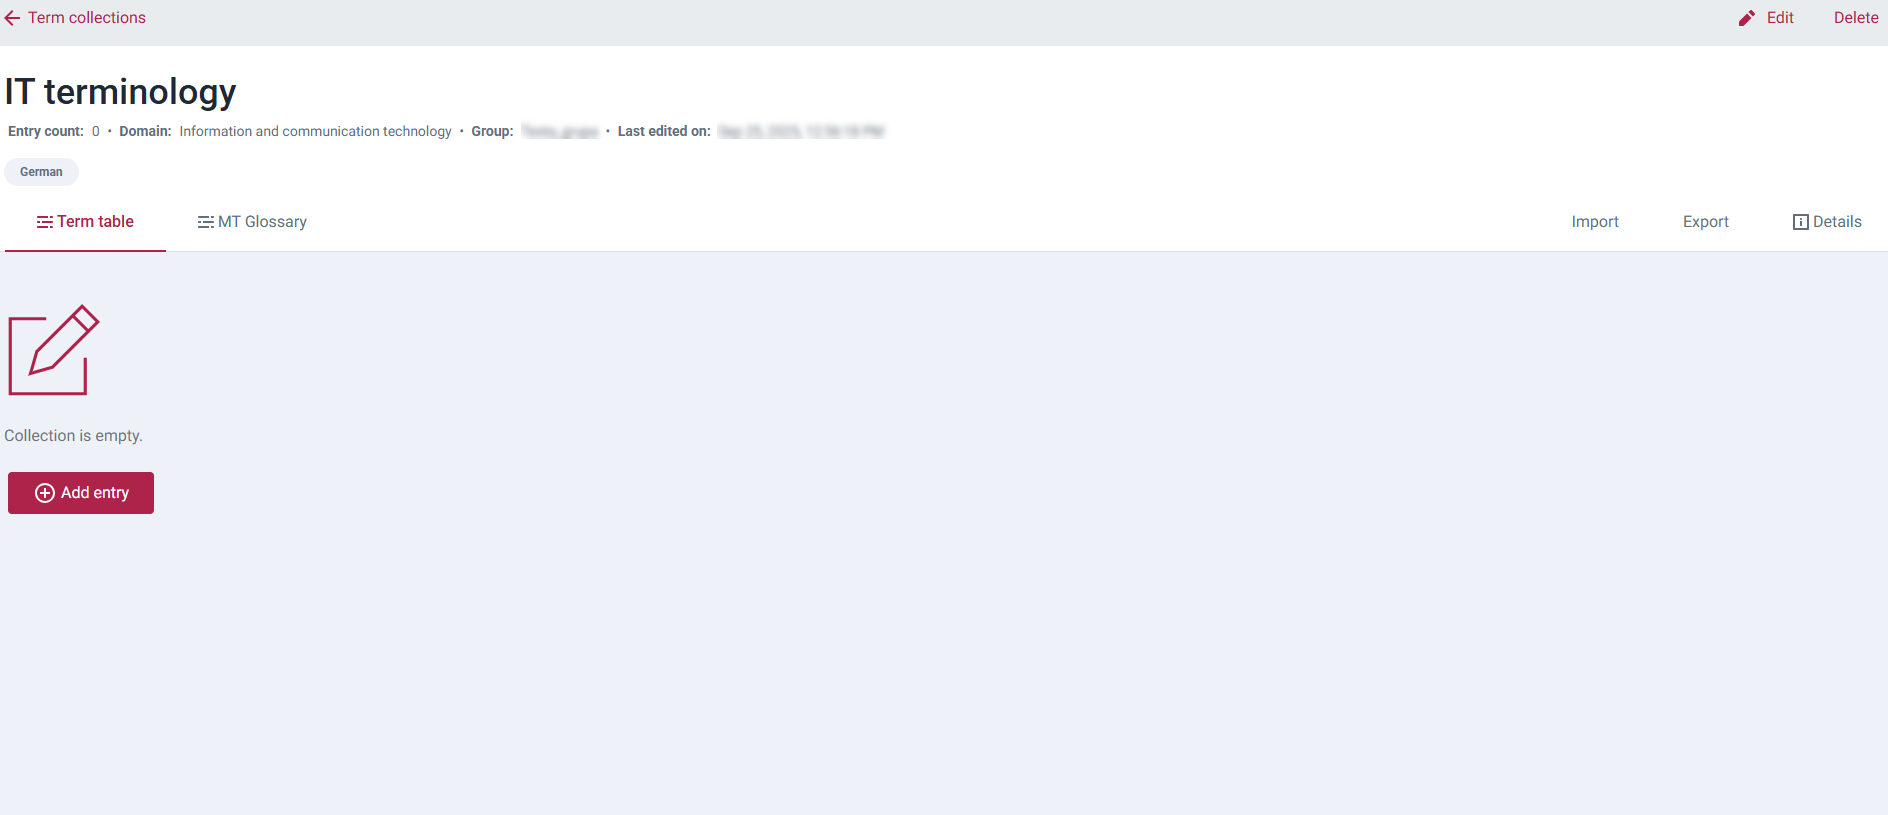
- Your new collection will be opened.
Step 2: Adding terms
Once your collection is created, you can add terminology using one of the following methods:
- Importing: Upload terms from an existing file (.xlsx, .csv, .tsv, .tbx). Ideal for large amounts of existing data.
- Manual Entry: Add terms one by one directly in the Tilde Term platform interface. Suitable for starting from scratch or adding a few terms.
Method A: Importing collection data
Easily import your existing terminology data into the platform. Your import file must contain source and target terms. You can also include additional information (metadata).
We support importing collections from the following file formats:
.xlsx(Microsoft Excel).tbx(TermBase eXchange).csv(Comma-separated values).tsv(Tab-separated values)
Want to see exactly how your file should be structured, especially with all possible metadata fields?
- Create a sample collection.
- Add a few sample terms and any relevant metadata.
- Export the collection. The downloaded file serves as a perfect template for importing your own data.
- Import Excel file
- Import CSV or TSV file
- Import TBX file
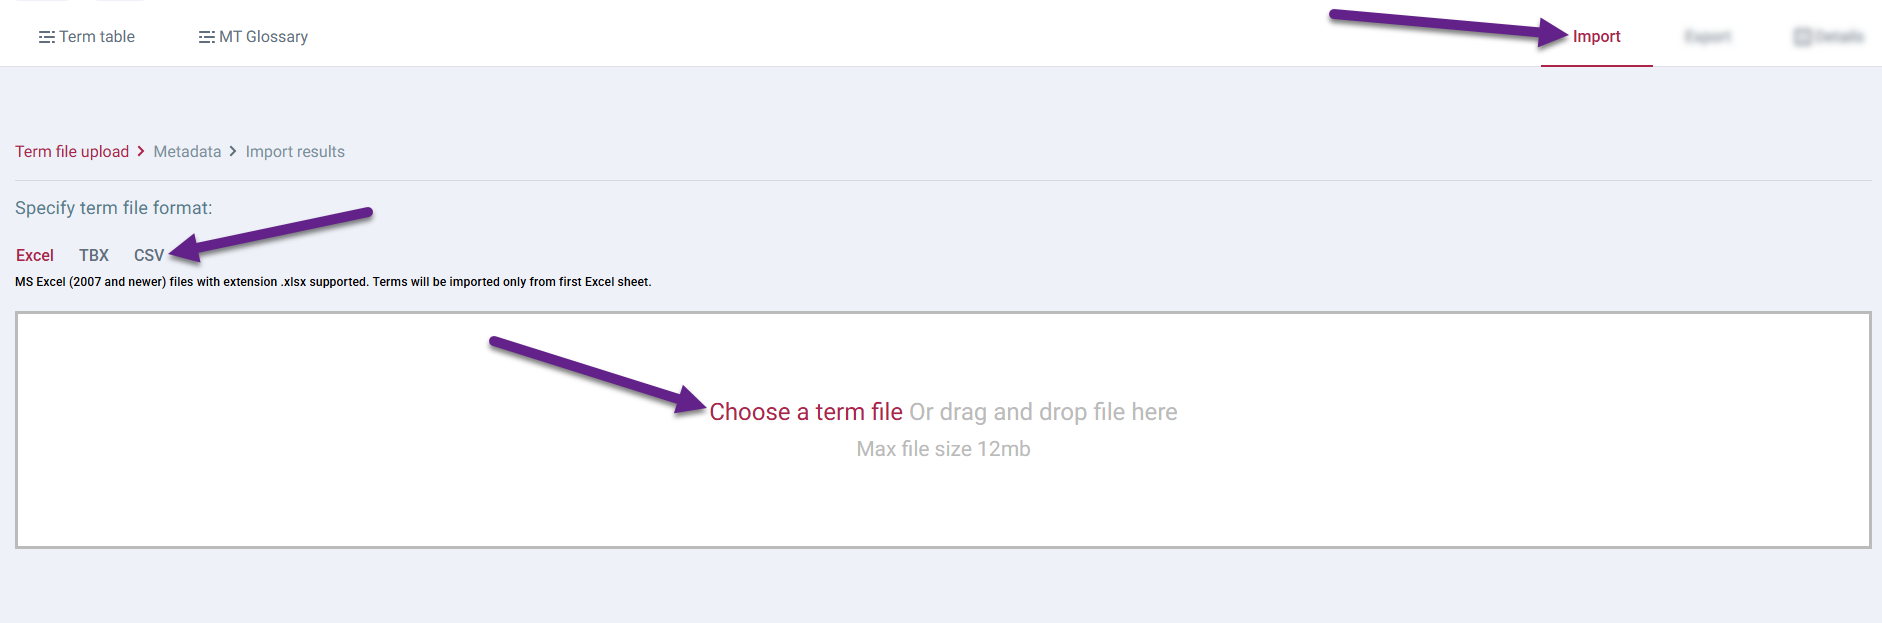
Follow these steps to import from an .xlsx file:
- In the single collection view, open the Import tab.
- Select the Excel file format.
- Upload the file.
- Select if the file has a header.
- Select if existing terms should be deleted.
- Select which columns should be imported, their languages and categories.
- Click Continue import.
- Close the import results.
Follow these steps to import from a .csv or .tsv file:
- In the single collection view, open the Import tab.
- Select the CSV file format.
- Upload the file.
- Select the column divider (“,”, “;”, “/t” or other).
- Click Continue import.
- Select if the file has a header.
- Select if existing terms should be deleted.
- Select which columns should be imported, their languages and categories.
- Click Continue import.
- Close the import results.
"ID","Term-en","Definition-en","Term-lv","Definition-lv","ImageUrl","ImageLabel","VideoUrl","VideoLabel"
"4791","CAT tool","Computer-assisted translation, abbreviated as CAT tool, is translation software which can help translators translate faster and improve translation quality.","CAT rīks","Datorizētā tulkošana, saīsināti kā CAT rīks, ir tulkošanas programmatūra, kas var palīdzēt tulkotājiem tulkot ātrāk un uzlabot tulkojuma kvalitāti.","","","",""
Follow these steps to import from a .tbx file:
- In the single collection view, open the Import tab.
- Select the TBX file format.
- Select if existing terms should be deleted.
- Upload the file.
- Close the import results. The .tbx files must follow the expected XML schema (see the example below).
TBX files exported from MultiTerm termbase or other software must be edited to match the expected schema otherwise the import will fail.
<?xml version="1.0" encoding="utf-8"?>
<!DOCTYPE martif SYSTEM "https://eurotermbank.com/TBXcoreStructV02%20%281%29.dtd">
<martif type="TBX" xml:lang="en">
  <martifHeader>
    <fileDesc>
      <sourceDesc>
        <p>Example collection</p>
      </sourceDesc>
    </fileDesc>
    <encodingDesc>
      <p type="XCSURI">https://eurotermbank.com/tbx-0.5.1.xcs</p>
    </encodingDesc>
  </martifHeader>
  <text>
    <body><termEntry id="tgl-4791">
  <langSet xml:lang="en">
    <ntig>
      <termGrp>
        <term>CAT tool</term>
      </termGrp>
      <admin type="status">approved</admin>
    </ntig>
    <descripGrp>
      <descrip type="definition">Computer-assisted translation, abbreviated as CAT tool, is translation software which can help translators translate faster and improve translation quality.</descrip>
    </descripGrp>
  </langSet>
  <langSet xml:lang="lv">
    <ntig>
      <termGrp>
        <term>CAT rīks</term>
      </termGrp>
      <admin type="status">approved</admin>
    </ntig>
    <descripGrp>
      <descrip type="definition">Datorizētā tulkošana, saīsināti kā CAT rīks, ir tulkošanas programmatūra, kas var palīdzēt tulkotājiem tulkot ātrāk un uzlabot tulkojuma kvalitāti.</descrip>
    </descripGrp>
  </langSet>
  <xref type="xGraphic" target="https://www.example.com/image.png">Attēla nosaukums</xref>
  <xref type="xVideo" target="https://www.example.com/video">Video nosaukums</xref>
  <descrip type="subjectField">Information and communication technology</descrip>
</termEntry></body>
  </text>
</martif>
Method B: Adding terms manually
You can add terms directly using the interface from the main Term Table view of your collection.
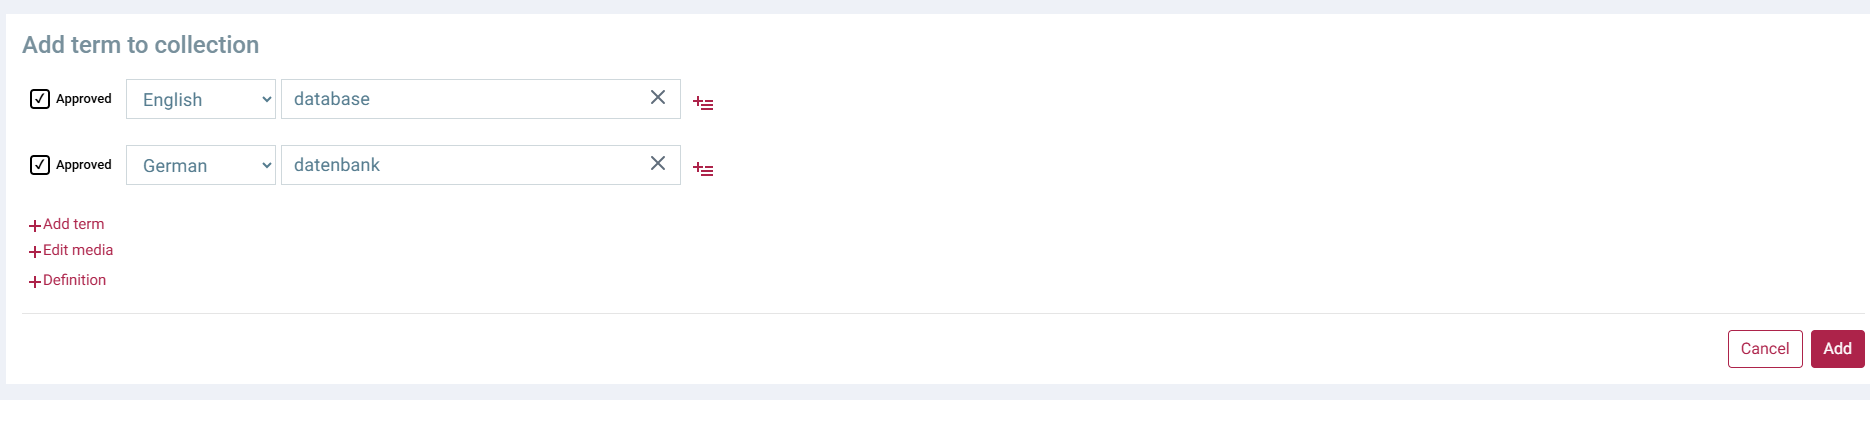
To add a new term entry manually:
- Click the Add entry button. The entry form will appear above the table.
- Enter the essential term details in the form:
- Select the language.
- Add the term.
- Choose the term status (Approved or Draft).
- (Optional) Click Add term to add a synonym or term in another language.
- (Optional) Click Edit media to add image and video information.
- (Optional) Click Definition to add term definition.
You can add the following metadata to term entries:
- context example,
- usage note,
- source,
- notes,
- grammatical gender,
- grammatical number,
- grammatical part of speech,
- term type,
- administrative status,
- approval status,
- temporal qualifier,
- register
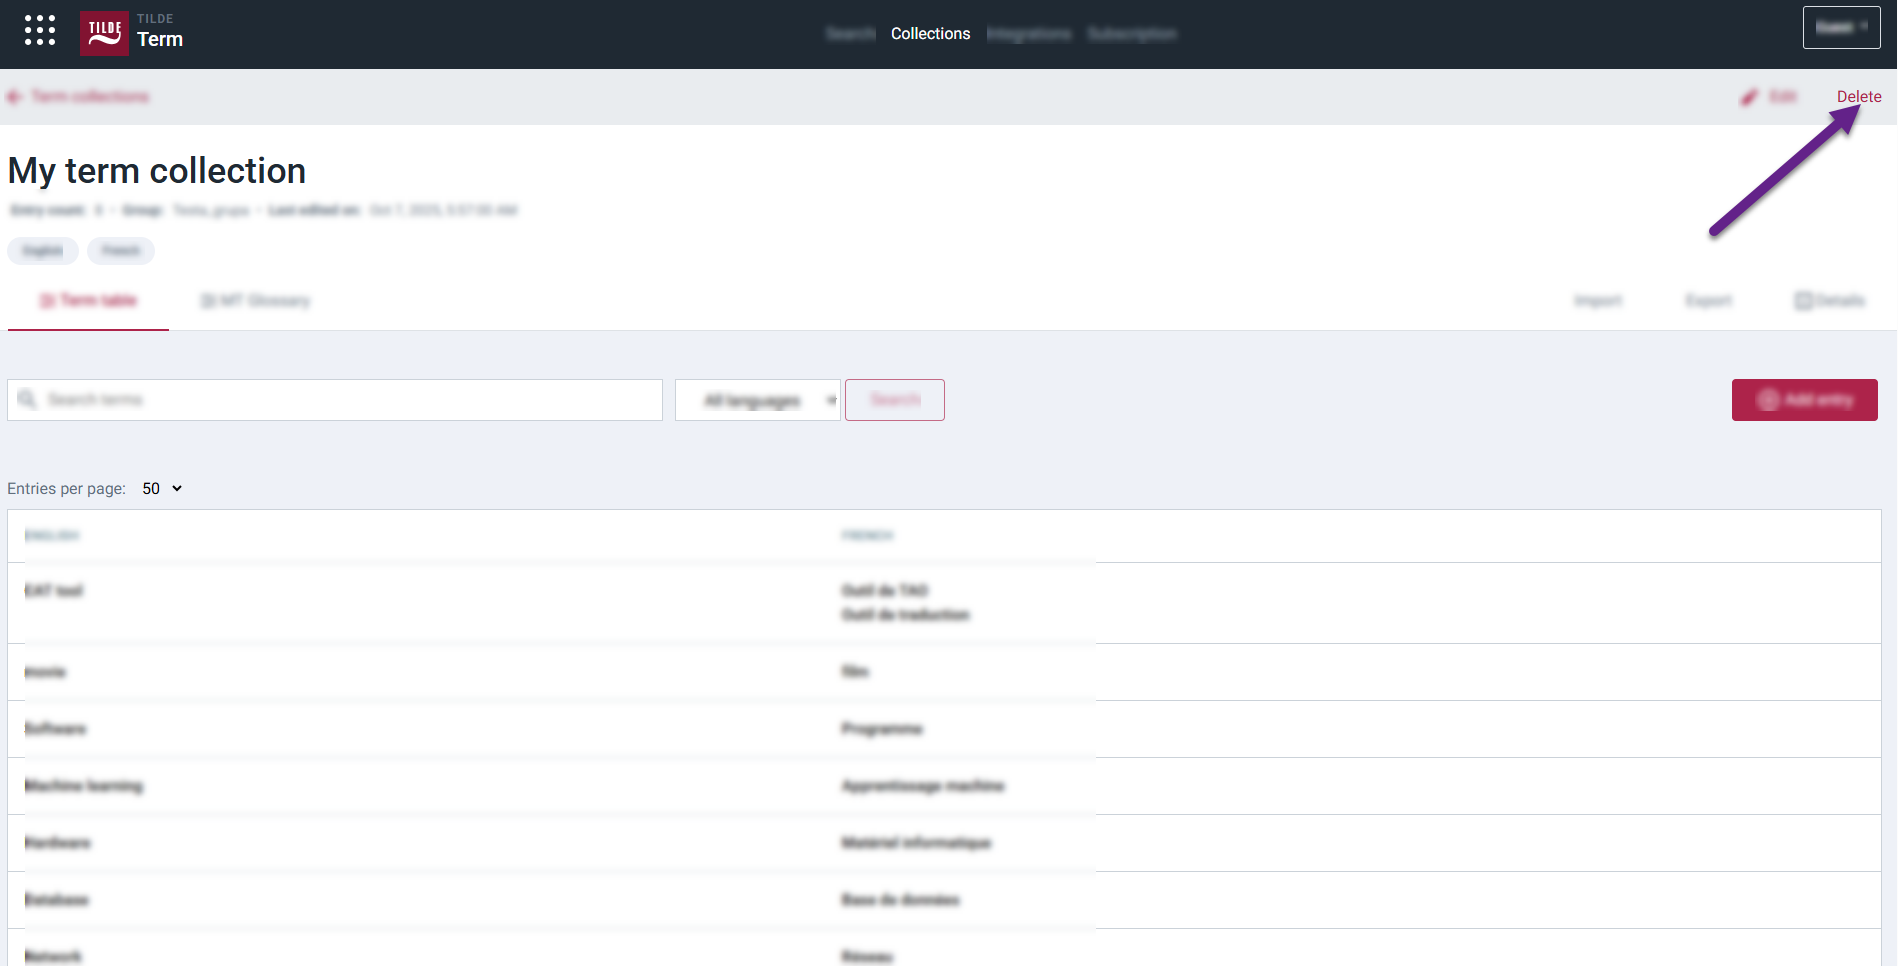
How to delete collection
To delete collection:
- Open the collection you want to delete.
- On the top right corner, click Delete.
- Confirm deleting.