Anonymise documents
While the platform's automatic anonymisation and pseudonymisation processes are highly advanced, it cannot guarantee 100% accuracy in all cases due to the complexity and variability of natural language.
Automatic anonymisation may occasionally:
- Miss some sensitive information.
- Identify or categorise information incorrectly.
- Over-mask non-sensitive data.
For this reason, it is highly recommended to review and adjust the results using the online editor to ensure completeness and correctness.
By reviewing the results, you can:
- Identify and mask any missed sensitive data.
- Correct errors in the masking or categorisation process.
- Customise the masking method to meet specific compliance or organizational needs.
Learn more about Tilde Anonymise in FAQ
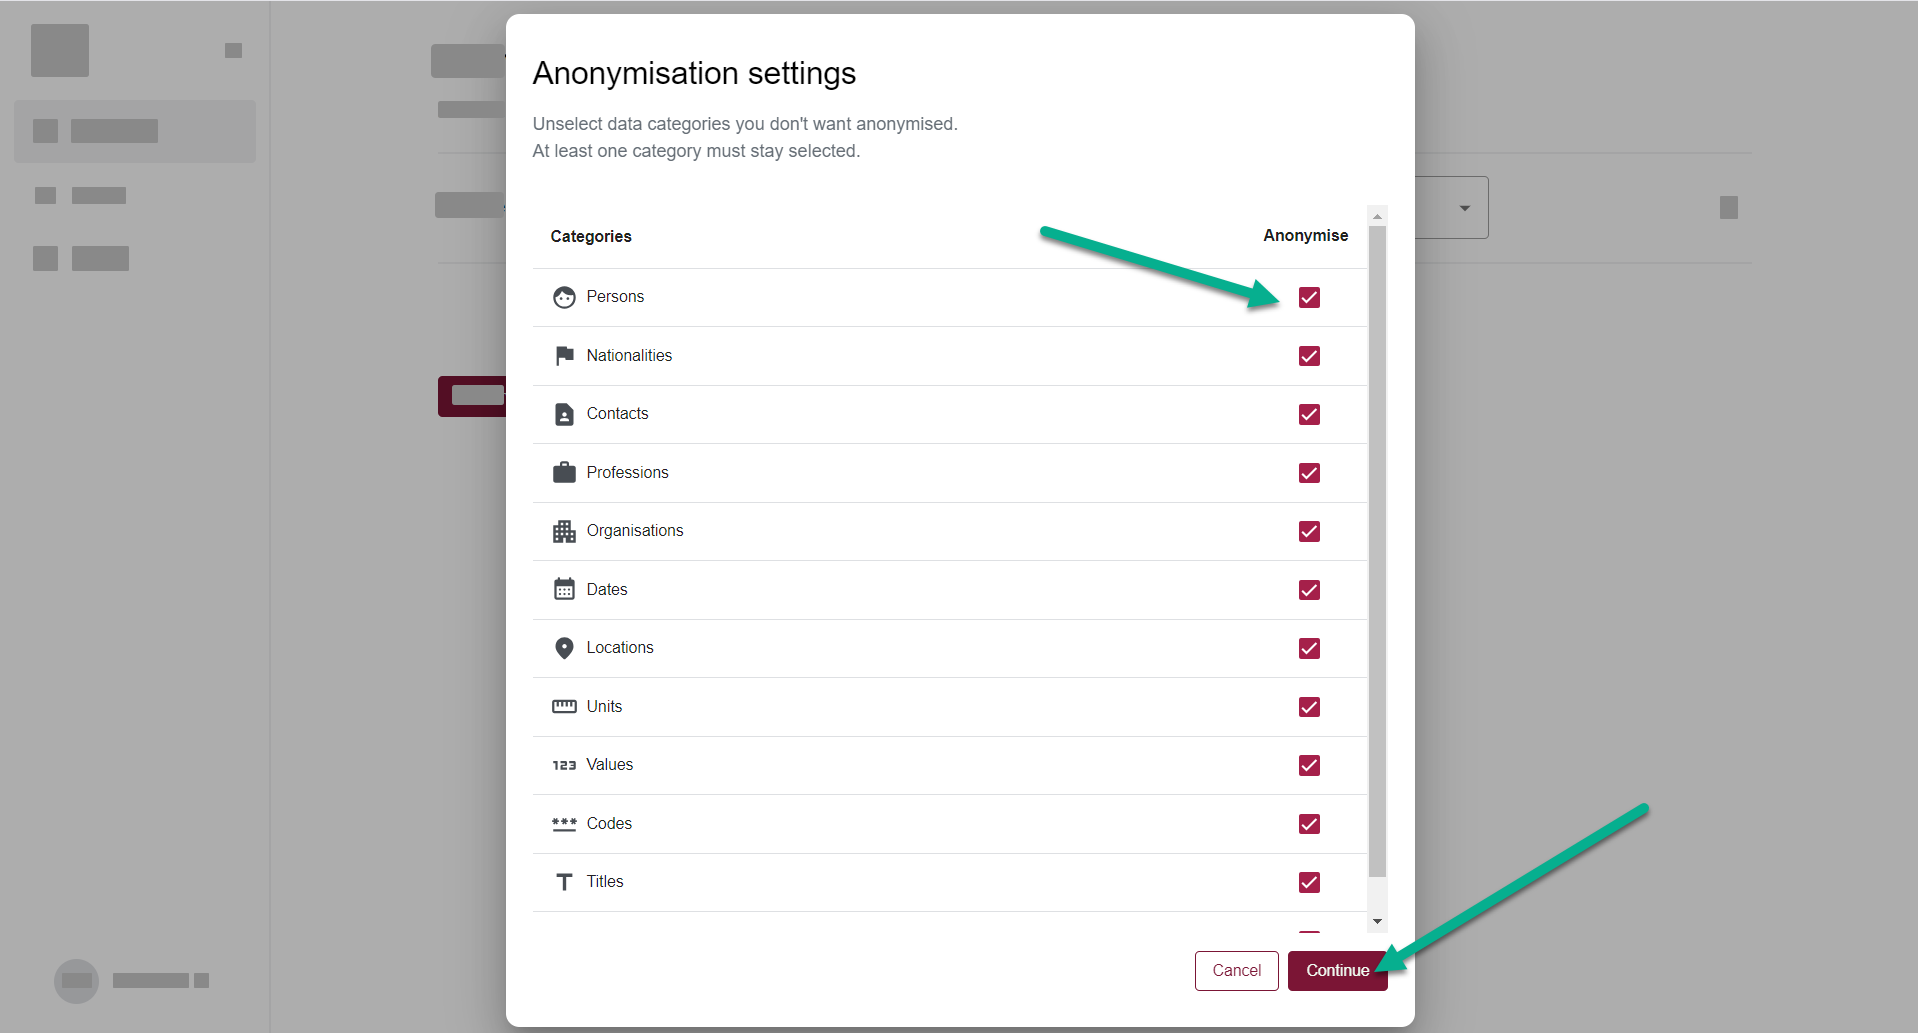
Data categories
Tilde Anonymise automatically detects predefined data categories and replaces them using the masking method you choose.
| Category | Description |
|---|---|
| Persons | Names, surnames, titles, initials, nicknames, usernames etc. |
| Nationalities | Nationalities, languages, citizenships |
| Contacts | Contact information like phone numbers, emails etc. |
| Professions | Professions, positions, ranks |
| Organisations | Specific (named) organizations – companies, government agencies, organised groups of people with a name |
| Dates | Dates |
| Locations | Places, addresses (countries, regions, cities, streets, houses), famous buildings, etc. |
| Units | Units of measurement (typically used with “Value”) |
| Values | Quantities – ages, money, sizes, weights, etc. numerical attributes |
| Codes | Identification codes (personal identification numbers, company codes, car numbers, etc.) and other unique identifiers |
| Titles | names of works of art, products, or events |
| URLs | IP addresses, computer names |
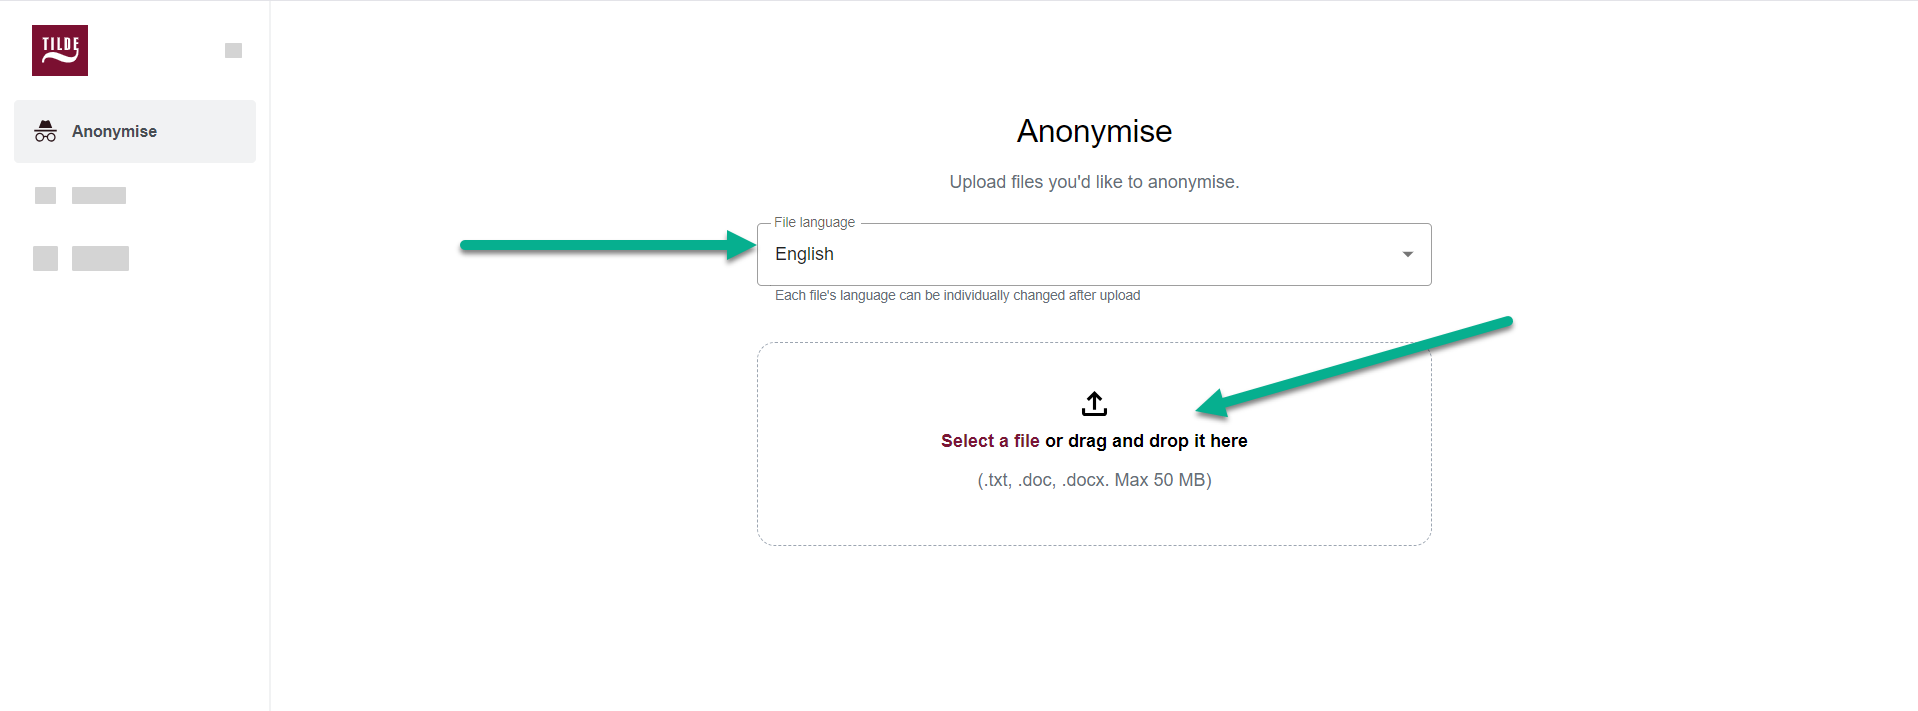
Step 1: Upload document
- Upload your document(-s) and select it's language.
- Select the data categories you want to conceal or replace with pseudonyms.
- Anonymisation process can take some time. Follow the progress in My files section.
- When it’s ready, open the editor by clicking the file name, or download the result by clicking the download icon.



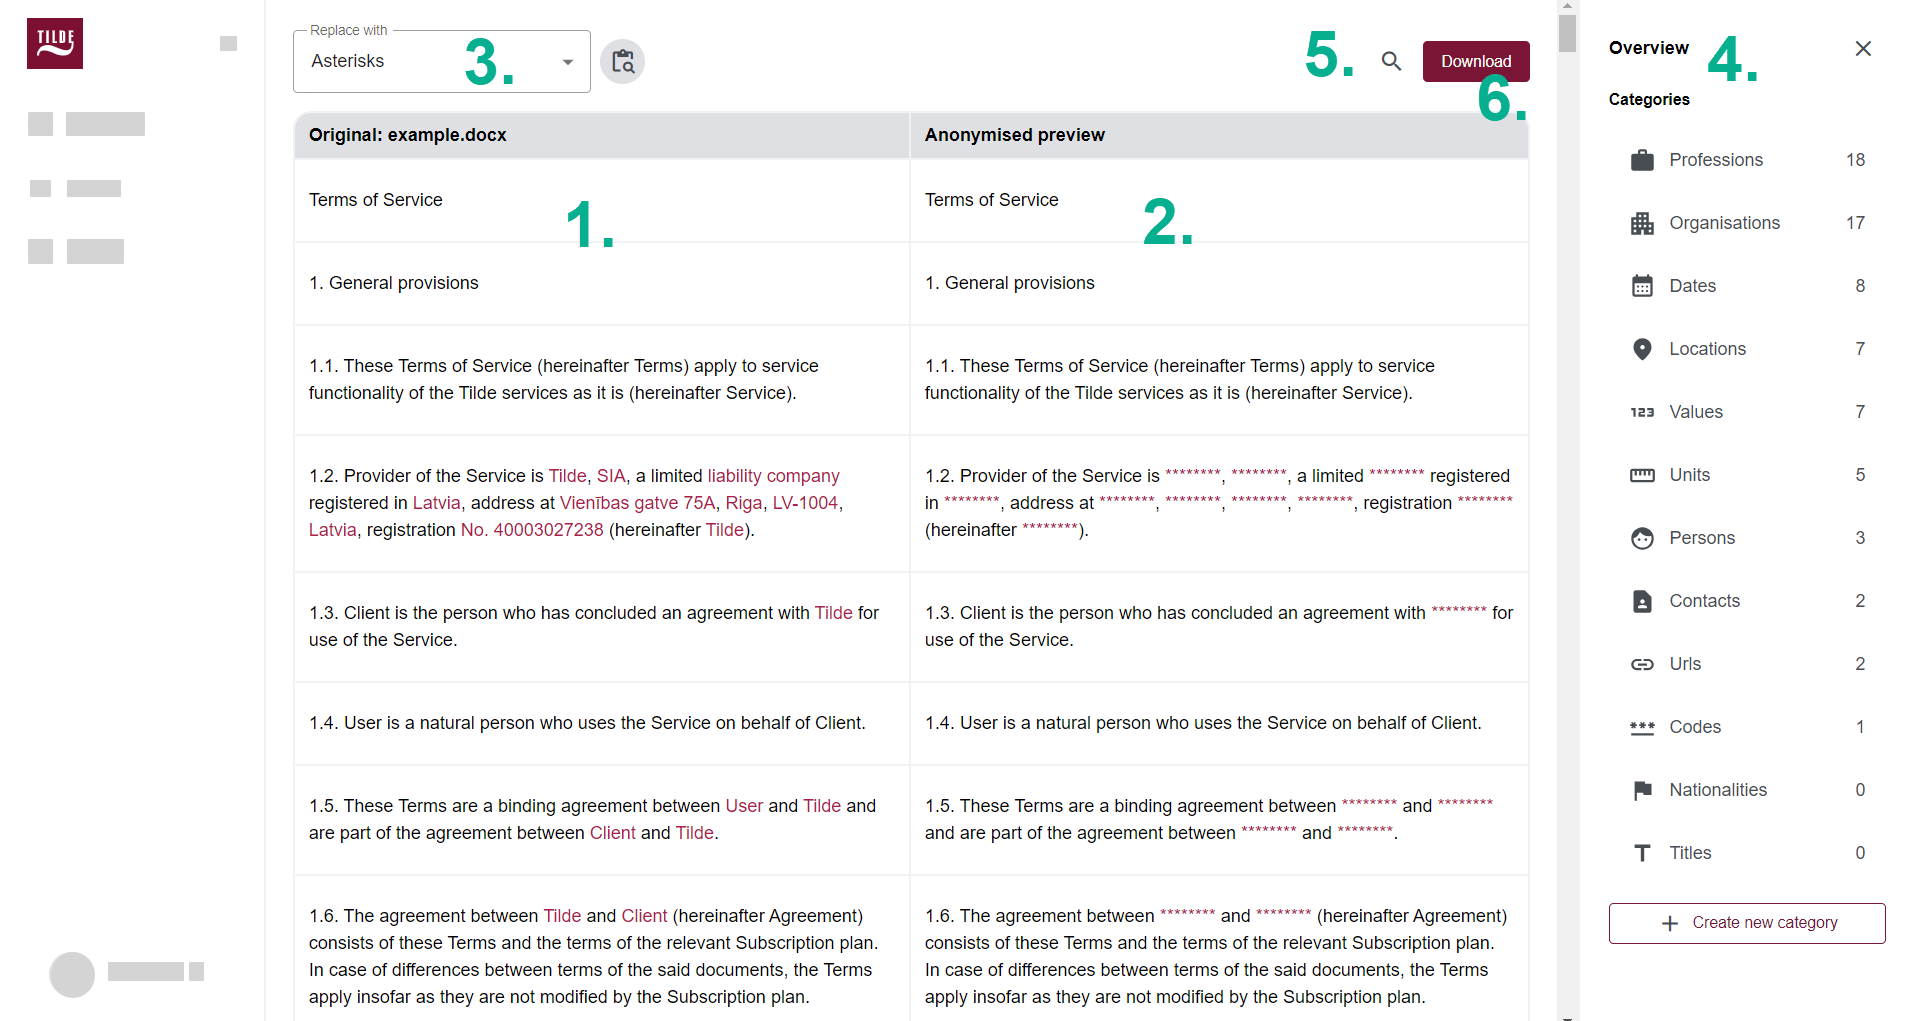
Step 2: Review result in editor
- The table shows the original text on the left(1) and the anonymised preview on the right(2).
- Choose how to replace data at the top of the page(3).
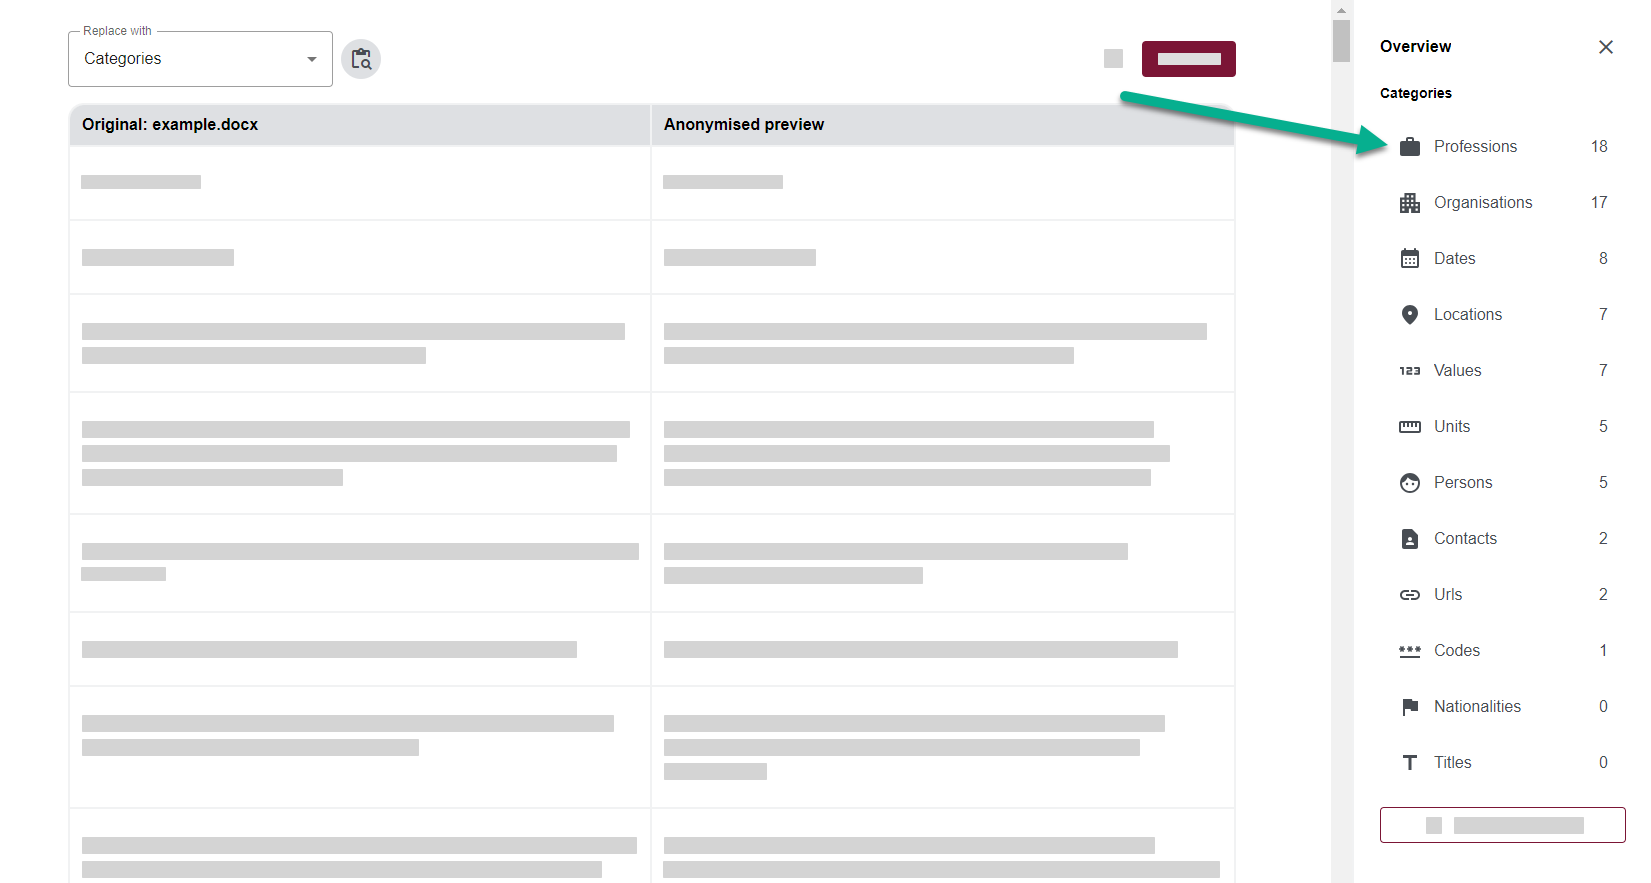
- The side panel(4) provides an overview of data categories. Click a category to view its items and highlight them in the table.
- Use search to filter the table(5).
- After reviewing the results download the document(6).
1. Choose How to replace data
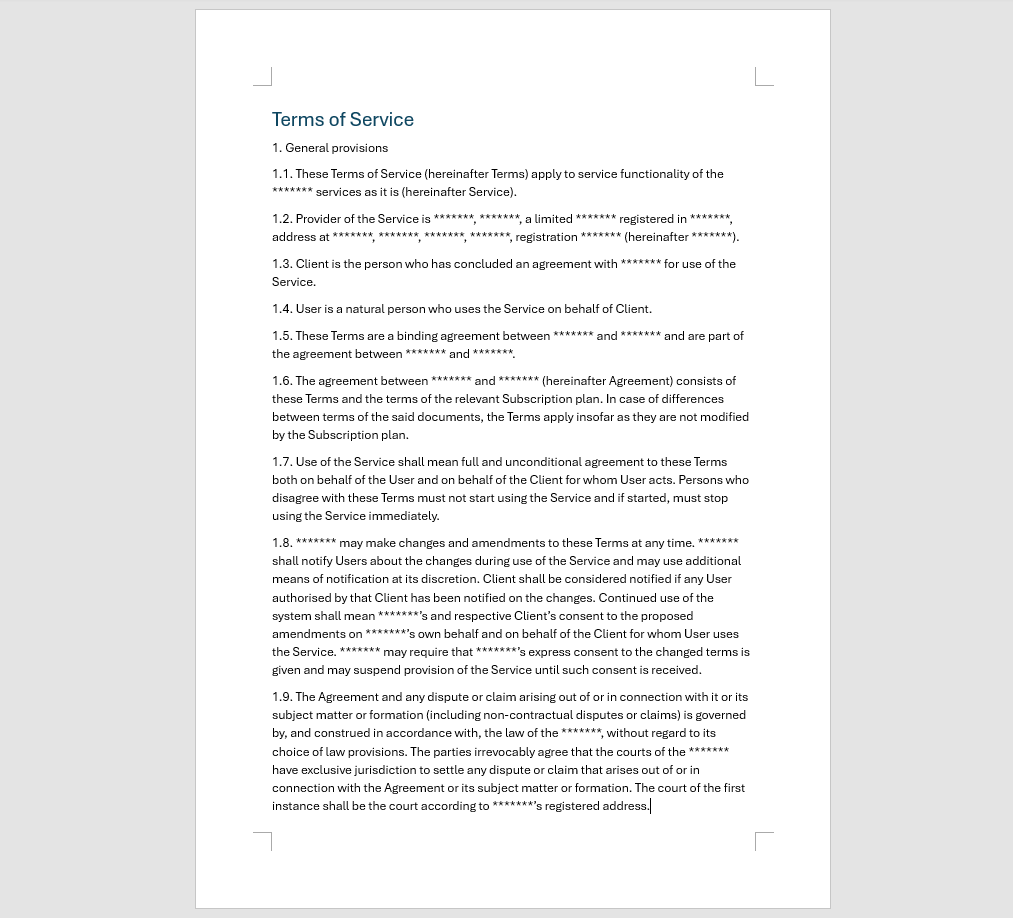
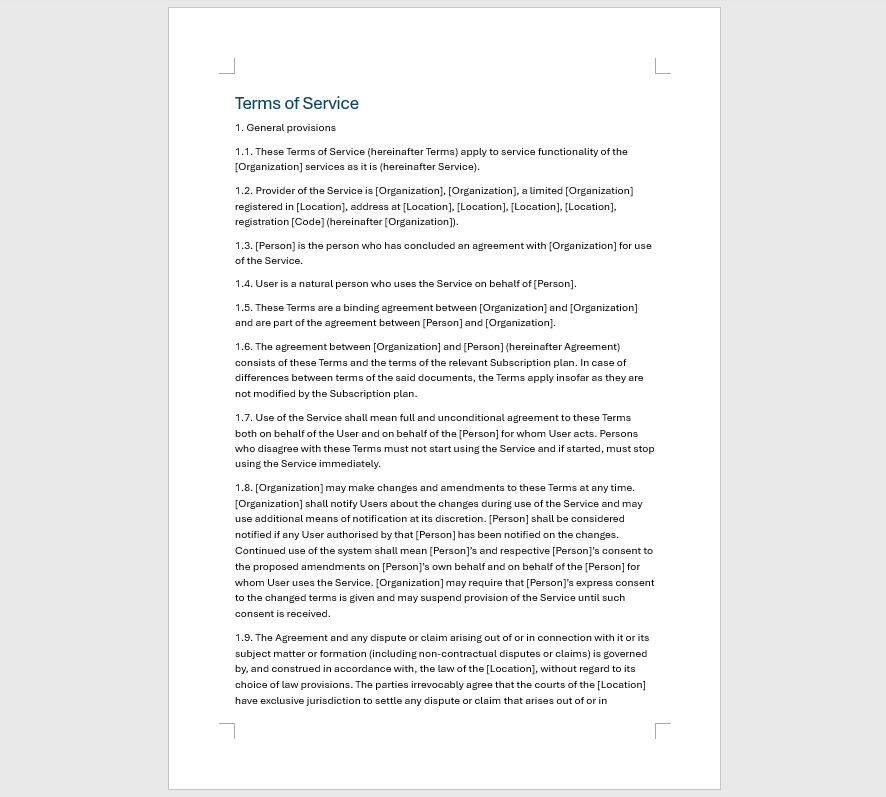
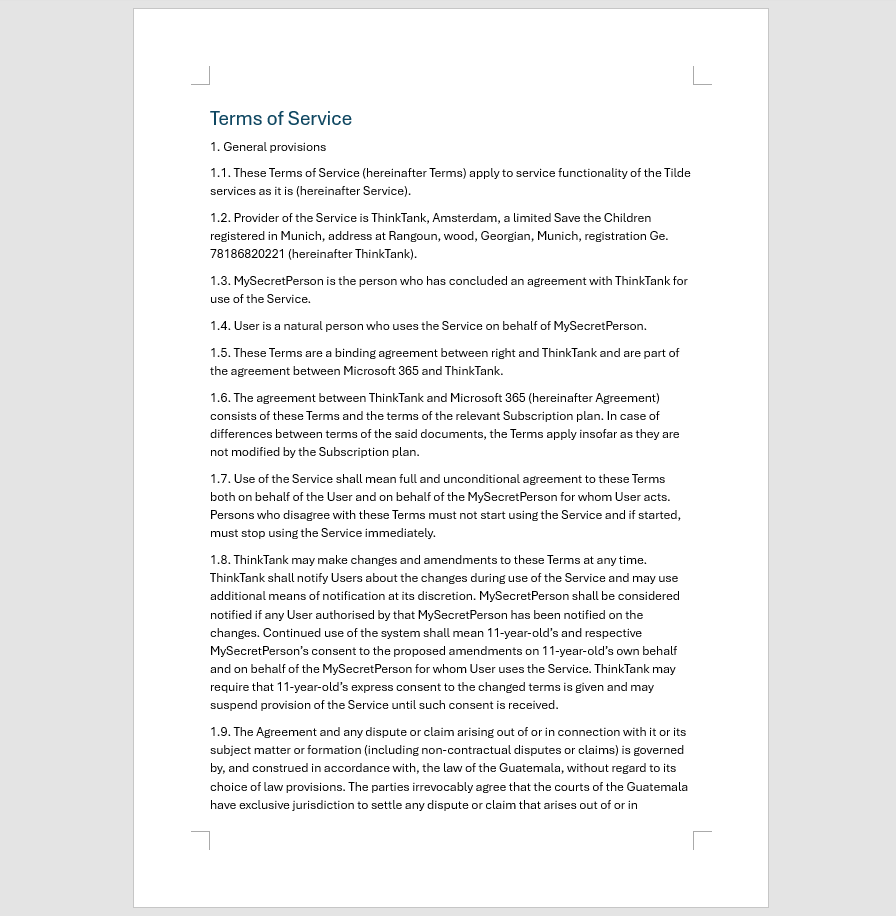
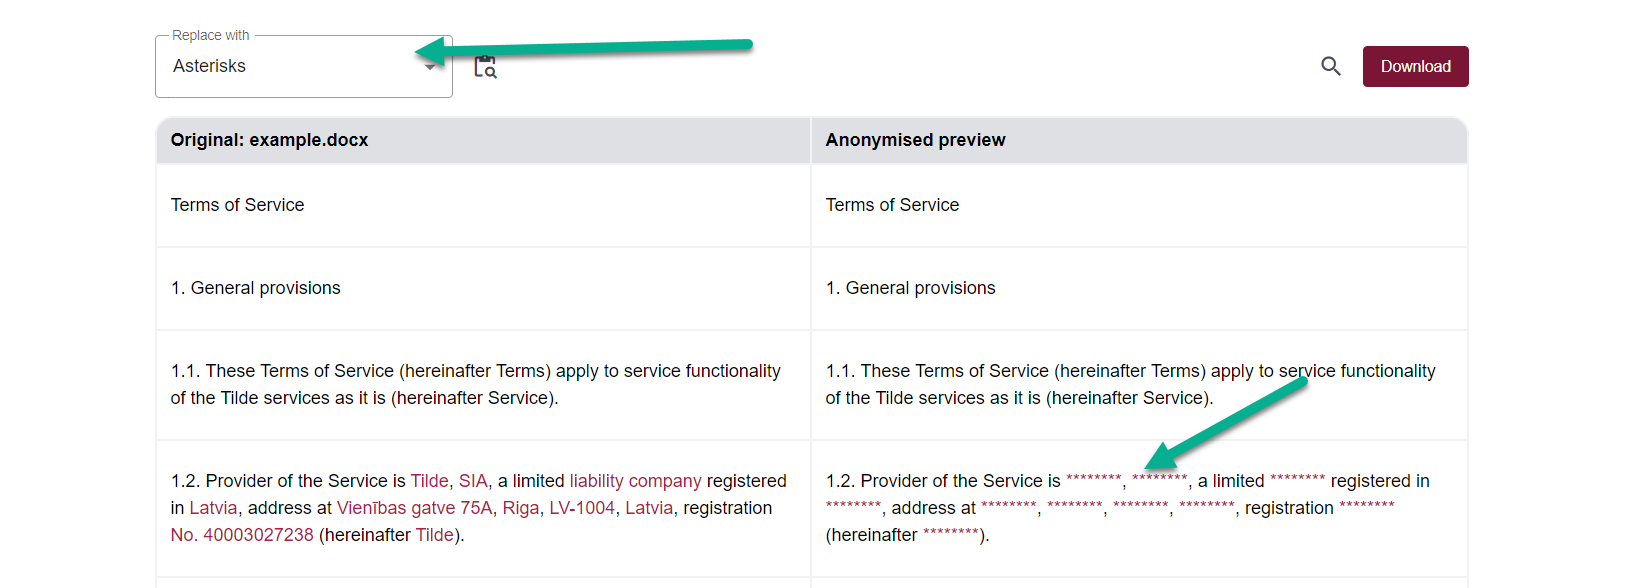
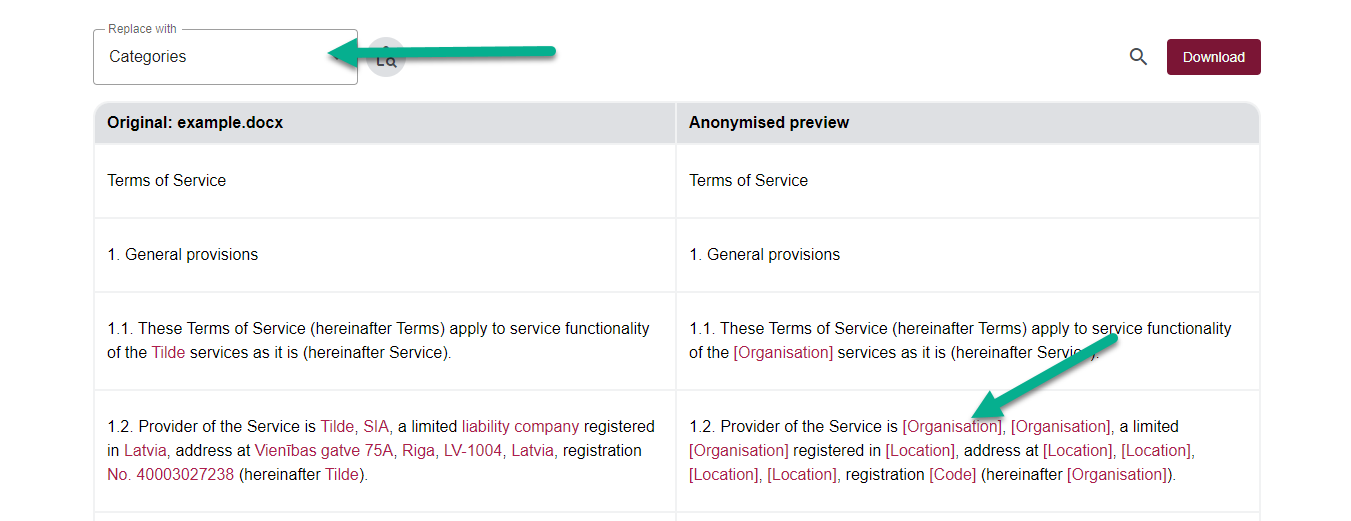
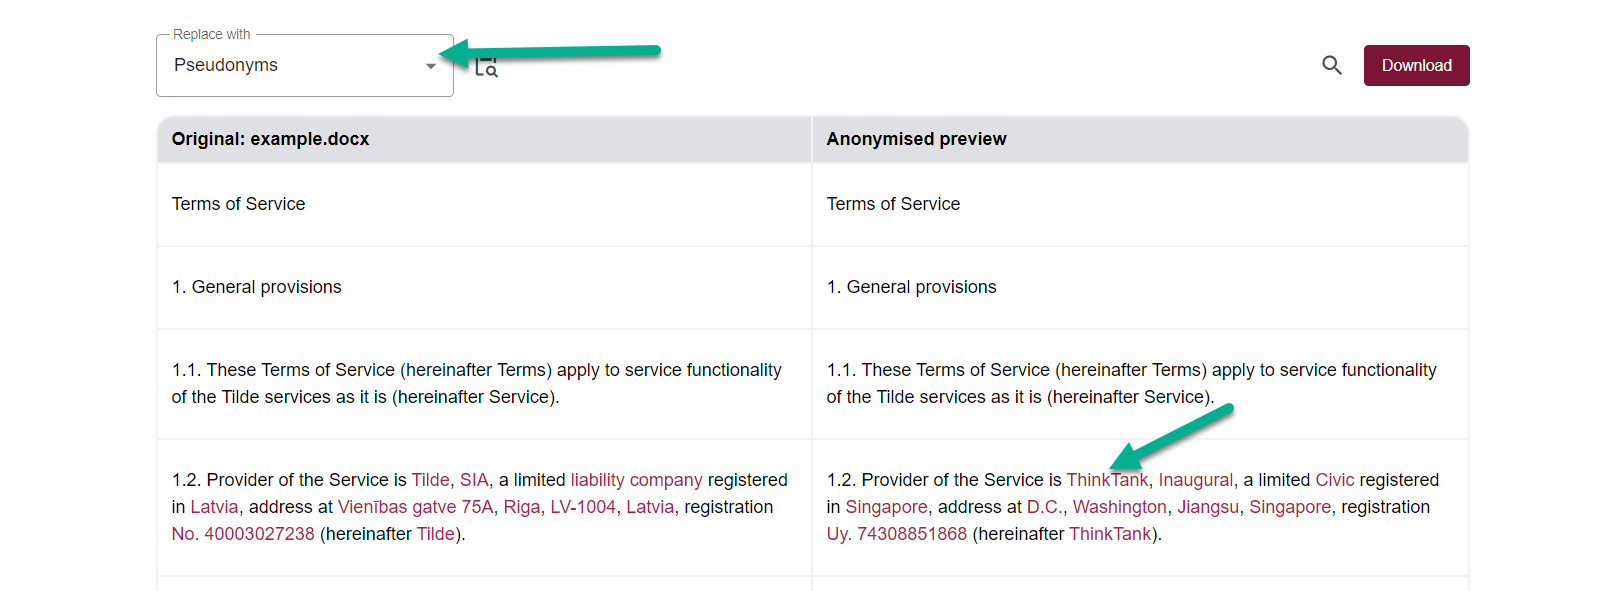
Choose how to hide sensitive information: Asterisks, Categories, or Pseudonyms. Select a method from the menu to immediately see the results on the right side of the table.
- Asterisks
- Categories
- Pseudonyms
2. Find missed sensitive items
Find items that the automatic process may have missed:
- Use the overview in the side panel to see automatically identified items:
- Click a category to view its items.
- Click an item to highlight all instances in the text.
- Use the search bar to find sensitive information and filter the table.
3. Add new items
To add a new item:
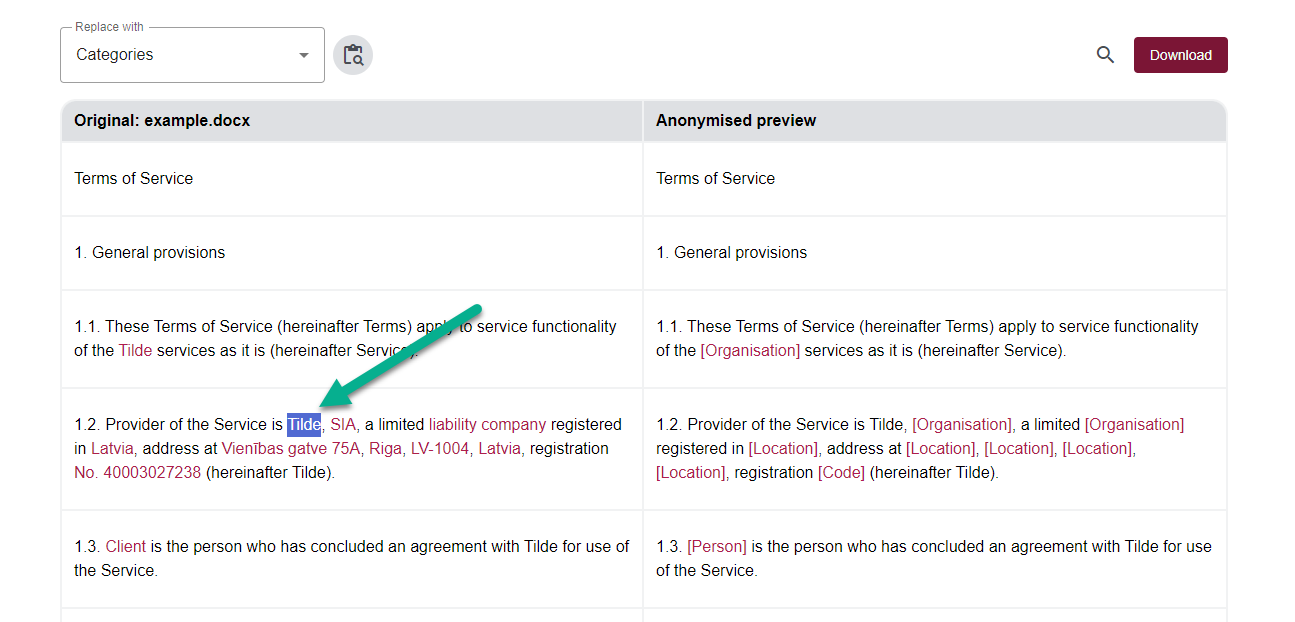
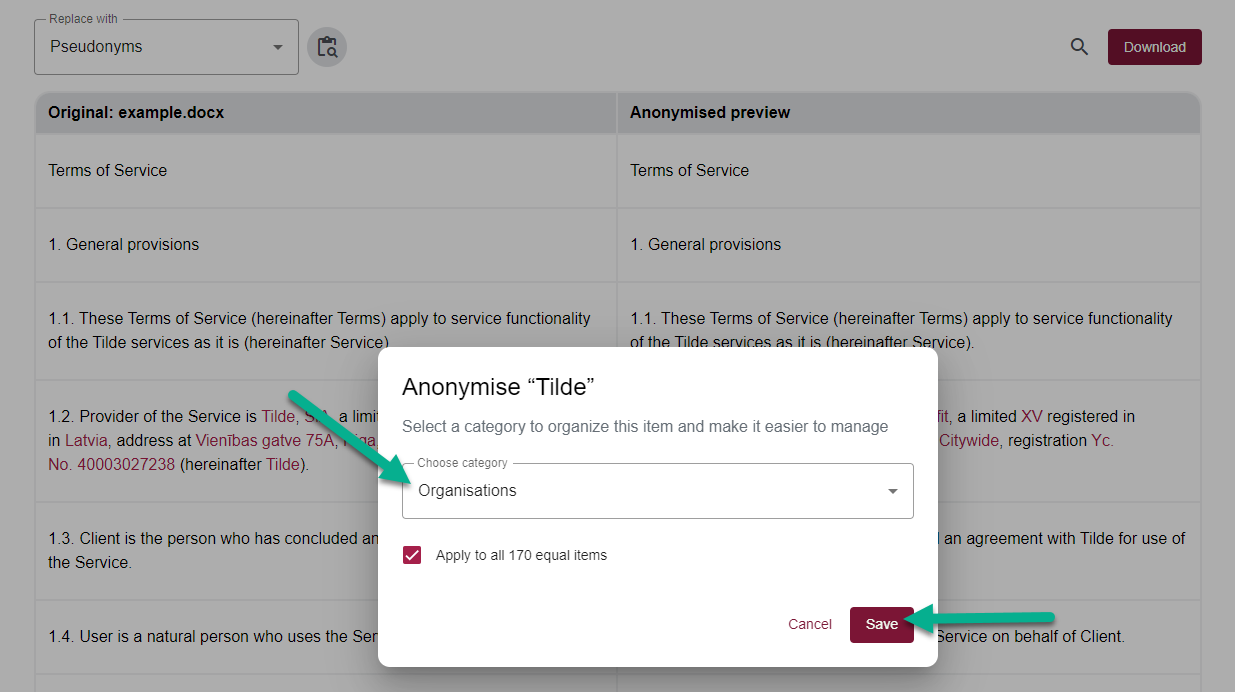
- Highlight text on the left by clicking and dragging to select.
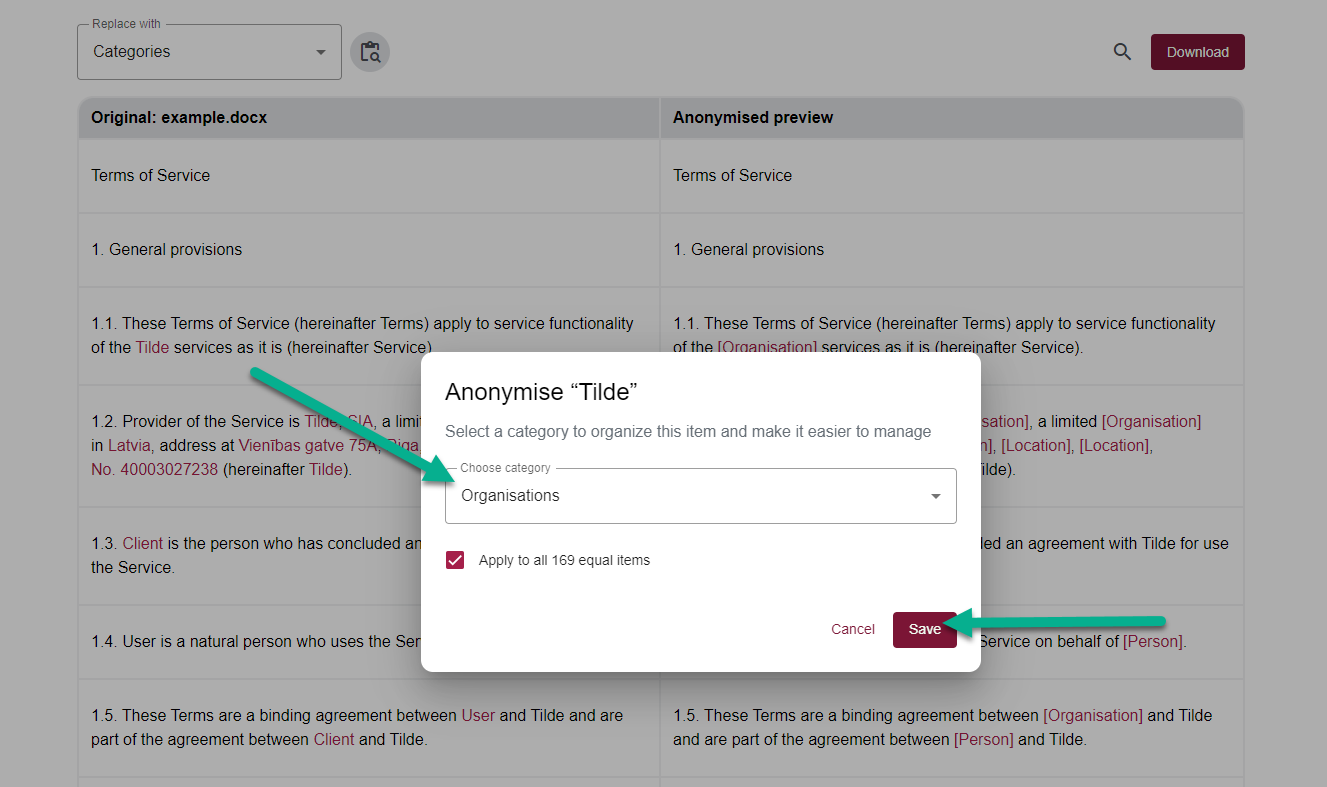
- Choose a category in the popup.
- Keep Apply to all equal items checked to replace all instances, or uncheck to replace only this one.
- Click Save.
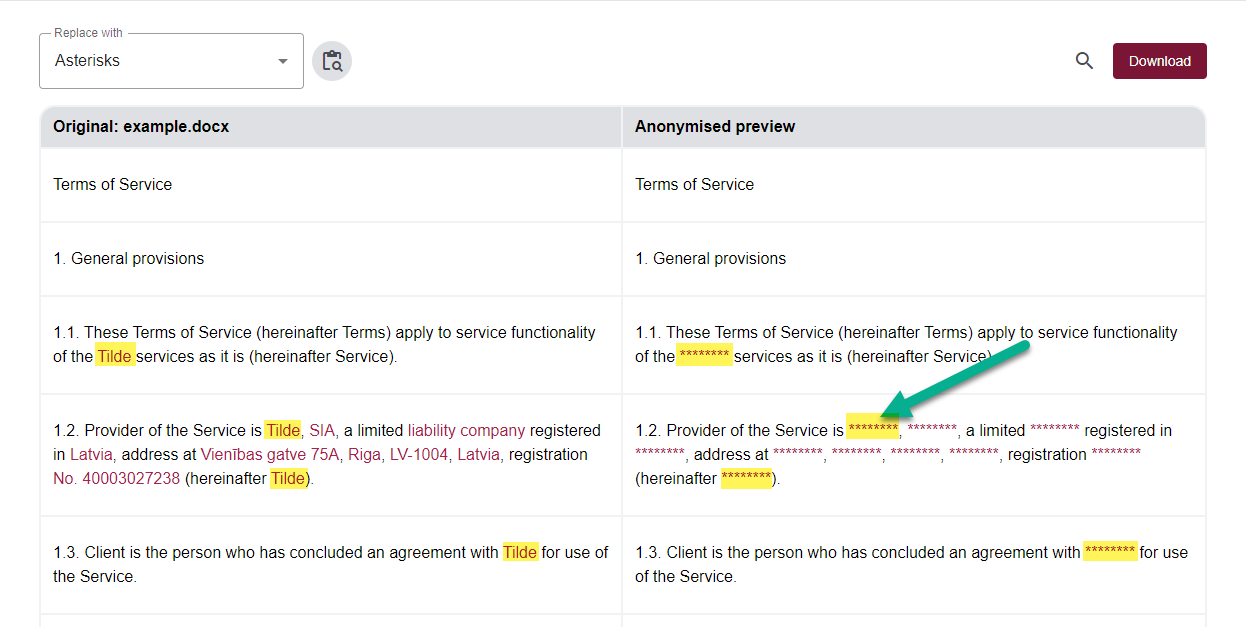
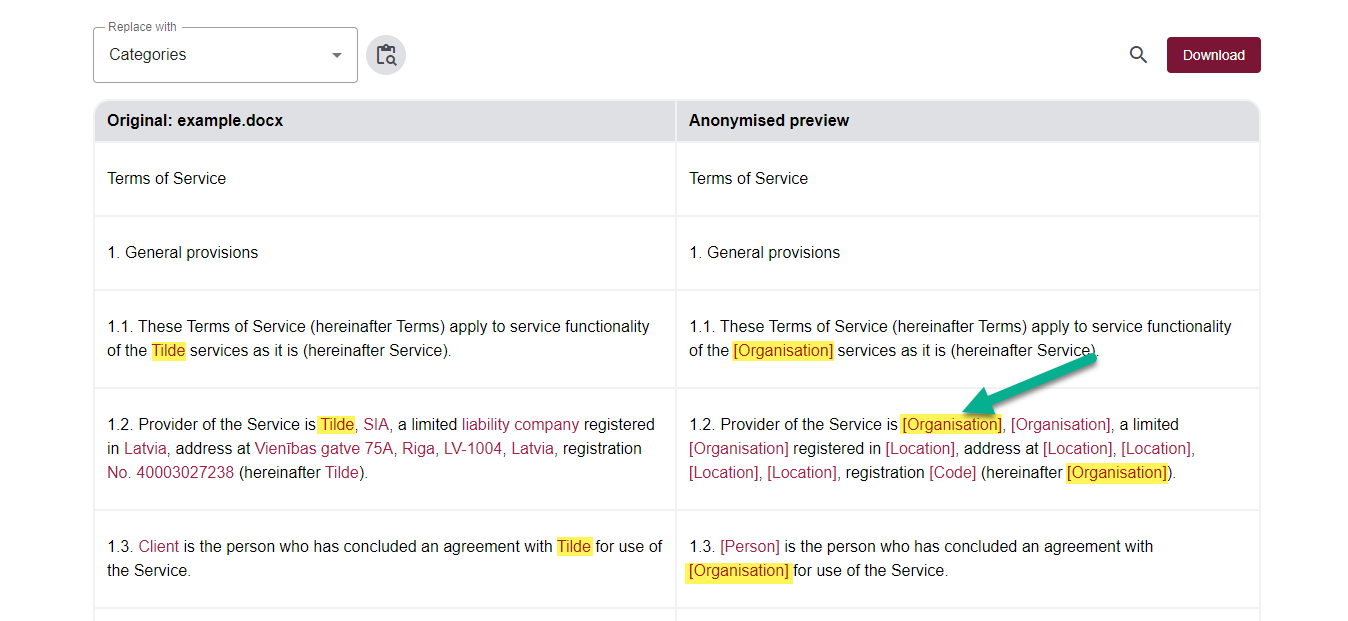
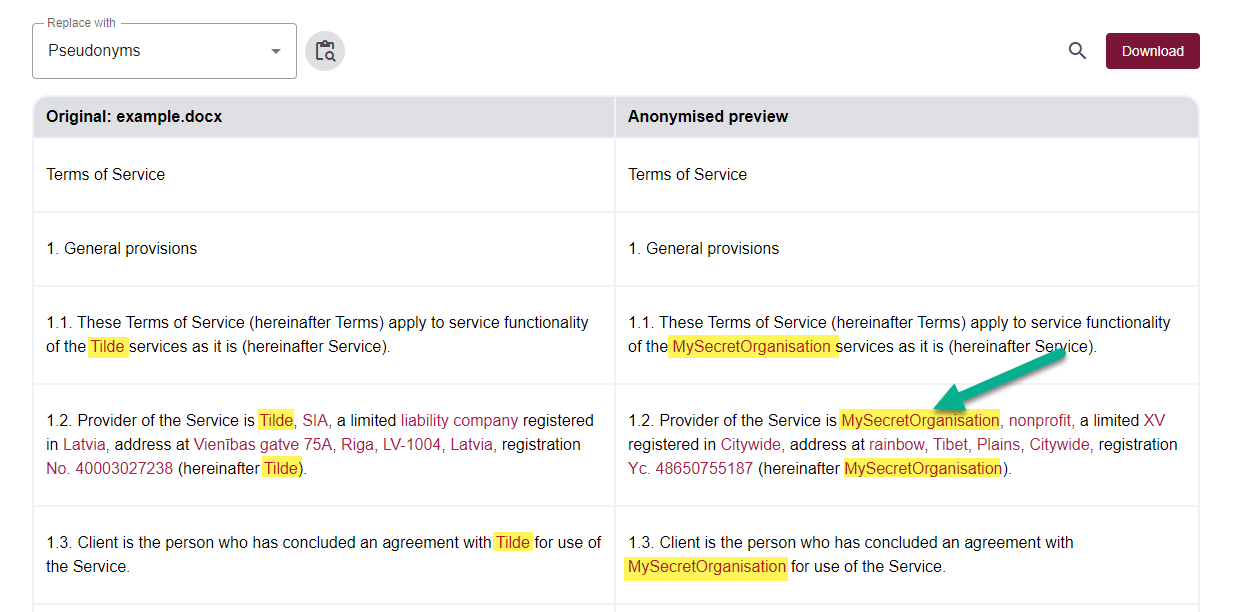
- Make sure all instances are correctly replaced on the right.
- For pseudonyms click on the newly added item to edit it and enter a word or phrase to replace it with.
- Asterisks
- Categories
- Pseudonyms
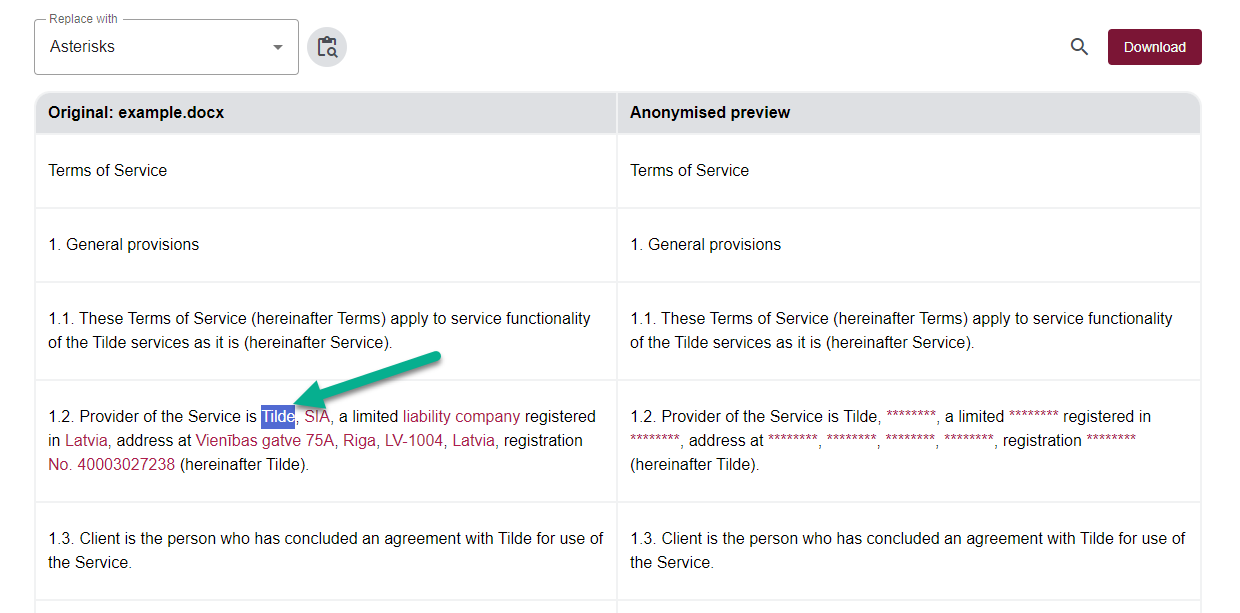
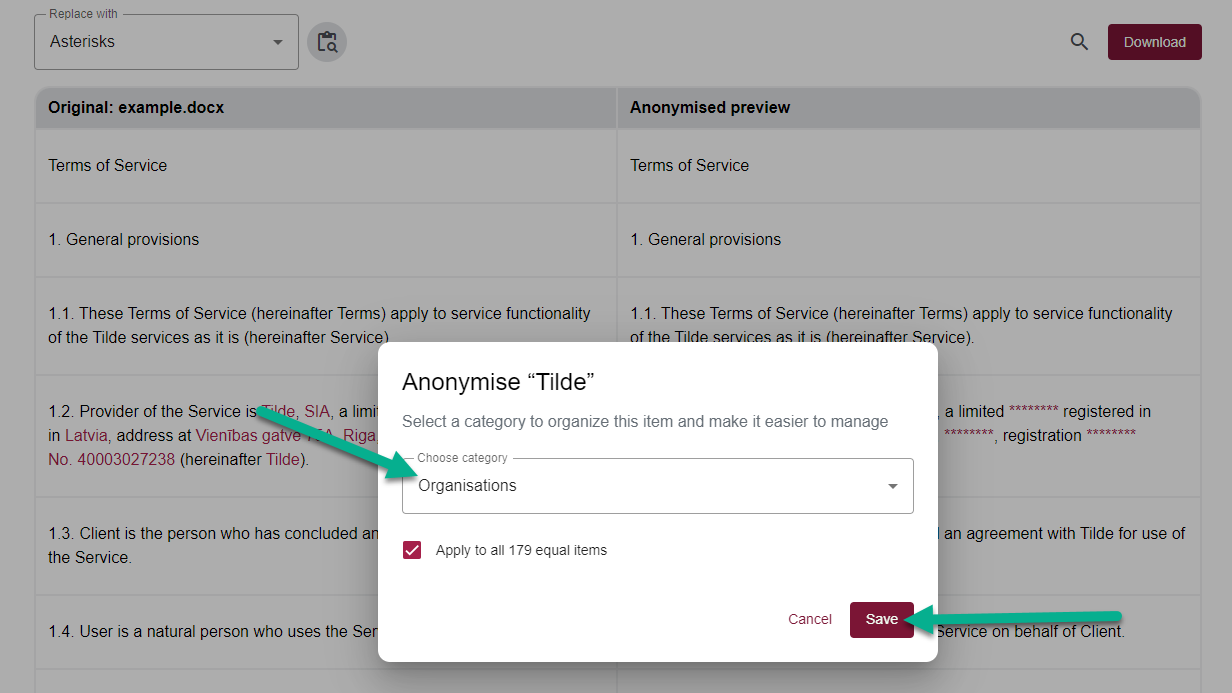 Replaced with Asterisks:
 Replaced with Category:
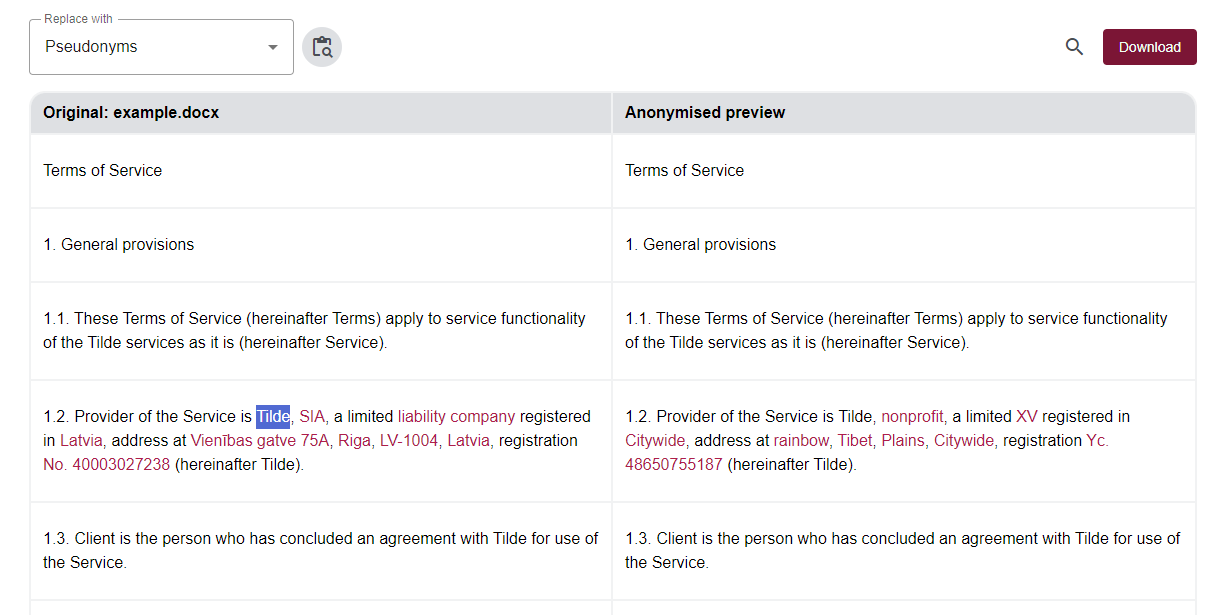
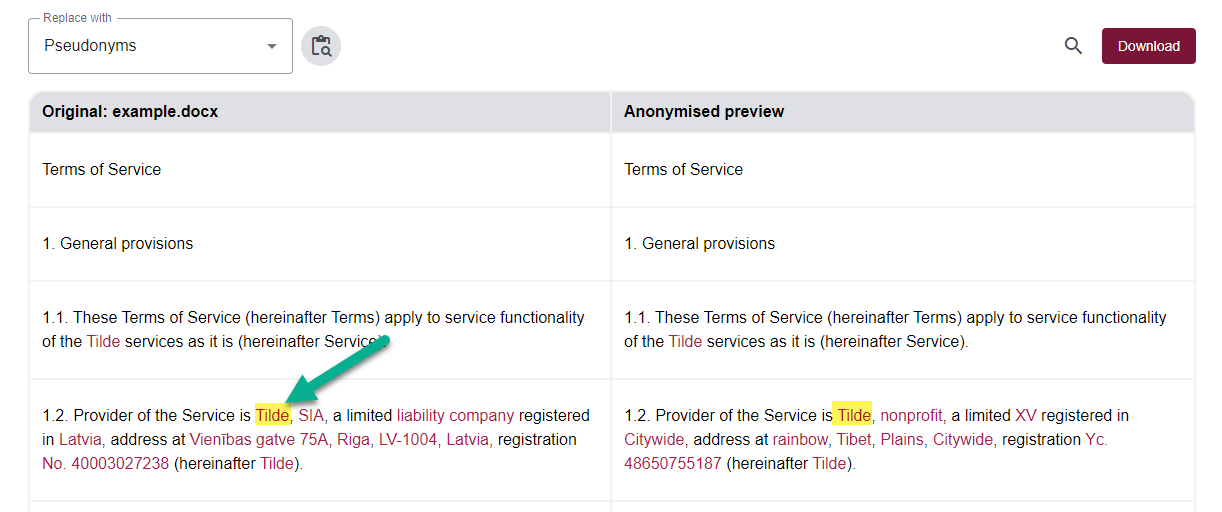
 Item has been created. Click the item on the left to add a pseudonym:
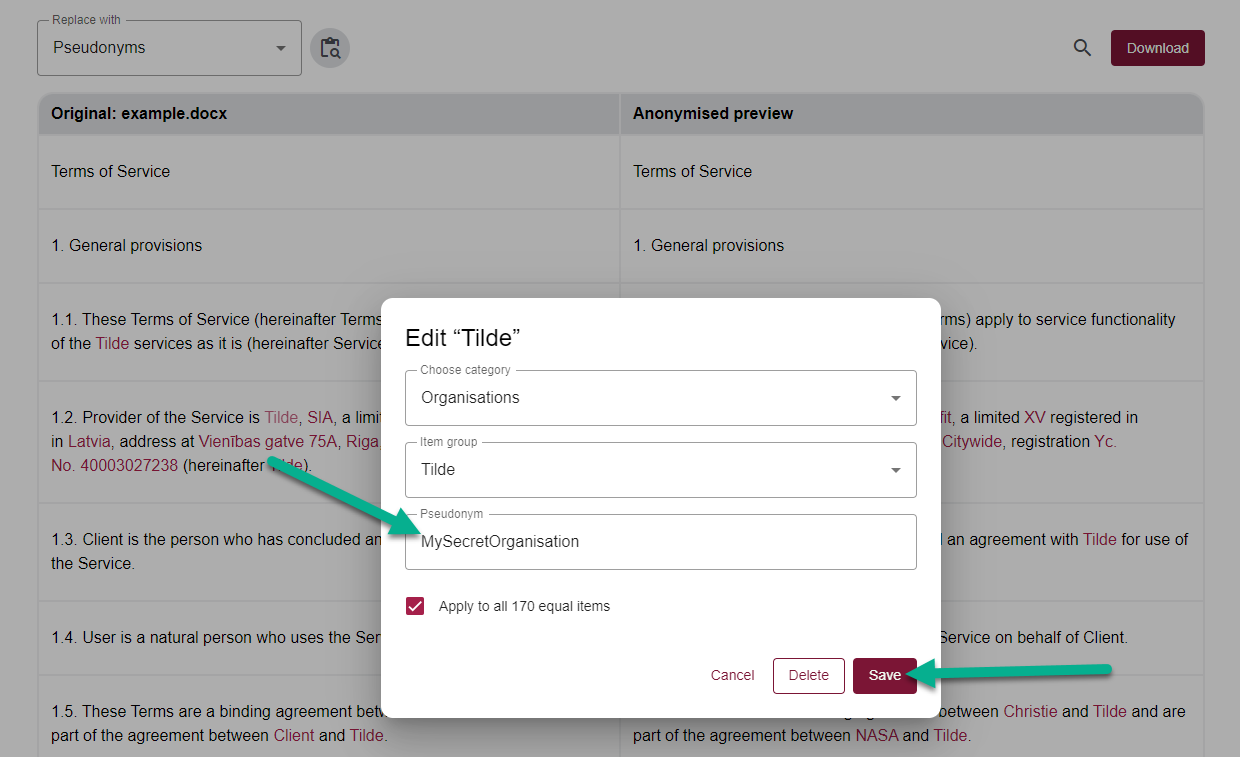 Replaced with Pseudonym:
3. Remove incorrectly masked items
To remove an incorrectly masked item:
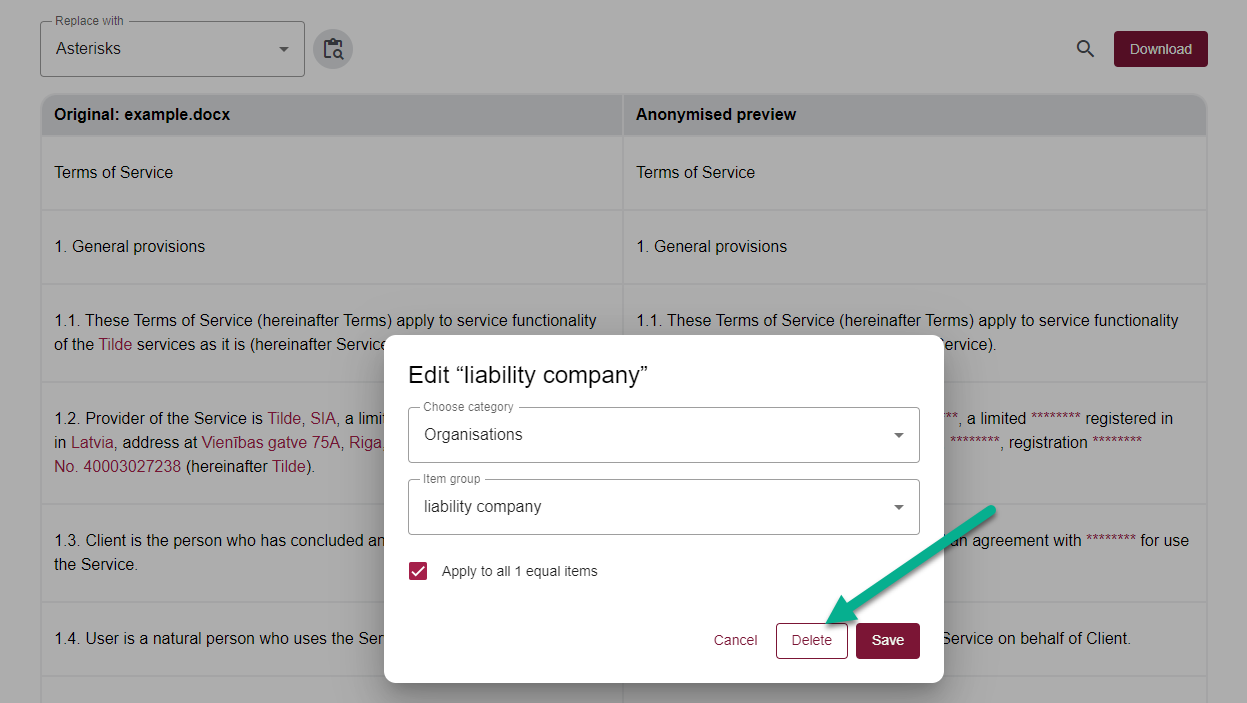
- Click the item on the left.
- Keep Apply to all equal items checked to remove all instances, or uncheck to remove only this one.
- Click Delete.
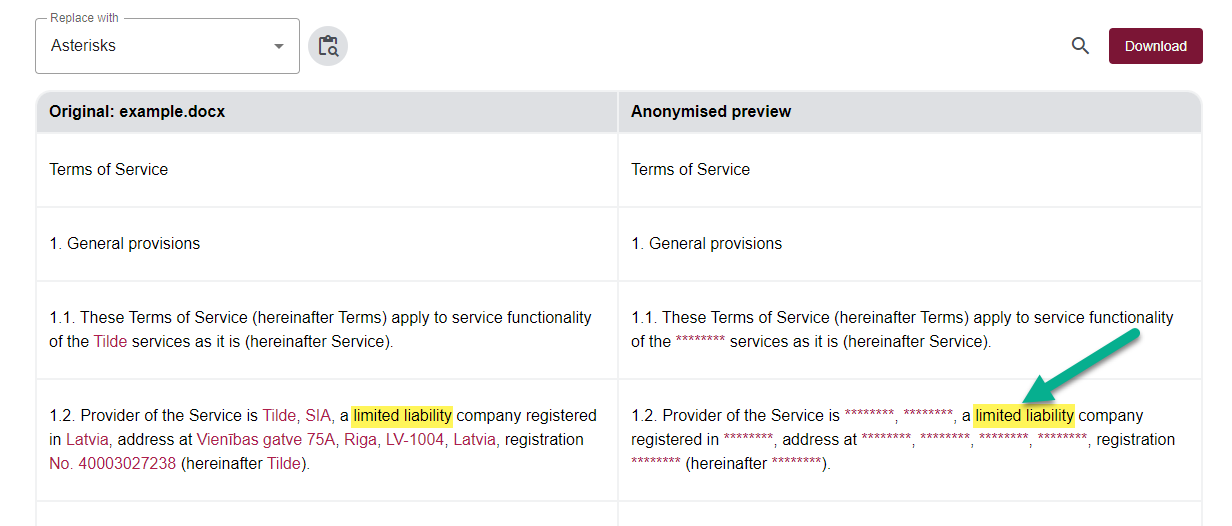
- Make sure all instances are correctly removed on the right.
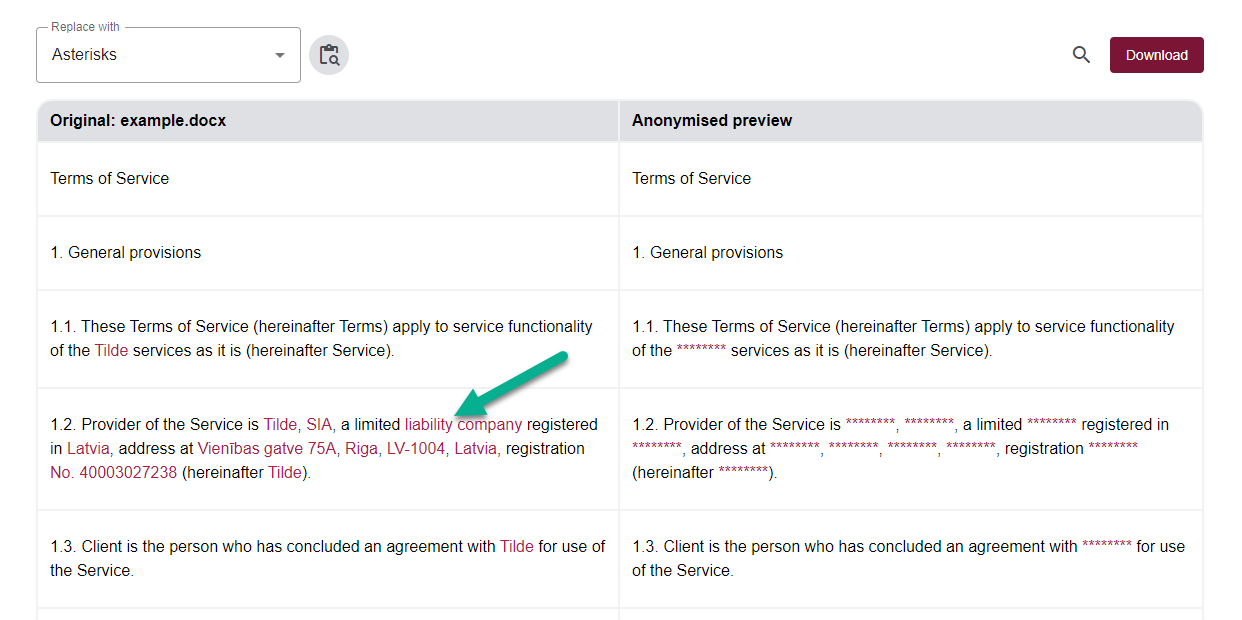
 Item has been removed and original text appears on the right:
4. Edit items
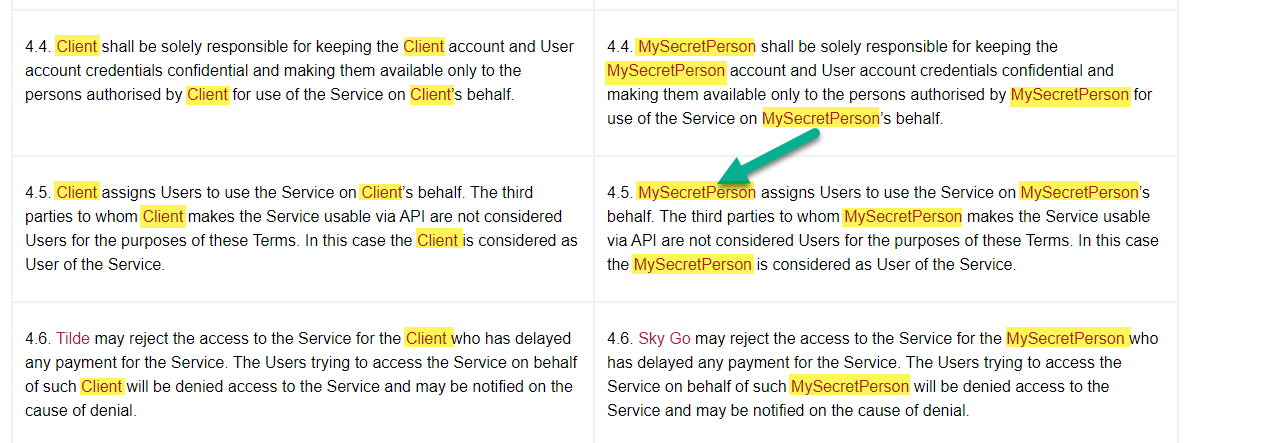
- If you’ve chosen to replace everything with category names, ensure all categories are accurate and edit any incorrect items.
- If you’ve chosen to replace everything with pseudonyms, you can edit the pseudonyms for each item group. Ensure that all similar items are correctly assigned to the same category and group for consistent masking.
To verify all items are correctly categorised:
- Click on each category in the side panel and look for items that should be moved.
- Click on the item to highlight it in the table.
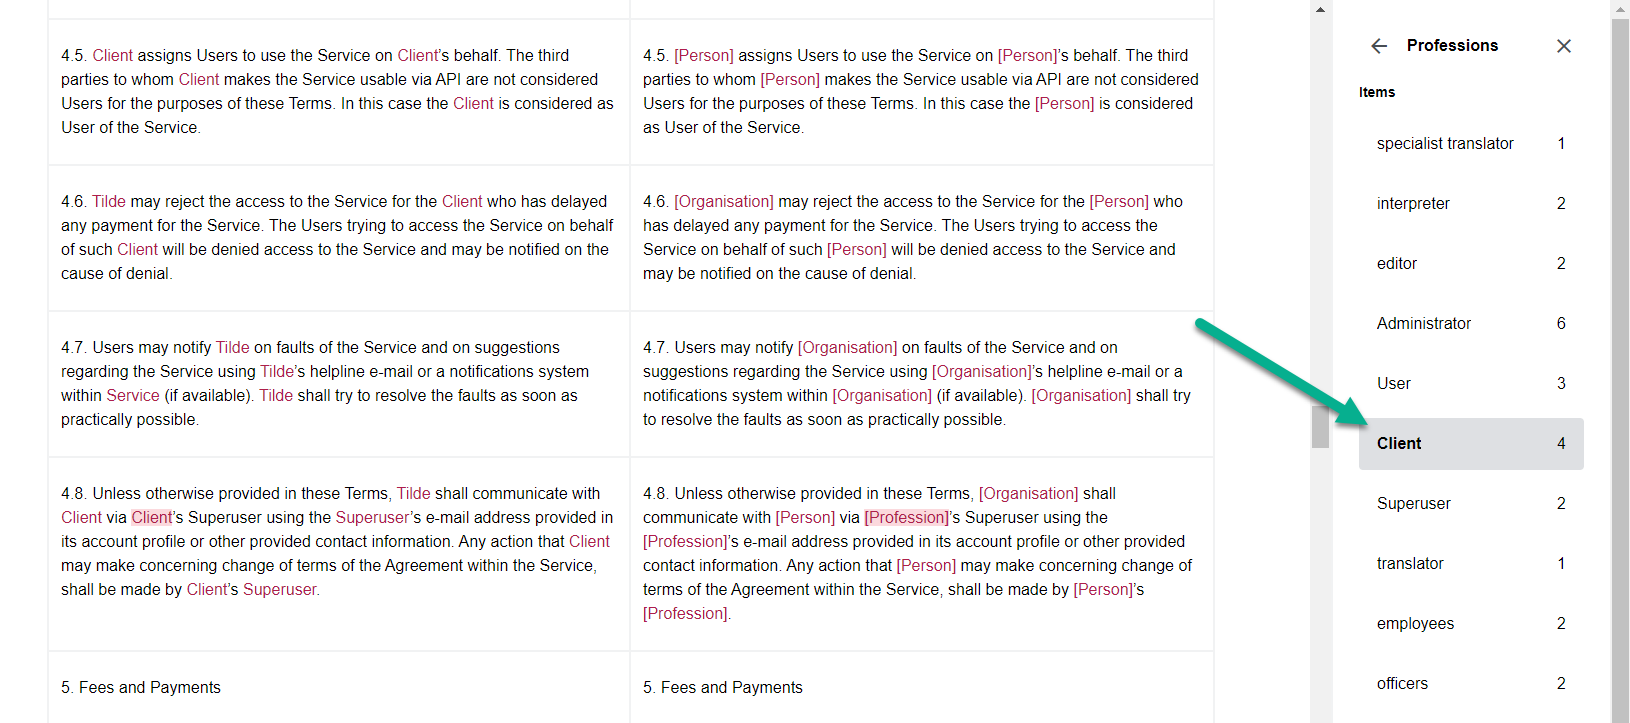
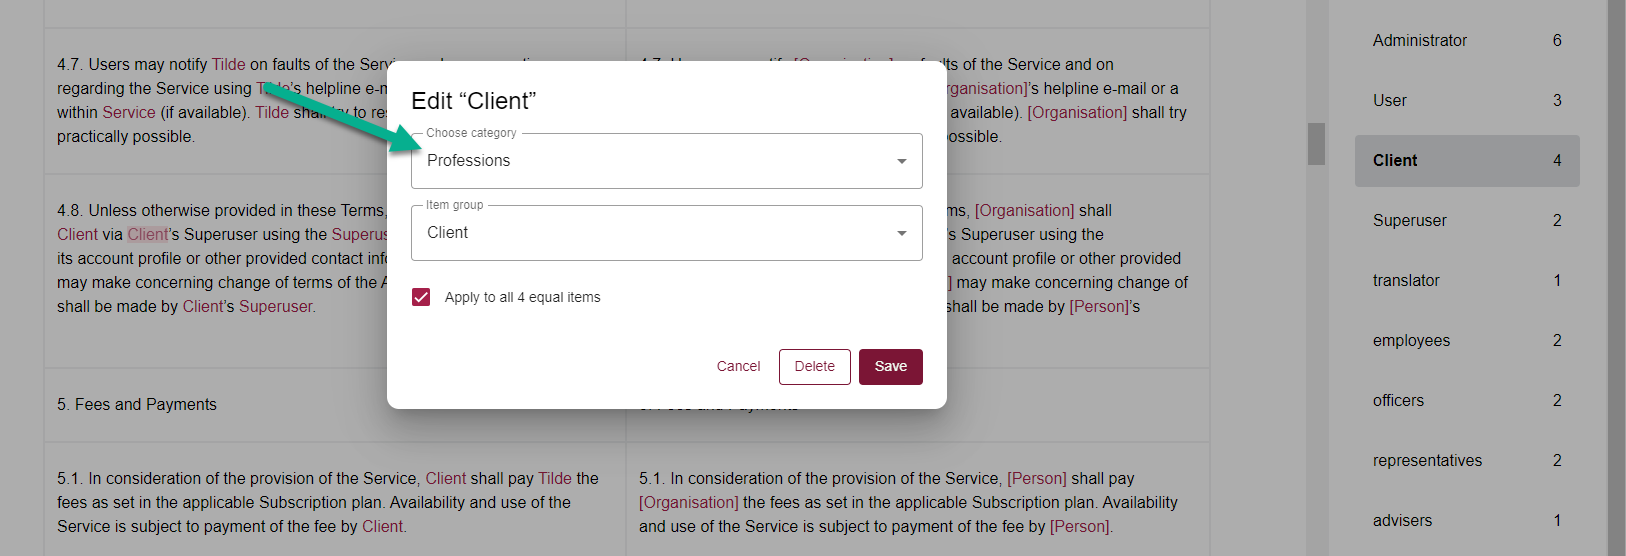
To edit an item:
- Click the item on the left.
- In the popup, select the correct category.
- If the item's group menu doesn’t include a similar item, choose New Group.
- For pseudonyms enter a word or phrase you want to use as a pseudonym.
- Click Save.
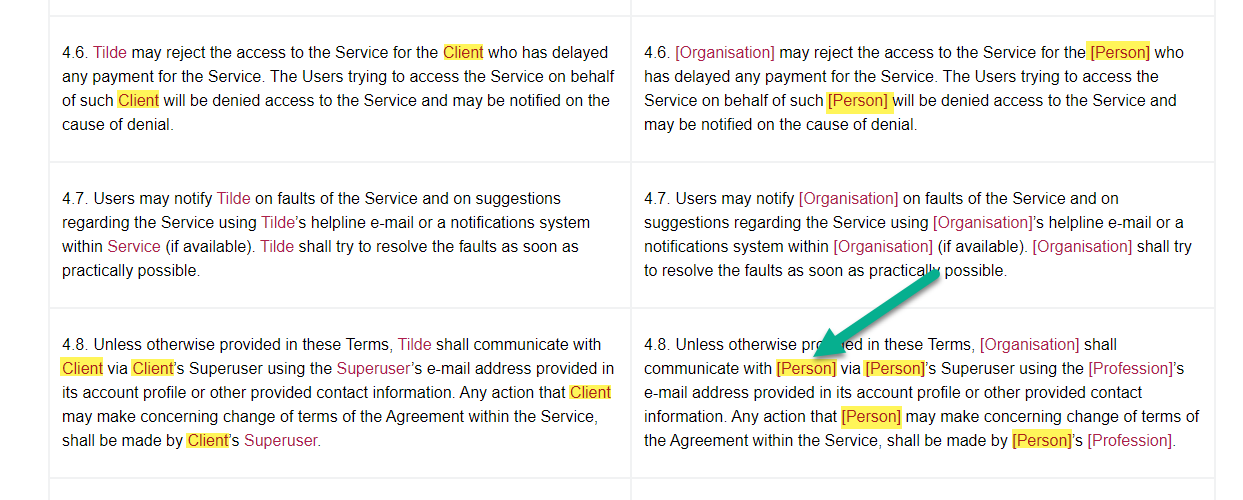
- Make sure all instances are correctly replaced on the right.
- Categories
- Pseudonyms

 Updated category can be seen on the right:

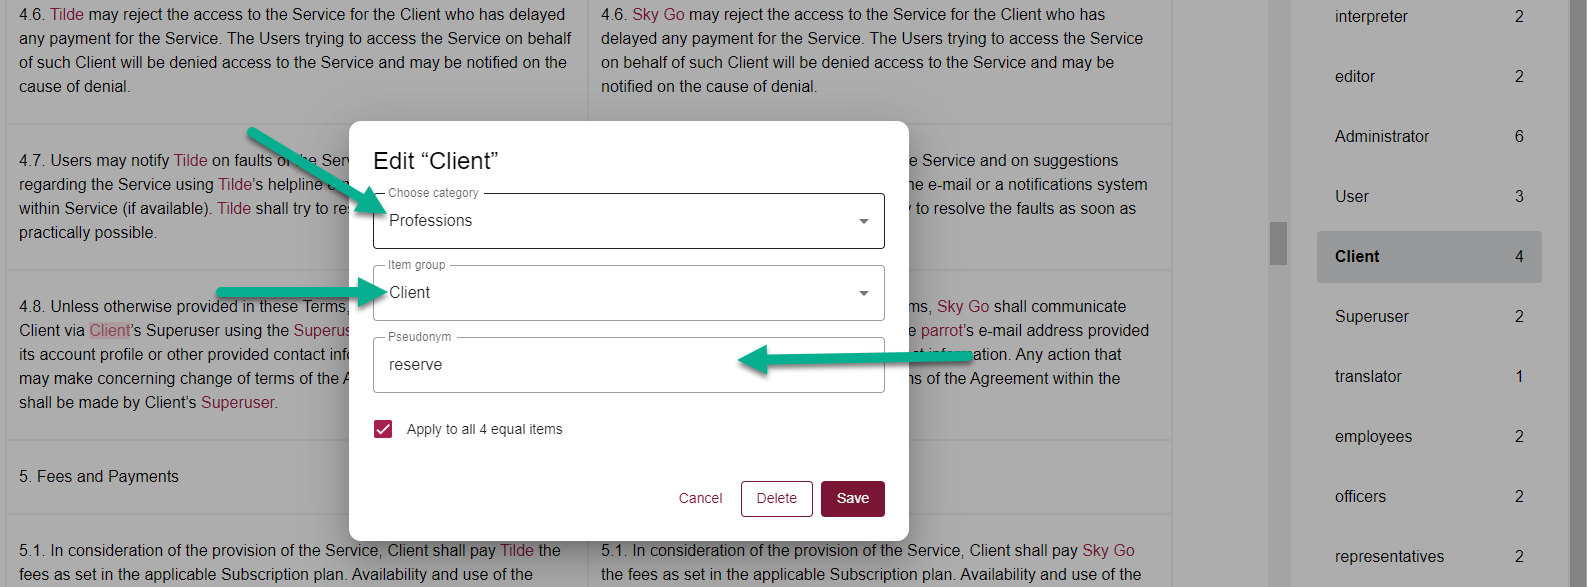
 Updated pseudonym can be seen on the right:
5. Create new categories (Optional)
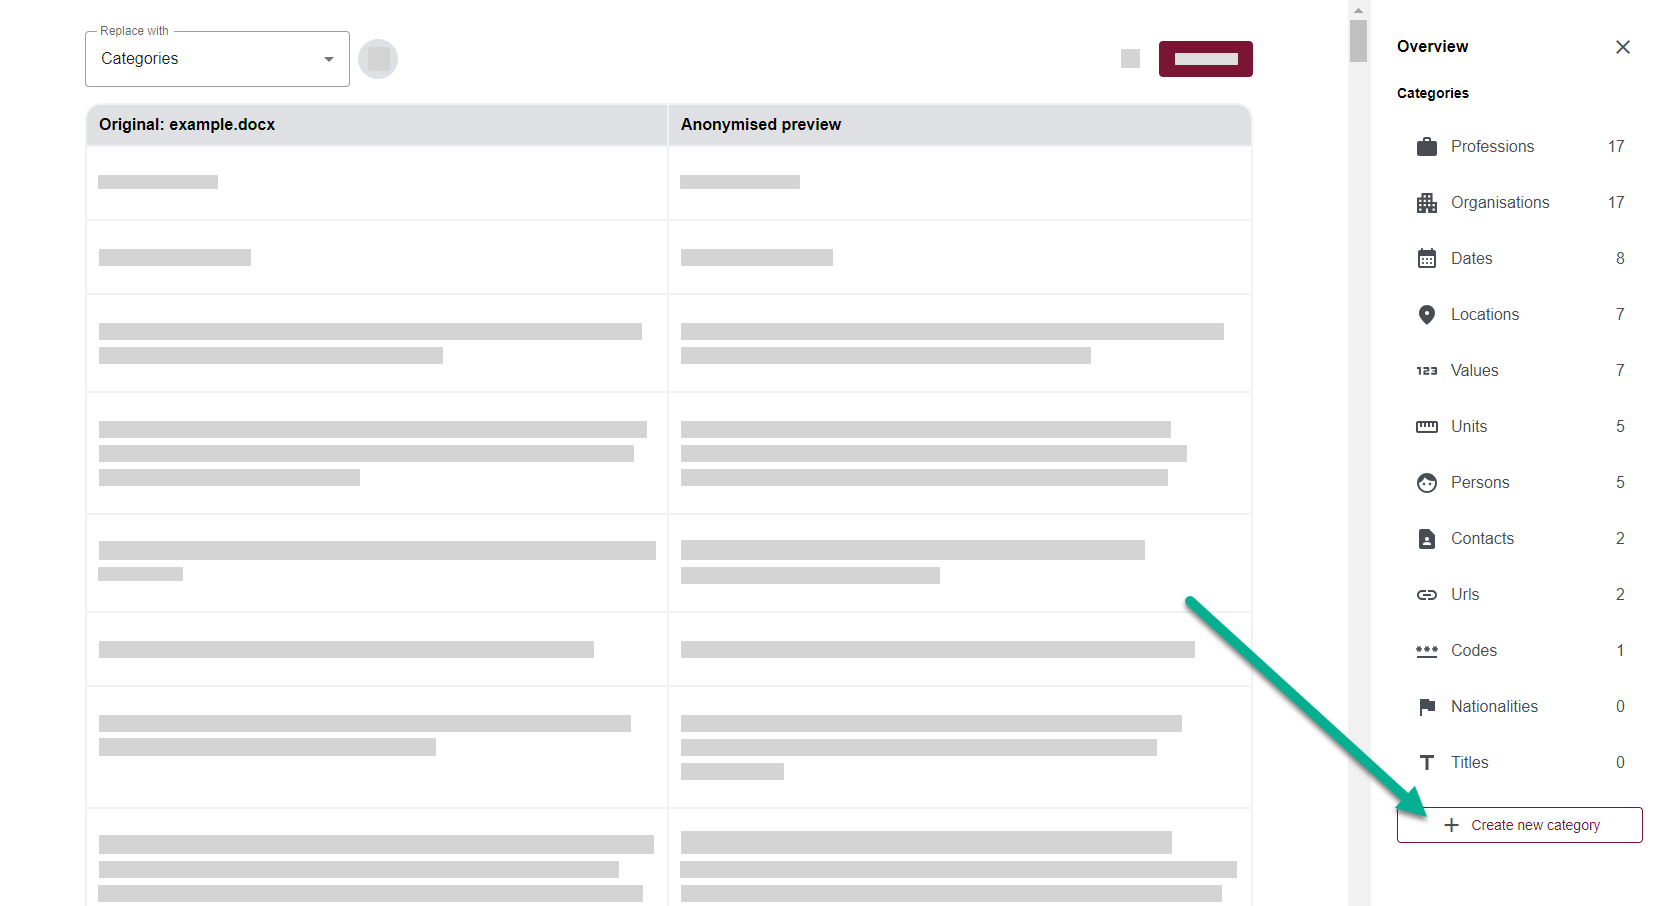
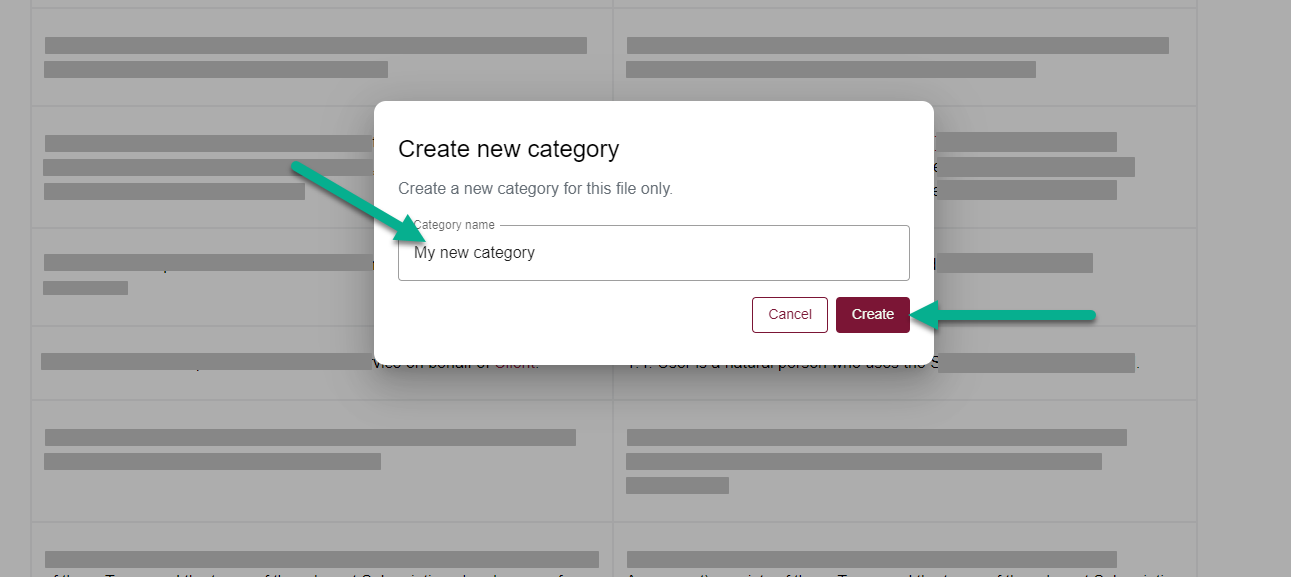
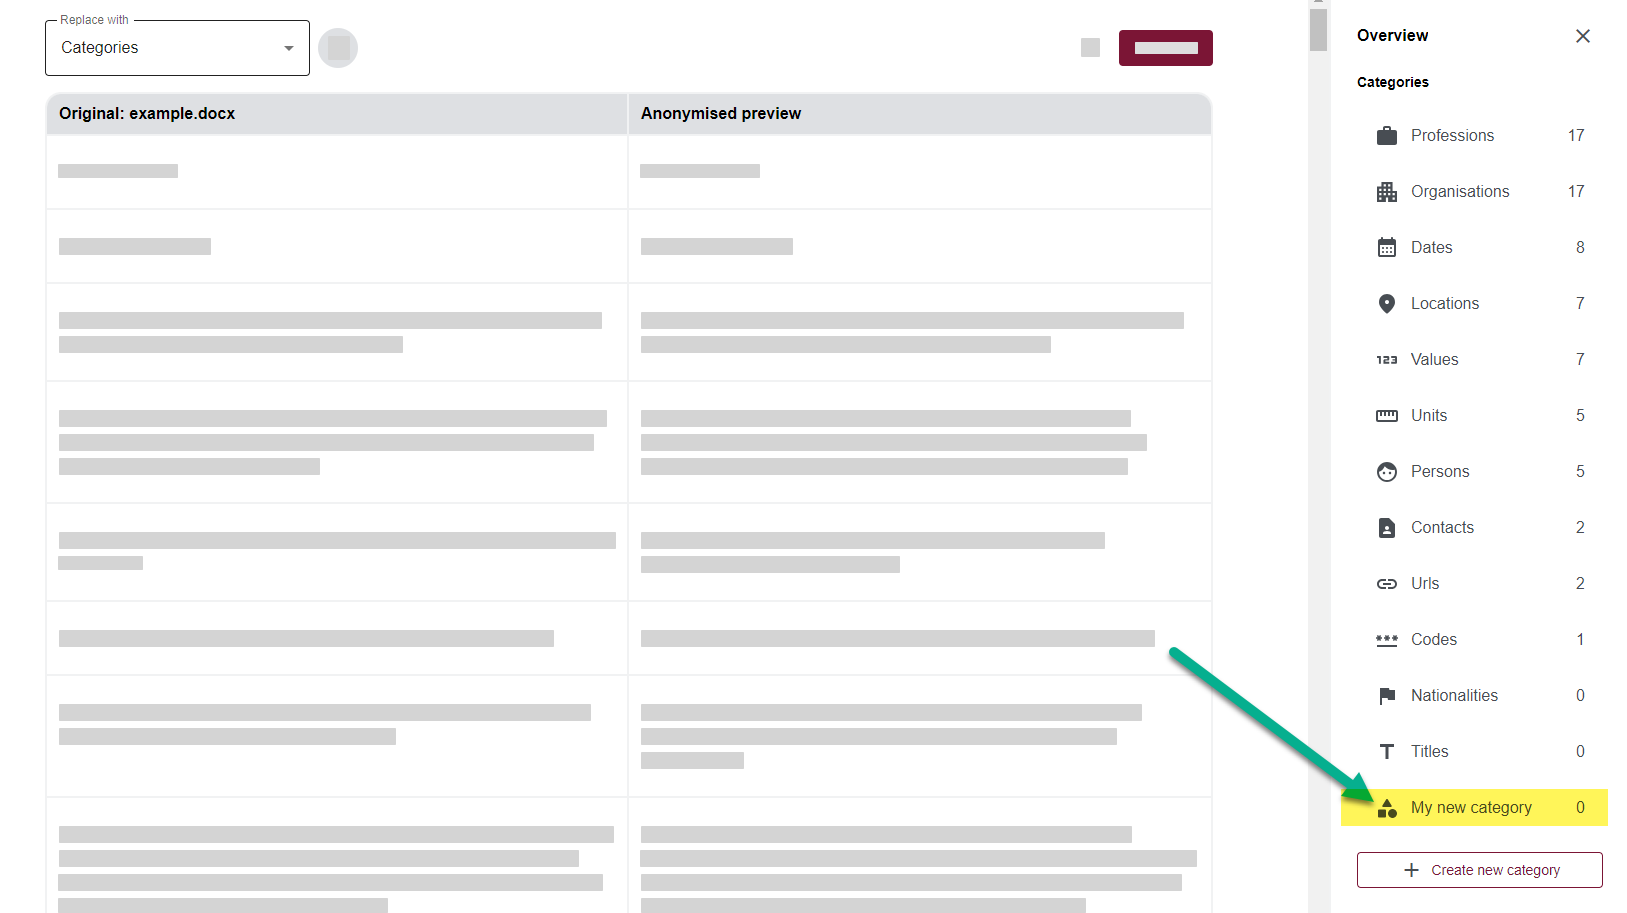
Create custom categories to better organise items. You can manually add items to these categories, and the category name will be used as a mask if you choose to replace everything with category names.
To create a new category:
- In the side panel, click Create new category.
- In the popup, enter the category name and click Save.
- The new category will appear in the side panel, ready for use when adding or editing items.
Step 3: Download result
Download the anonymised file from either the editor view or the My Files page.
- In the editor, click Download to save the file.
- In My Files, hover over the file name to reveal the download icon, then click it to download.

Downloaded result:
- Asterisks
- Categories
- Pseudonyms
